
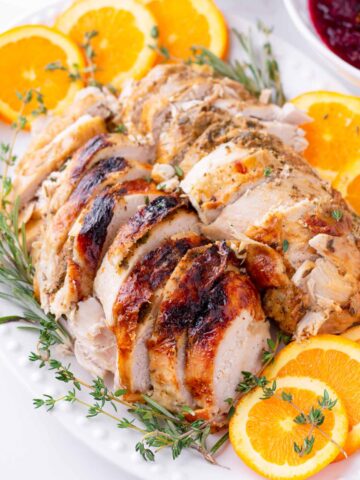
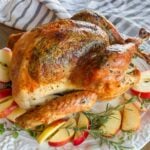
Learn how to make the perfect Thanksgiving turkey with my simple, foolproof, and completely mess-free method: dry brining. A dry brine turkey will guarantee not only moist and juicy results, but also perfectly seasoned from the inside out!
With this turkey recipe, there’s no messy liquid brine to deal with. Just let the turkey dry brine before Thanksgiving, then on the big day, slather it with garlic herb butter and roast in the oven!

Cooking on Thanksgiving day can feel overwhelming, so a fuss-free turkey method is exactly what we all need. With this easy dry brine turkey recipe, you’ll get juicy, flavorful meat and golden, crispy skin. Your guests will be asking for the secret behind the best Thanksgiving turkey they’ve ever had!
A dry brine is simply a mix of Kosher salt and aromatics. You just rub the turkey with it and let it sit in the fridge for 24-48 hours for it to do its magic (more on this below!). No liquid brine involved, but if you’re interested in a traditional wet brine, check out my turkey breast brine recipe.
Another bonus: this dry brine turkey recipe can cut your roasting time by 15-20 minutes. My 12.72-pound whole turkey was perfectly cooked in just 2 hours and 40 minutes. Just enough extra time to bake your fresh green bean casserole or reheat those fluffy mashed potatoes before dinner starts!
Jump to:
Why I Love This Recipe
- Prep in advance. The dry brine for the turkey needs to do its magic overnight anyway.
- Easy and less messy. No need to worry about a wet brine.
- Juicy and flavorful. The dry brine seasons the turkey from the inside out, and the garlic herb butter we add under the skin makes it even better!
- Crispy skin. The trick is to start with high heat, then roast at a lower temperature.
Benefits of Dry Brining a Turkey
Dry brining means rubbing the turkey with salt and seasonings, then letting it rest uncovered in the fridge for 24-48 hours days before roasting. The salt draws out and reabsorbs the turkey’s natural juices, seasoning it from the inside out for juicy and tender meat. It’s almost like a self-brine.
This dry brine turkey method also helps to season the meat all the way through. It saves you from dealing with a giant pot of liquid, and because it’s so easy and efficient, it can be done in advance. It will also roast a little quicker than a traditional turkey.
Ingredient Notes
You only need a few simple ingredients for this method and below, I have included a few notes that I hope you find helpful.
For the turkey and dry brine:
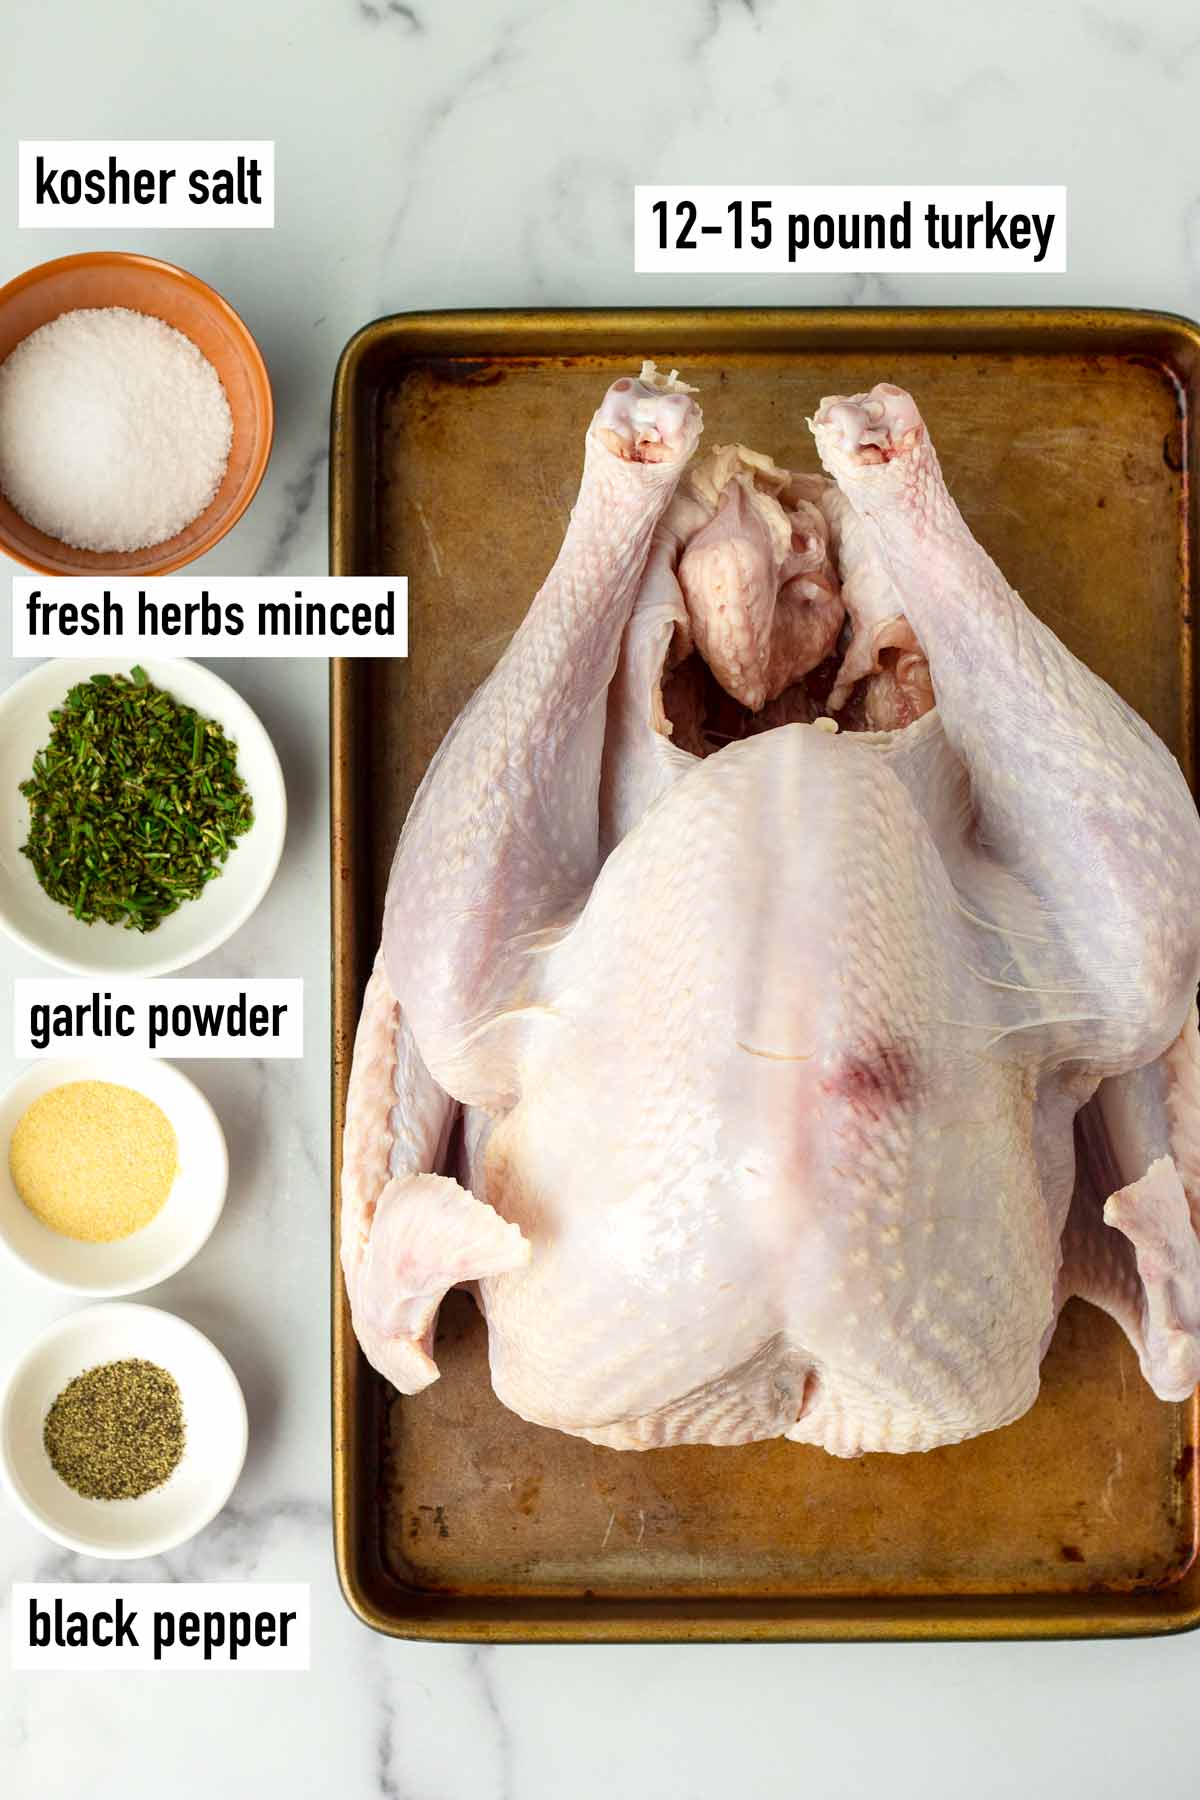
- Whole turkey: Make sure it’s completely thawed, neck and giblets removed.
- Kosher salt: Avoid using table salt as it may end up too salty. Kosher salt has larger crystals that disperse evenly but without making the turkey overly salty.
- Fresh minced herbs: Use anything like rosemary, thyme, or sage. You can also swap the fresh herbs for about half the amount of dried.
- Garlic powder and black pepper: For extra seasonings!
For the herbed garlic butter and for roasting:
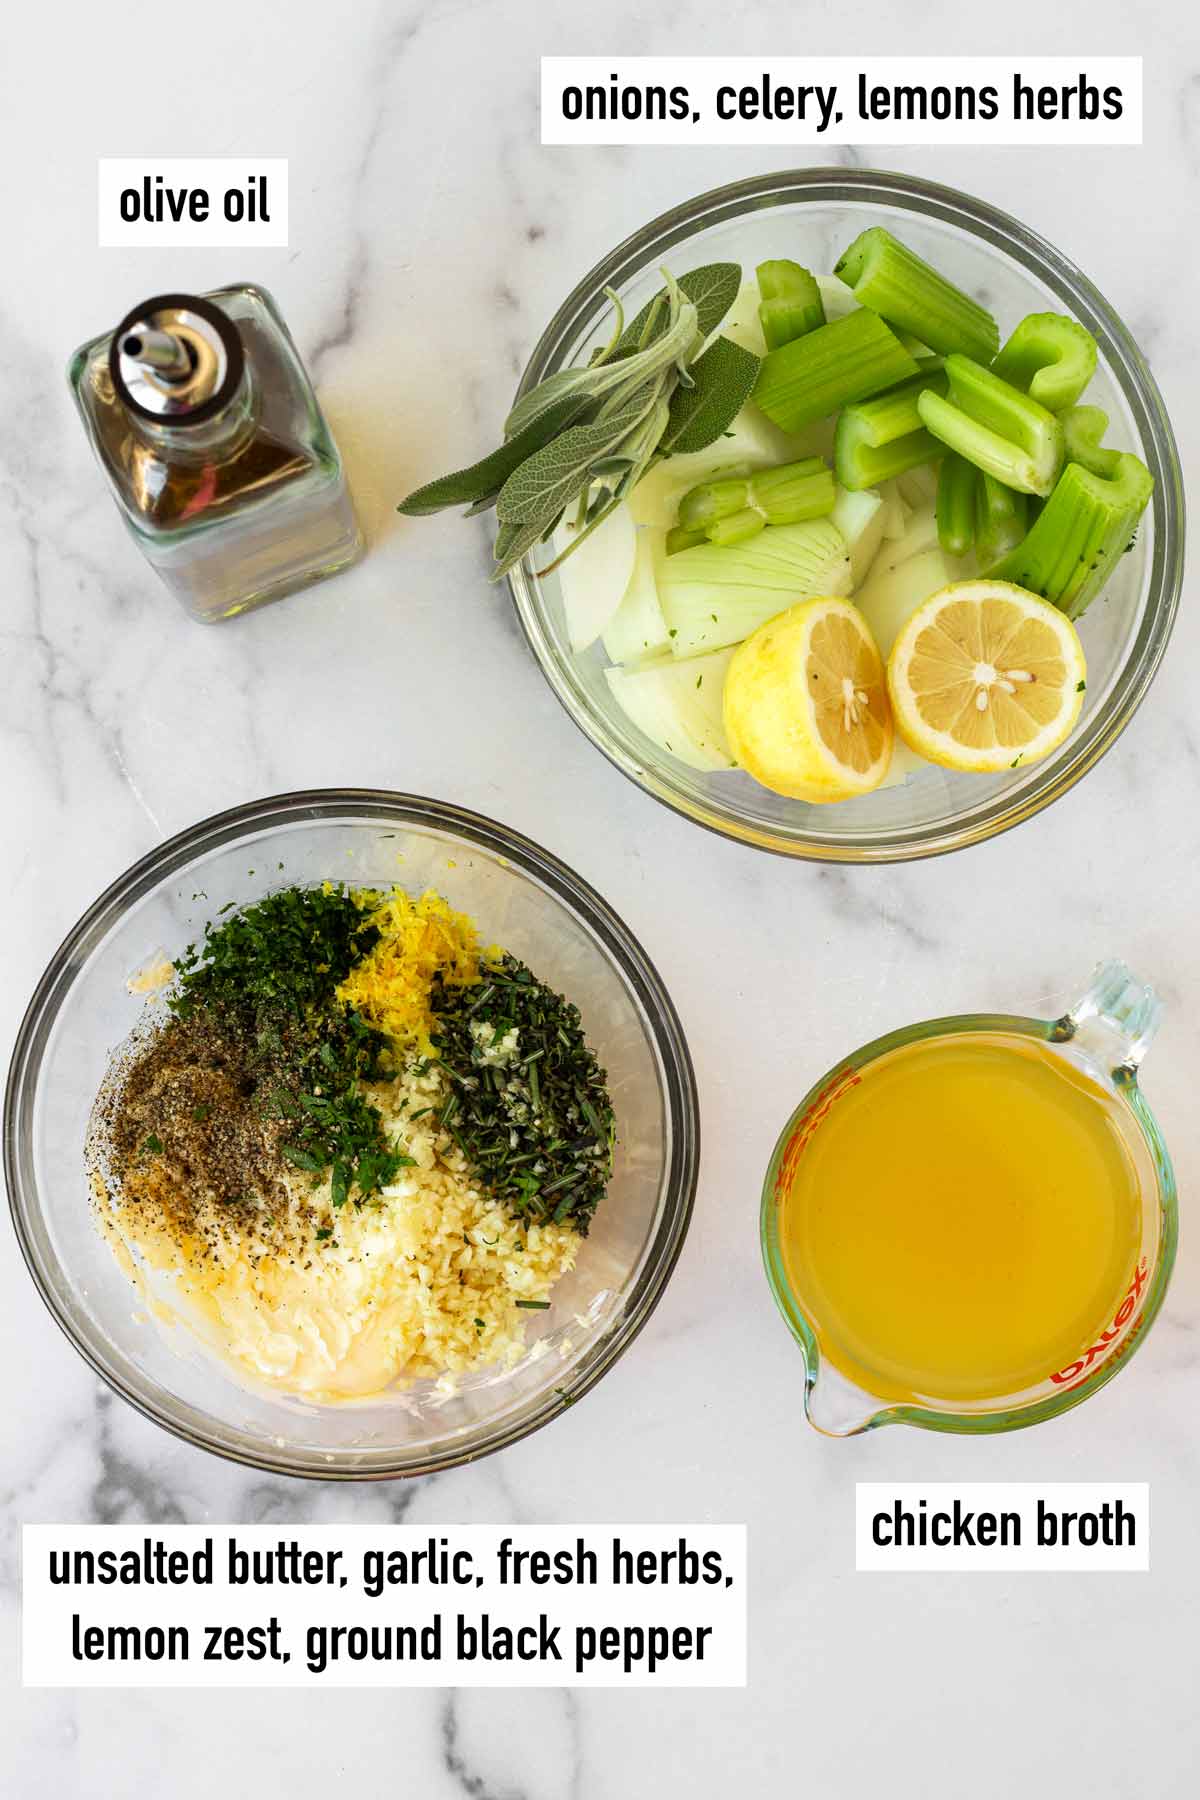
- Unsalted butter: Bring it out with plenty of time to soften fully.
- Fresh minced herbs: Again, rosemary, thyme, or sage are great options.
- Fresh chopped Italian parsley: This one I like to think of as a must!
- Finely minced garlic and lemon zest: Use fresh zest from 1 lemon. I love the garlic and lemon flavors!
- Olive oil: For rubbing the outside. This helps create that crispy skin!
- Onions, celery, lemons: For stuffing the cavity. Adds extra moisture!
- Chicken broth: This will be added to the bottom of the roasting pan as the turkey roasts.
Ingredient quantities are listed in the recipe card down below, as always.
How to Dry Brine a Turkey
Let me show you how to make this easy dry brined turkey recipe for Thanksgiving!
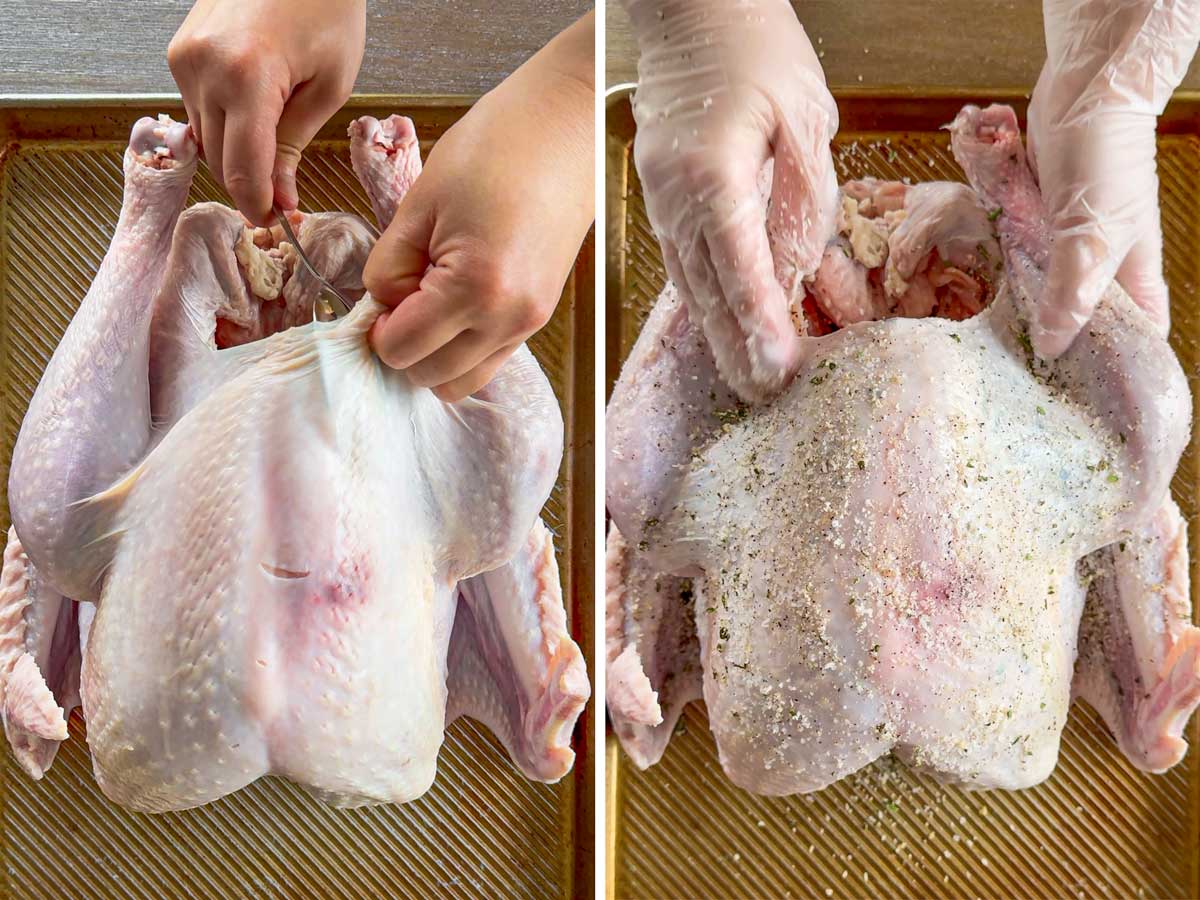
Step 1 | Dry brine turkey overnight
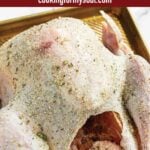
Prepare the dry brine: Mix the Kosher salt, herbs, garlic powder, and black pepper. Use paper towels to thoroughly pat the surface of the turkey dry. You want to eliminate as much moisture as possible.
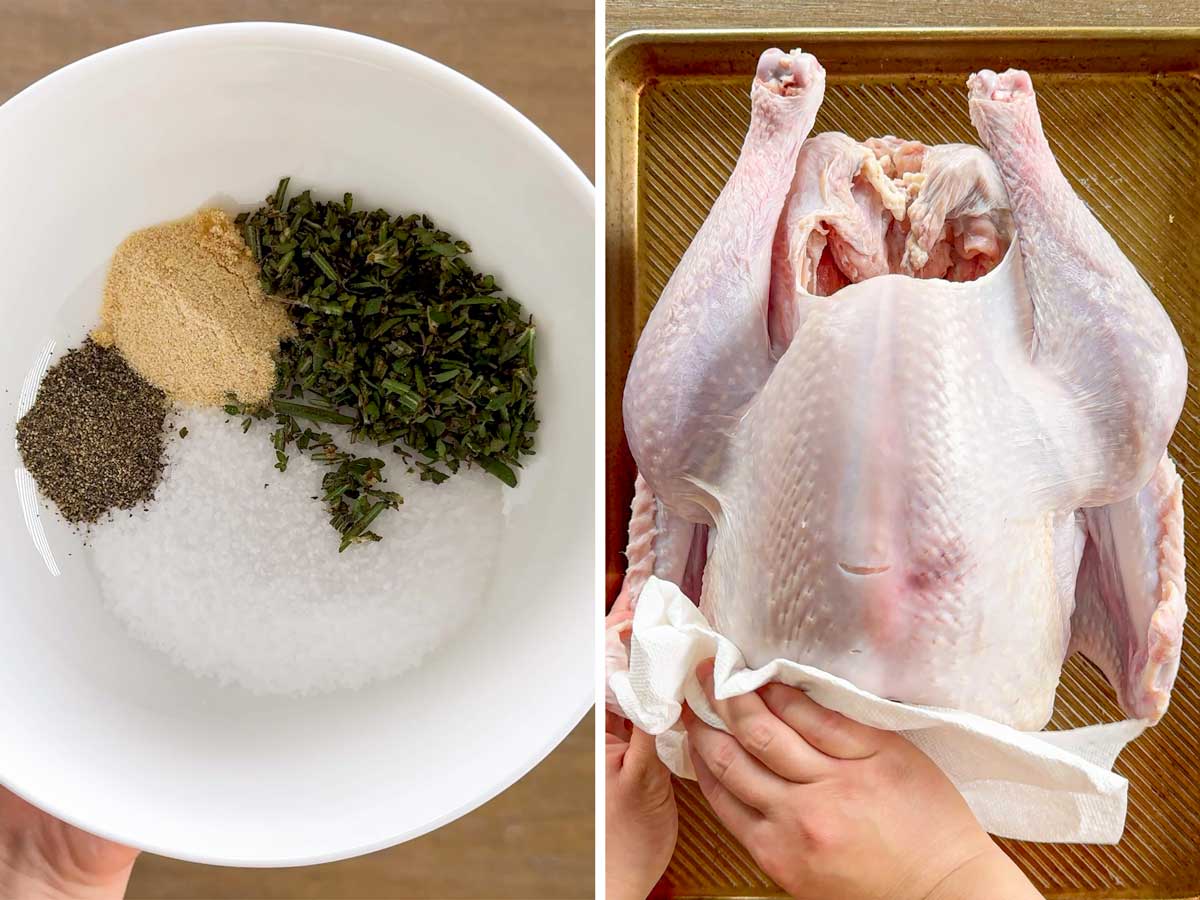
Rub the mixture all over the turkey, including under the skin, inside the cavity, and in all the nooks and crannies. Place the turkey on a baking pan, uncovered, and refrigerate for at least 24 hours or up to 48 hours.
Step 2 | Before roasting
Preheat the oven to 425°F. Remove the turkey from the fridge and bring it to room temperature about 1 hour before roasting. Do NOT rinse it, but do get rid of any liquid that has pooled under the turkey.
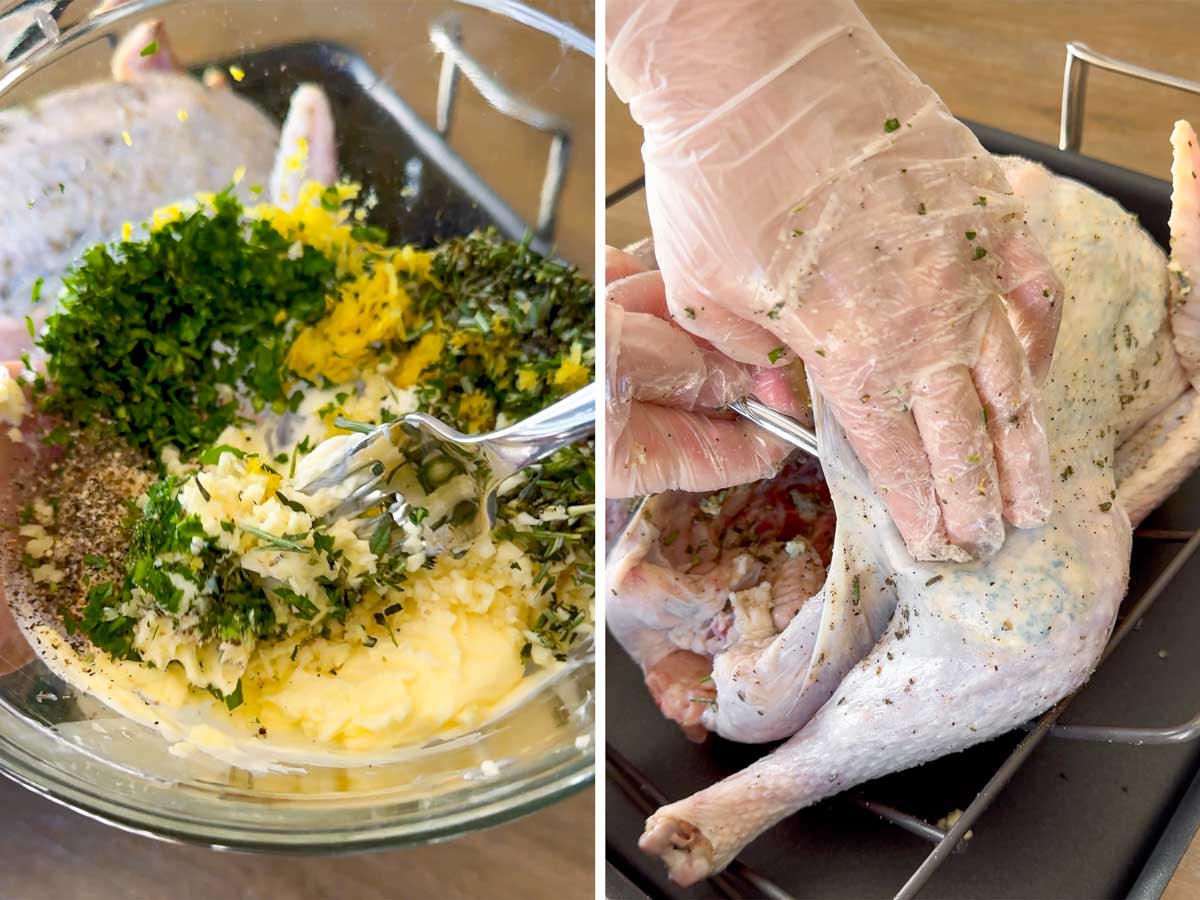
Step 3 | Prepare the turkey
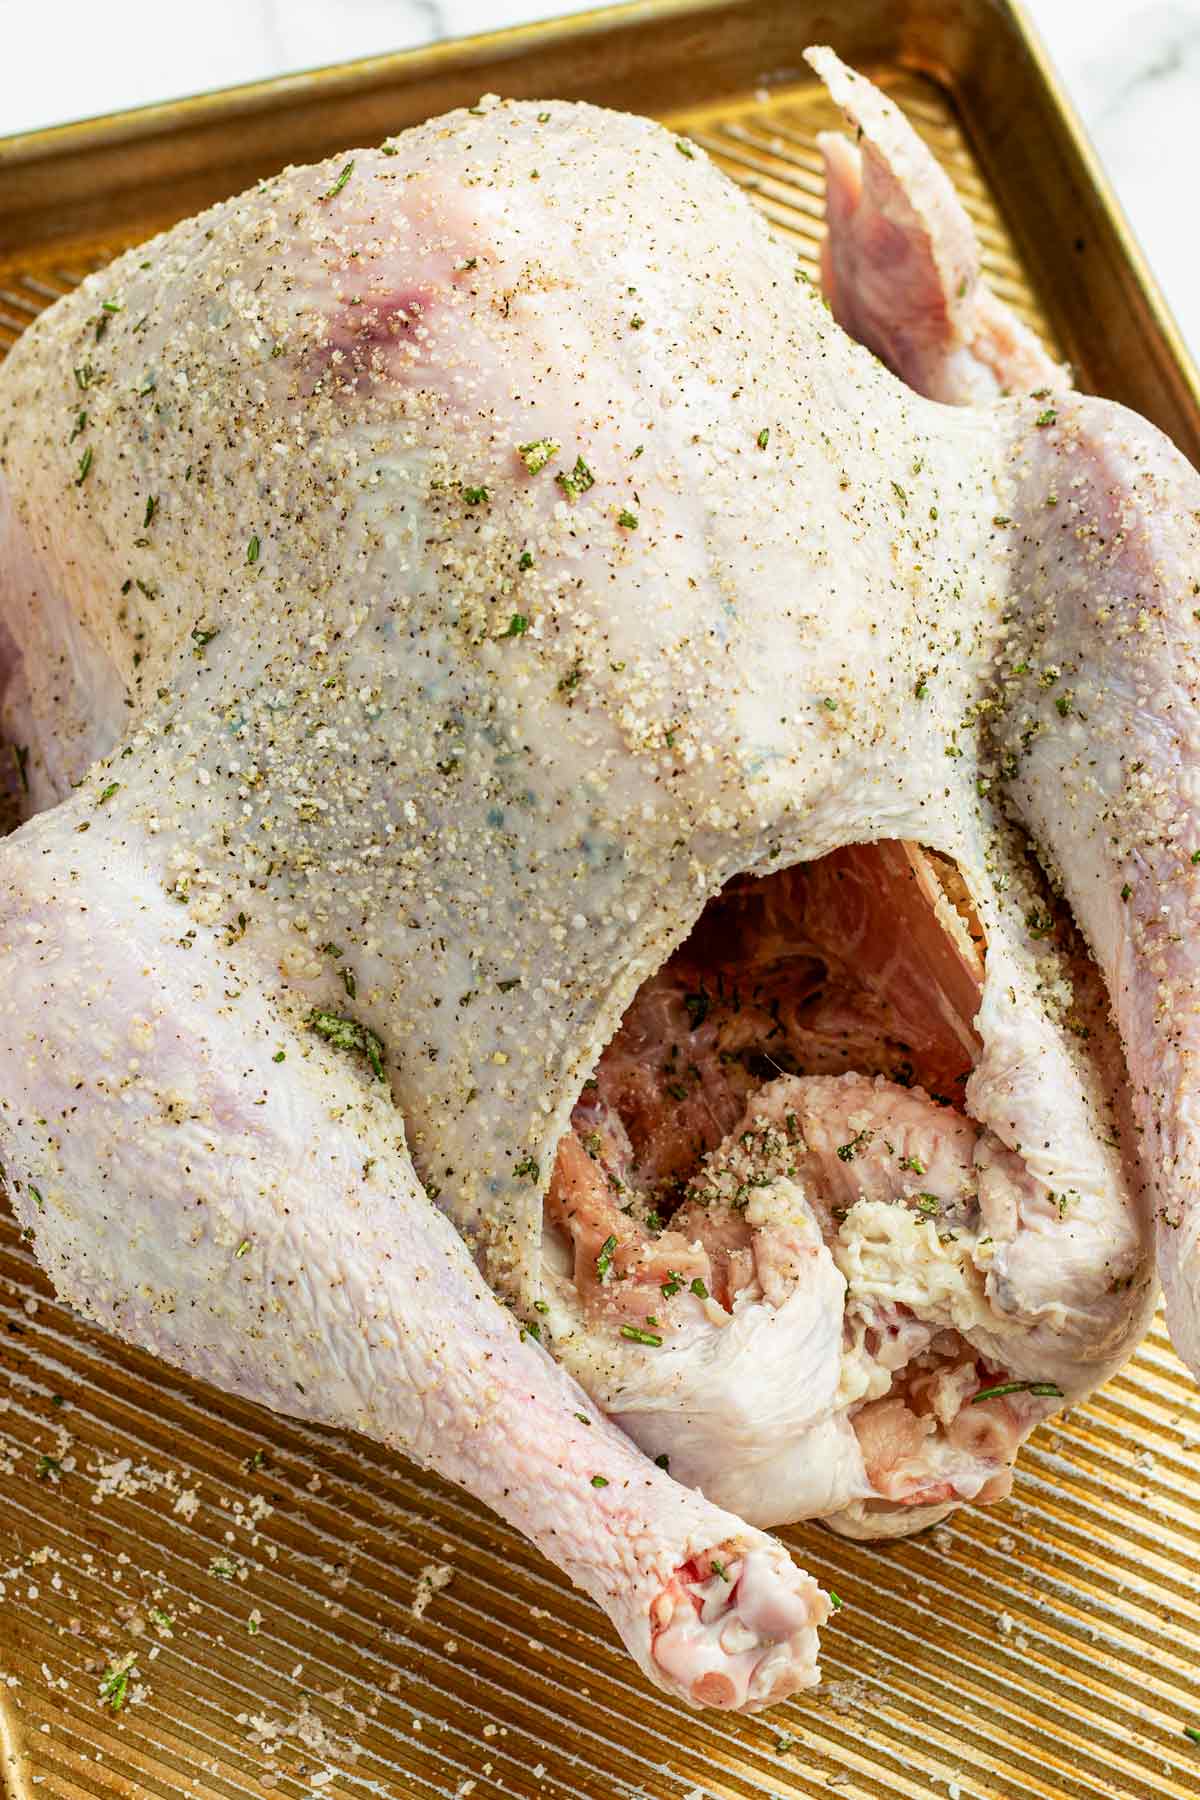
In a bowl, make the garlic herb butter by mixing the softened butter with fresh herbs, lemon zest, minced garlic, and parsley. Gently loosen the skin from the breast and legs and spread the butter under the skin only, not on top.
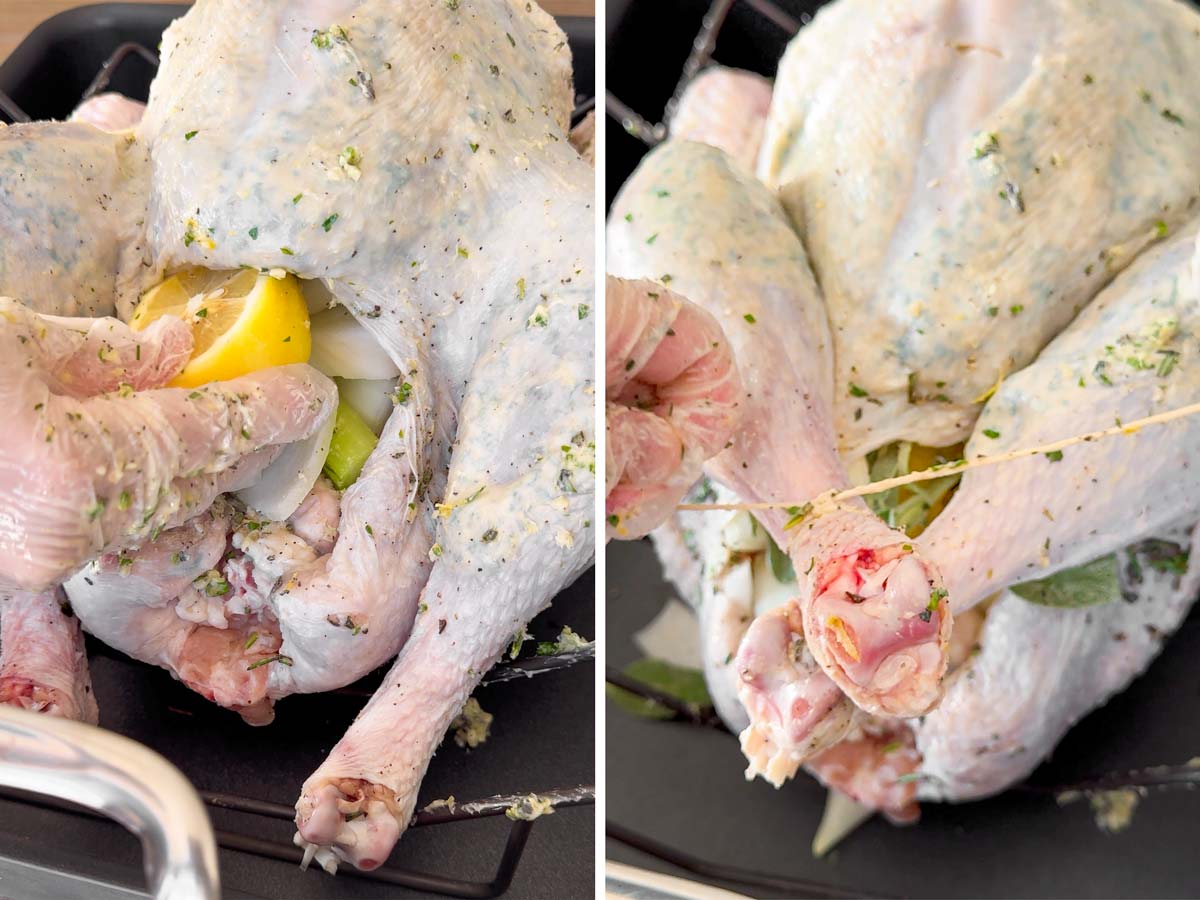
Stuff the cavity with lemon wedges, celery, and onion and a few sprigs of fresh herbs. Use a kitchen twin to tie the legs together.
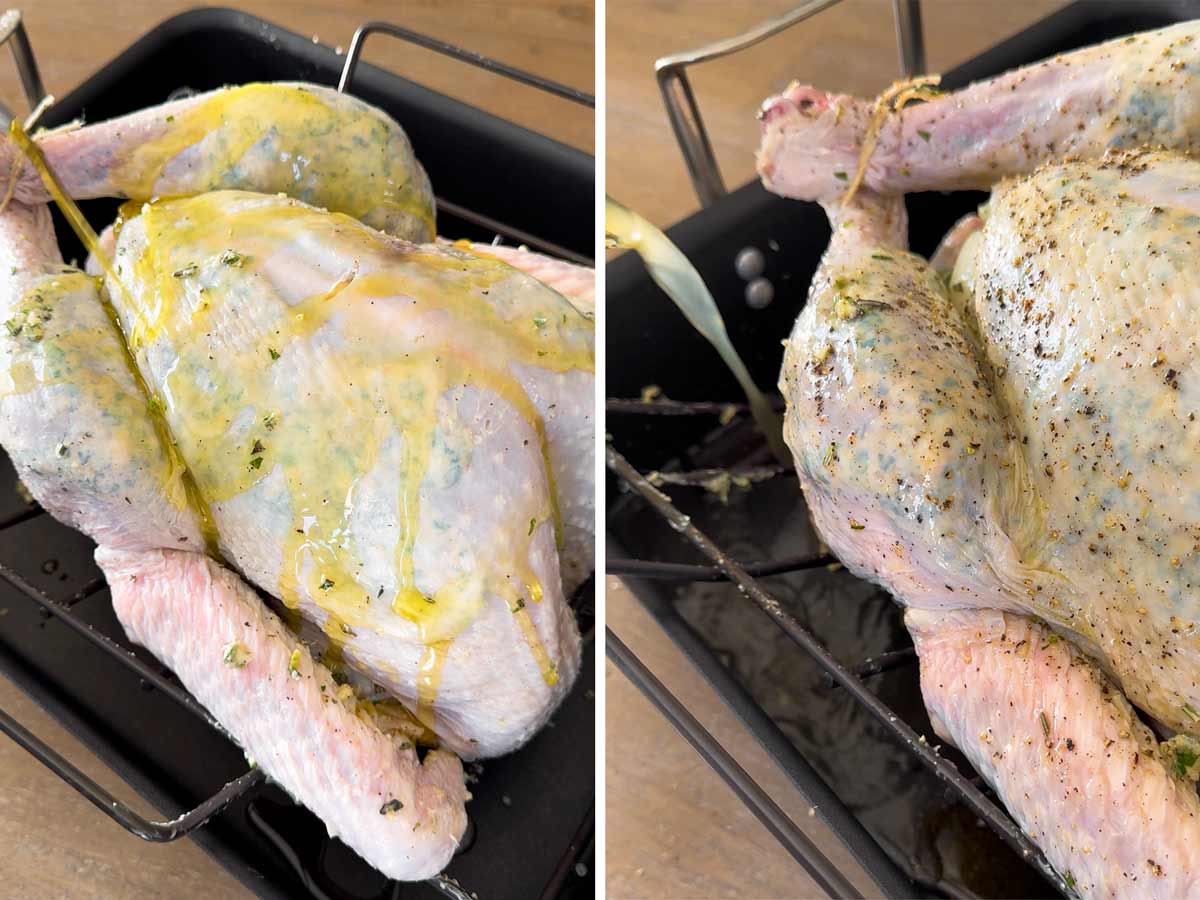
Coat the outside with olive oil and pepper. Since olive oil contains no moisture, it helps the skin crisp up beautifully. Fill the bottom of the pan with about 1/2 inch broth.
Step 4 | Roast
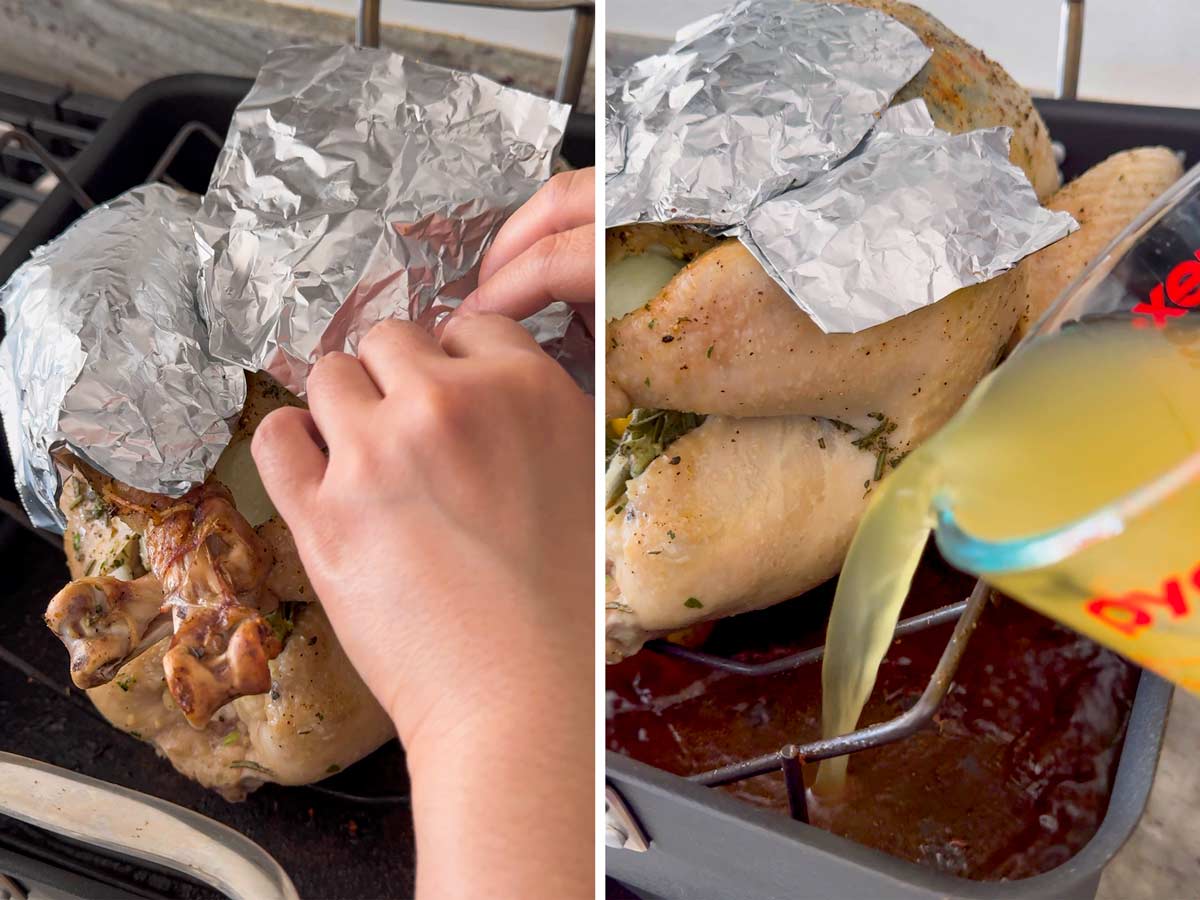
Lift the prepared turkey onto a rack in a large roasting pan. Roast for 20 minutes at 425 degrees F, uncovered, to jumpstart the browning of the skin. Remove the turkey from the oven, and turn the oven temperature down to 350 degrees F. Place foil squares on top of the areas that have already nicely browned.
Pour more broth into the bottom of the pan and continue roasting. Fill the bottom of the pan with more broth as needed.
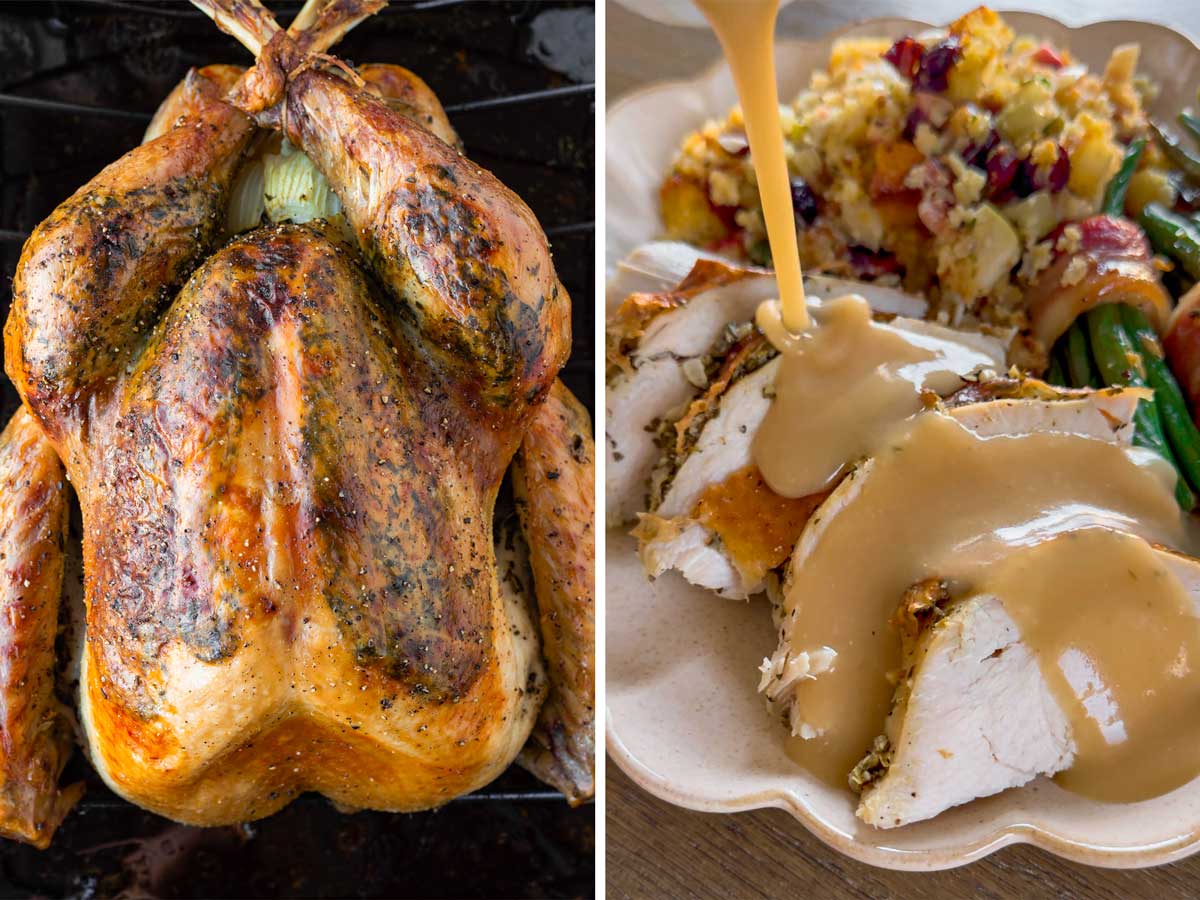
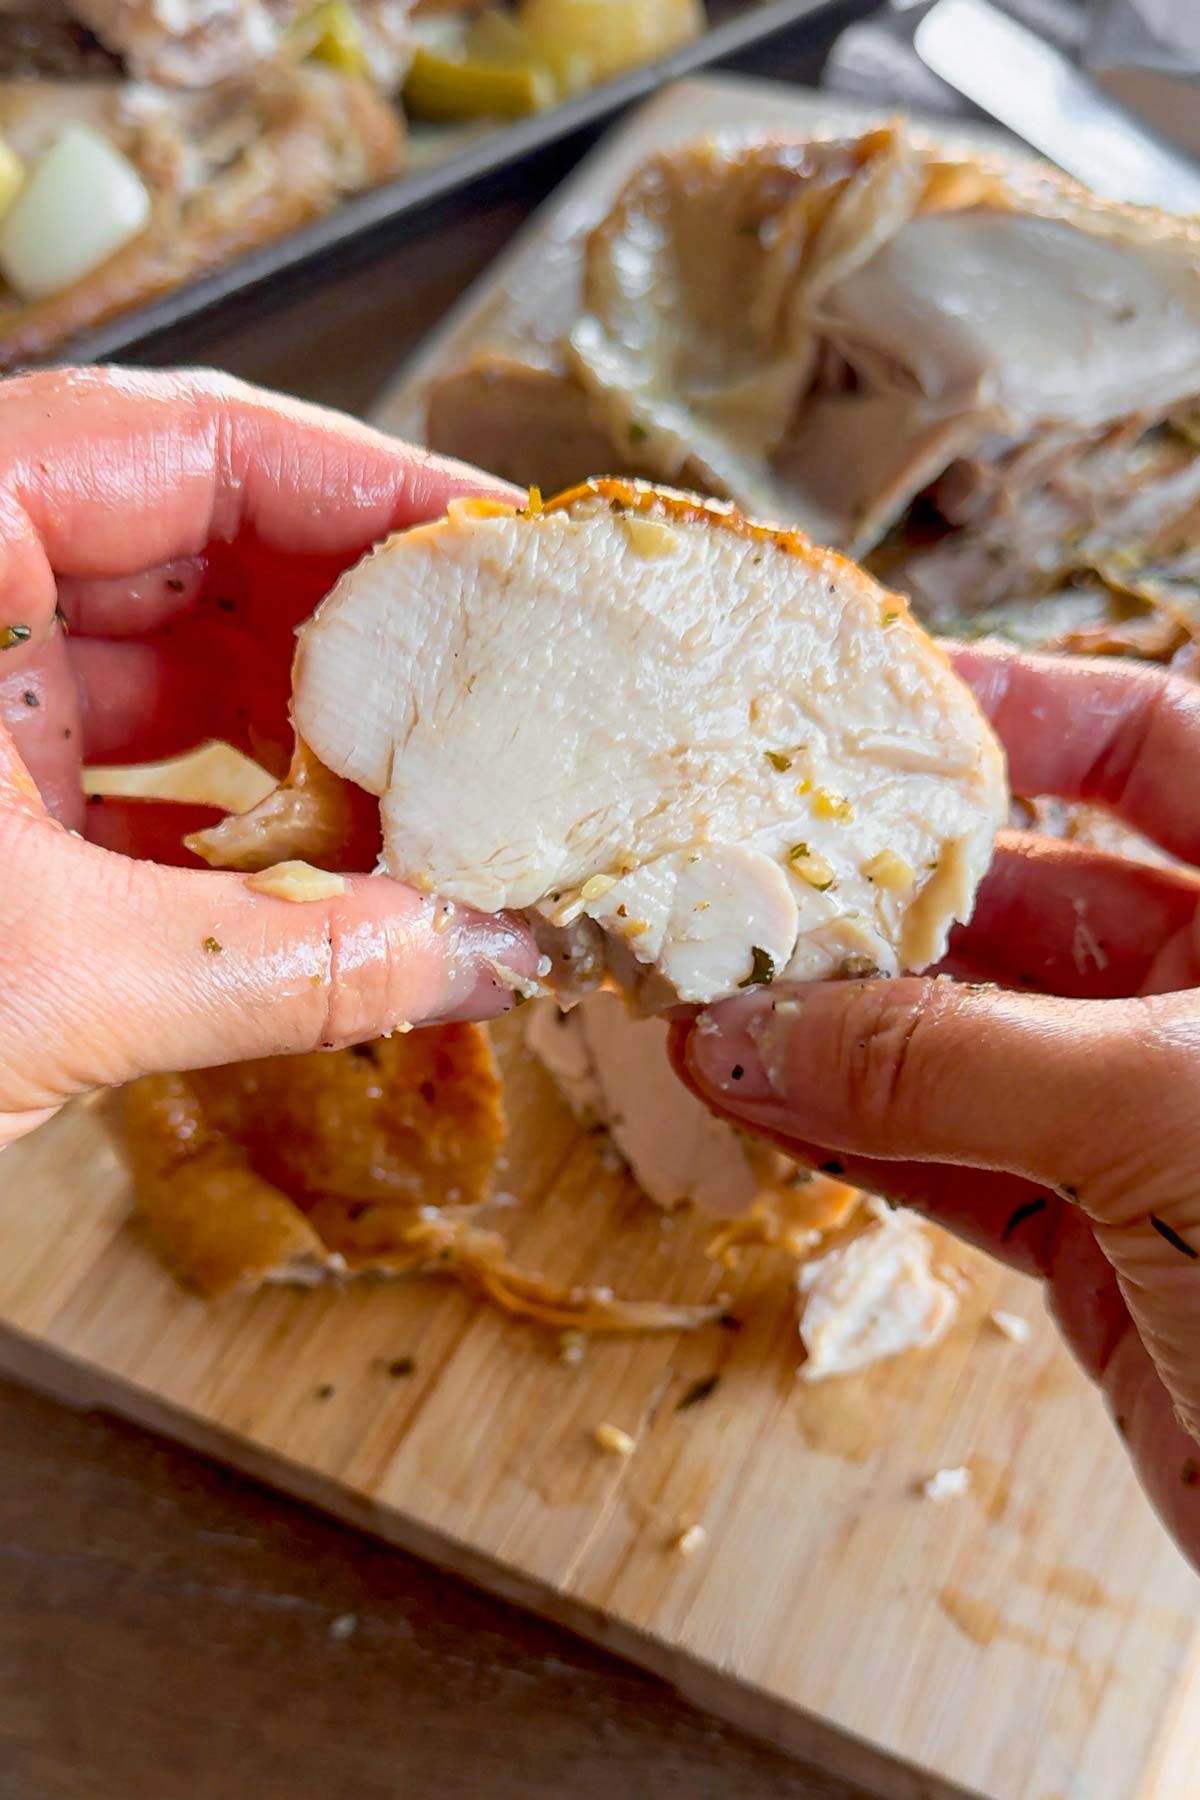
Continue roasting. The rule of thumb is 12 minutes per pound, but the best way to know is by using a thermometer in the thickest part of the breast and thighs, it should read 165F when done. Remember, the temperature will rise by 5 degrees as it rests for 20-30 minutes before carving.
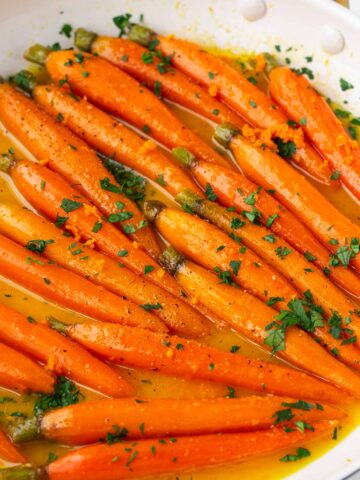
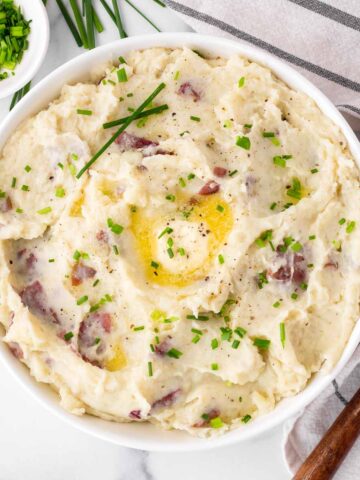
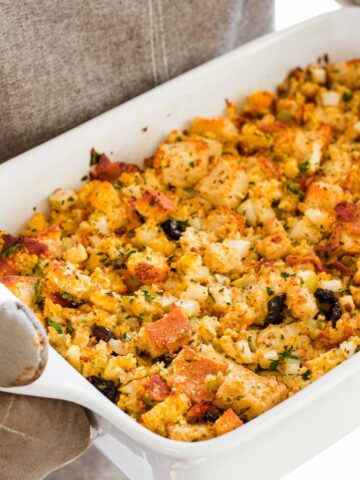
I served this amazing turkey with my bacon wrapped green beans and cornbread stuffing, as you can see in the photo below!
Tips for Success
- Technically, you can skip the herbed butter, but I’d HIGHLY recommend it. Much richer flavor and makes it even more juicy and tender than it already is!
- Plan ahead. Make sure the turkey is fully thawed before starting the dry brining process. It takes at least 1-2 days for the brine.
- Don’t rinse the turkey after brining. Just gently pat it dry to remove any excess moisture. You don’t want to wash away all that seasoning.
- Stuffing the cavity with vegetables will circulate moisture inside, which will keep the turkey moist. I use onions, celery, lemon, and herbs.
- Truss the bird. Use kitchen twine to tie the legs, and also tuck the wings underneath. This prevents direct heat exposure to smaller areas, which helps avoid burning.
- Let it rest. Don’t carve too early. Let the juices redistribute and settle first, about 20-30 minutes.
Recipe FAQs
I don’t recommend it as it can’t penetrate frozen meat. Make sure the turkey is fully thawed first.
I’d recommend using Kosher salt for dry brine turkey.
No. The flavored butter does not contain any salt – the brine already does its job with the salt. Use unsalted butter.
No, or you’ll rinse away the flavor of the skin. Rinsing can also add unnecessary moisture to the surface of the turkey, which will prevent the skin from crisping up. Just pat dry where you can see excessive moisture.
A dry brined turkey will need about 12 minutes per pound, but it depends on many other factors, such as how often you open the oven. Always check with a meat thermometer to be sure. It should register 165 F in the thickest part. It will rise by another 5 degrees while resting.
How To Make Gravy From The Drippings
Pour the pan drippings into a measuring cup and let the fat rise to the top (or use a fat separator). Skim off about 2–3 tablespoons of fat and whisk it with an equal amount of flour in a saucepan over medium heat to make a roux. Cook for 1–2 minutes, then slowly whisk in 2–3 cups of warm turkey or chicken stock or broth along with the remaining drippings to taste. Simmer until thickened, about 5-10 minutes, and season to taste. Alternatively, you can use my turkey gravy without drippings recipe!
Prep Ahead Tips
This dry brine turkey recipe is naturally prep-ahead friendly since it needs to brine in the fridge, so make sure the turkey is fully thawed by then.
Other prep things you can do ahead:
- Make the herbed garlic butter, soften at room temperature before using
- Chop all the vegetables you’ll use to stuff the cavity
Pairing and Serving Ideas
Trust me, you’re going to want to show off this turkey with some amazing side dishes!

I’d love to hear from you! If you loved my recipe, please consider leaving a 5-star rating and a comment down below. Sign up for my newsletter and follow along on Instagram, Facebook, or Pinterest


Dry Brine Turkey
Equipment
Ingredients
For the turkey and dry brine:
- 1 (12-15 pound) turkey, thawed - see notes, neck and giblets removed
- 3 tablespoons Kosher salt
- 2 teaspoons fresh minced herbs - I use rosemary, thyme and sage (or 1 ½ tsp dried)
- 2 teaspoons garlic powder
- 1 teaspoon ground black pepper
For the herbed butter and roasting:
- 8 tablespoons unsalted butter - fully softened, don't use salted
- 3 teaspoon fresh minced herbs - I use rosemary, thyme and sage (or 1 tsp dried)
- 2 tablespoons freshly chopped Italian parsley
- 6 cloves fresh garlic, minced
- Zest of 1 lemon
- Olive oil - for rubbing the outside skin
- Onions, celery, lemon - chopped, for stuffing the cavity
- 6 to 8 cups chicken broth - for the pan, plus more as needed
Instructions
Dy Brine turkey 24-48 hours ahead:
- Pat the turkey dry with paper towels thoroughly.
- Make the dry brine: In a small bowl, mix the Kosher salt, dried herbs, garlic powder and black pepper.
- Rub the mixture all over the turkey, including inside the cavity and under the skin (use a spoon to carefully separate the skin from the meat).
- Place the turkey on a large baking pan (it may release some juices, so make sure the pan is not shallow). Refrigerate, uncovered, for at least 24 hours and up to 48 hours.
Before roasting:
- Preheat the oven to 425 degrees F. Remove the turkey from the fridge 1 hour before roasting to bring it closer to room temperature, and discard any water that may have pooled underneath. Do NOT rinse the turkey (that will wash away all the seasoning), but you can gently pat dry any areas with excessive moisture.
Prepare the turkey:
- Make the herb butter: In a bowl, mix the softened butter with fresh herbs, parsley, lemon zest, and minced garlic until well combined.
- Gently loosen the skin over the breast and legs. Rub the herbed butter mixture under the skin only. Do not rub the butter over the skin – instead, rub olive oil all over the top skin. Season with black pepper. Tip: Since oil doesn’t contain moisture (butter does), rubbing the top with oil only will help crisp up the skin nicely.
- Stuff the cavity with onion, celery, lemon wedges, and a few sprigs of herbs. Tie the legs together with kitchen twine.
Roast:
- Place the turkey on top of the rack inside a large roasting pan, and add a layer of broth to the bottom of the pan. If not using a pan with a rack, use a regular large baking pan and sit the turkey on top of a light bed of vegetables plus a splash of broth.
- Roast at 425 degrees F for 20 minutes, uncovered, to help the skin start to brown better initially. Remove from the oven and then turn down the oven to 350 degrees F.
- Tent or cover certain spots of the turkey with aluminum foil squares, especially on the areas that are browned. If needed, refill the bottom of the roasting pan with more broth.
- Return to the oven and roast at 350 F for another 2 hours and 20 minutes or so, but it really depends on the size. Give it 12 minutes per pound total, or until a thermometer inserted in the center of the breast registers 165 F (180 F for thighs). You may need to refill the bottom of the pan as needed so it doesn't burn.
- Important: A dry-brined turkey tends to cook a little faster, so start checking about 20 minutes before it’s supposed to be done. My 12.72 pound turkey took 2 hours and 40 minutes total roasting time.
- Let the turkey rest for 20-30 minutes, covered with foil to keep it warm. It will rise by another 5 degrees while resting. Carve your turkey and enjoy! Happy Thanksgiving!
Notes
- Thawing turkey: Allow 24 hours per 4 pounds of turkey. Thaw in the fridge, never t room temperature.
- How long to dry brine a turkey: 24 to 48 hours.
- Let the turkey brine uncovered.
- A dry brined turkey roasts a little faster, give it about 12 minutes per pound. My 12.72-pound turkey took 2 hours and 40 minutes to roast. Always use an instant read thermometer. It should read 165F in the thickest part of the breast.
- Remember that the temperature will rise by another 5 degrees while the turkey is resting.
- Let it rest before carving! This will allow the juices to redistribute and give you juice results.


Anna Autullo says
Excellent recipe! Dry brine was easy and worked its magic on the turkey! Herbed butter adds to the deliciousness. This recipe is a keeper! Thank you!
Tania says
Hi Anna! I’m so happy to hear that! Thank you so much for trying my recipe. Happy Thanksgiving!
Jennifer O'Meara says
If I could give this ten stars I would. This was my first time cooking a turkey, and I wanted to try a dry brine. This dry brine was easy and created an incredibly delicious and moist turkey! My turkey was a little over 17 lbs and cooked in just about 3.5 hours. It was so flavorful and everyone agreed it was the best turkey they’ve ever had. Thank you for all the notes and guidance you provide throughout your recipe – it really makes a difference. I even stuffed the bird as that’s how I grew up enjoying stuffing and it was fantastic with the drippings from the bird. I used the same herbs you advised and absolutely loved the flavor. And the olive oil on the skin – game changer! Highly recommend this recipe!
Tania says
Hi Jennifer! Thank you so much for your kind words! I am so very happy everyone loved the turkey. Happy Thanksgiving to you and your family!