
If you love a good cheesecake, you’ll love this Apple Crisp Cheesecake! It’s perfect for fall and the holiday season…the most wonderful time of the year!
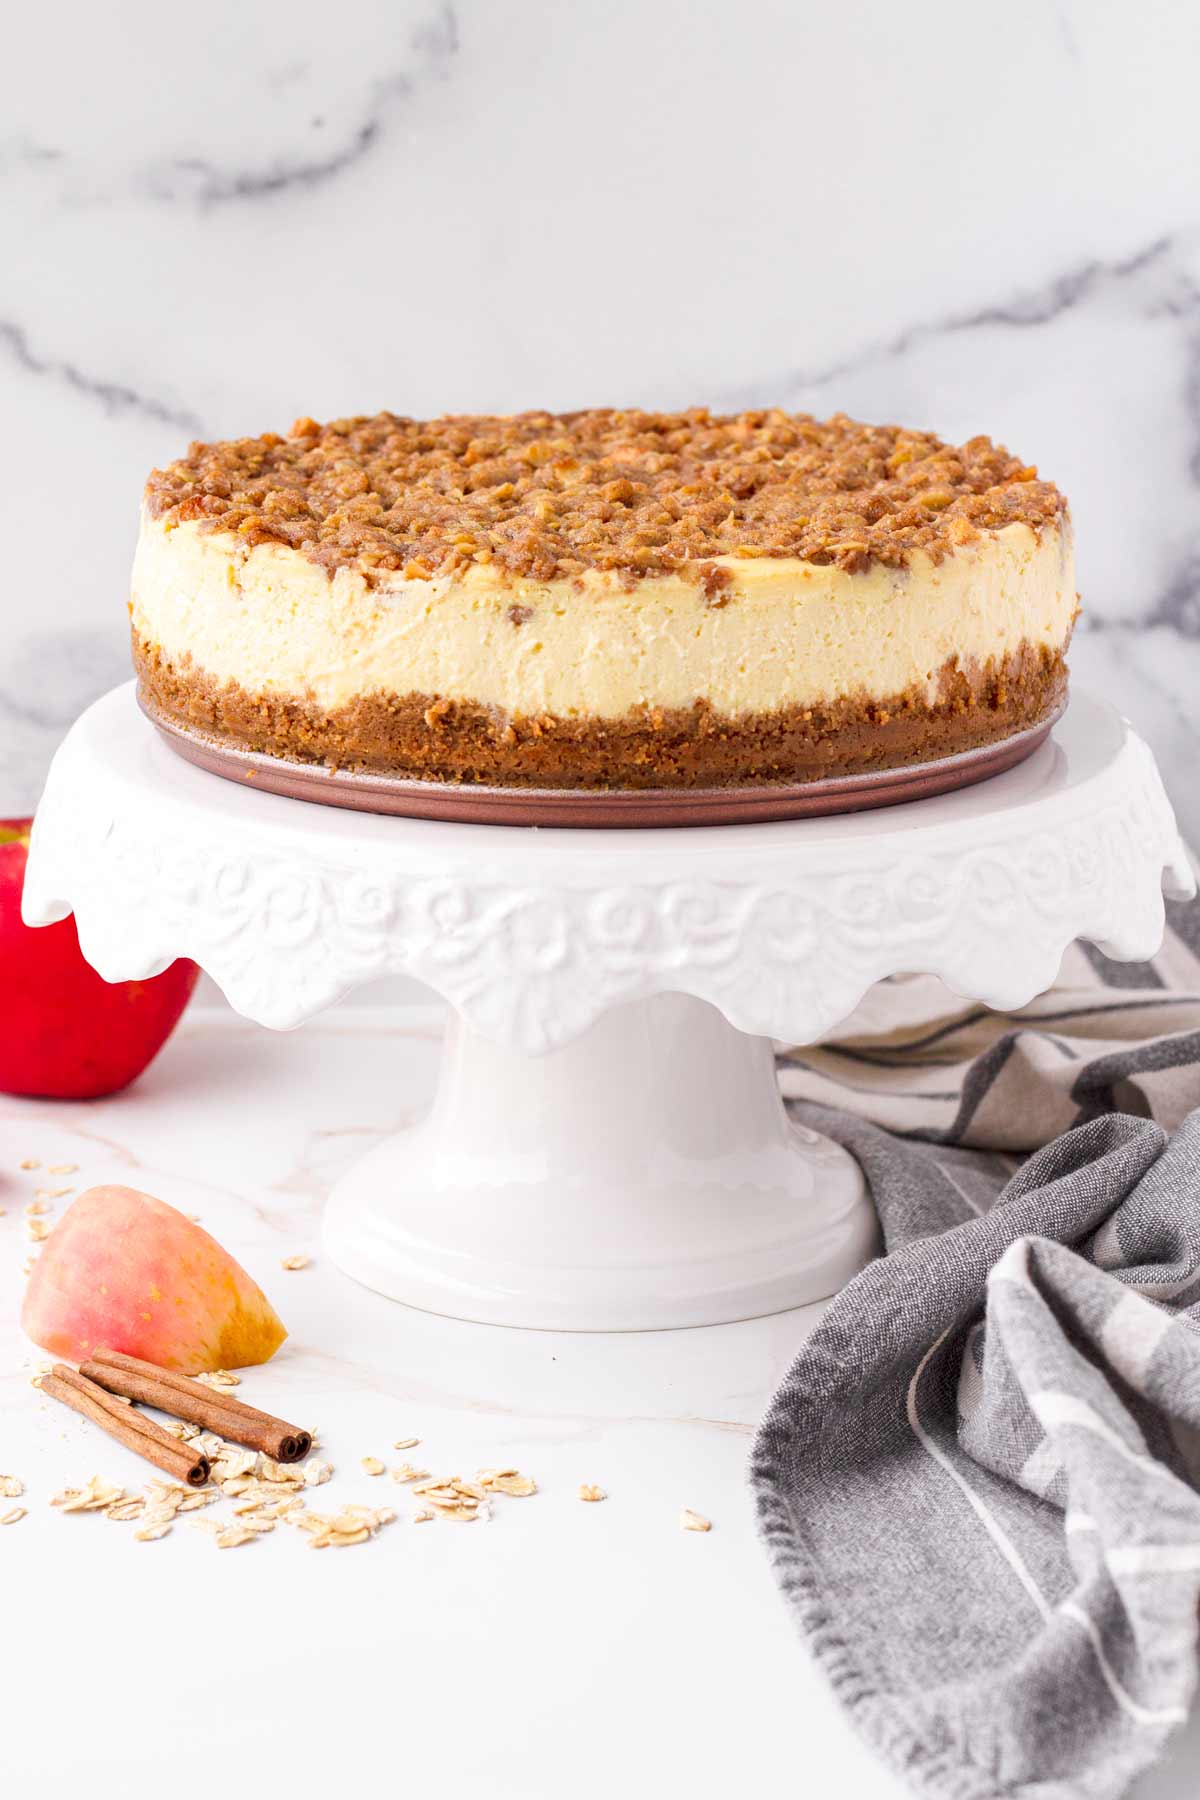
The cheesecake filling is so creamy and smooth, and it’s finished with a cozy apple crisp topping for all the holiday feels!
Everyone will love this decadent and cozy treat. This apple crisp cheesecake will surely be a crowd-pleaser!
I am so excited to share this apple crisp cheesecake with you today! After many recipe testing rounds, I think I have the perfect holiday recipe. I love it.
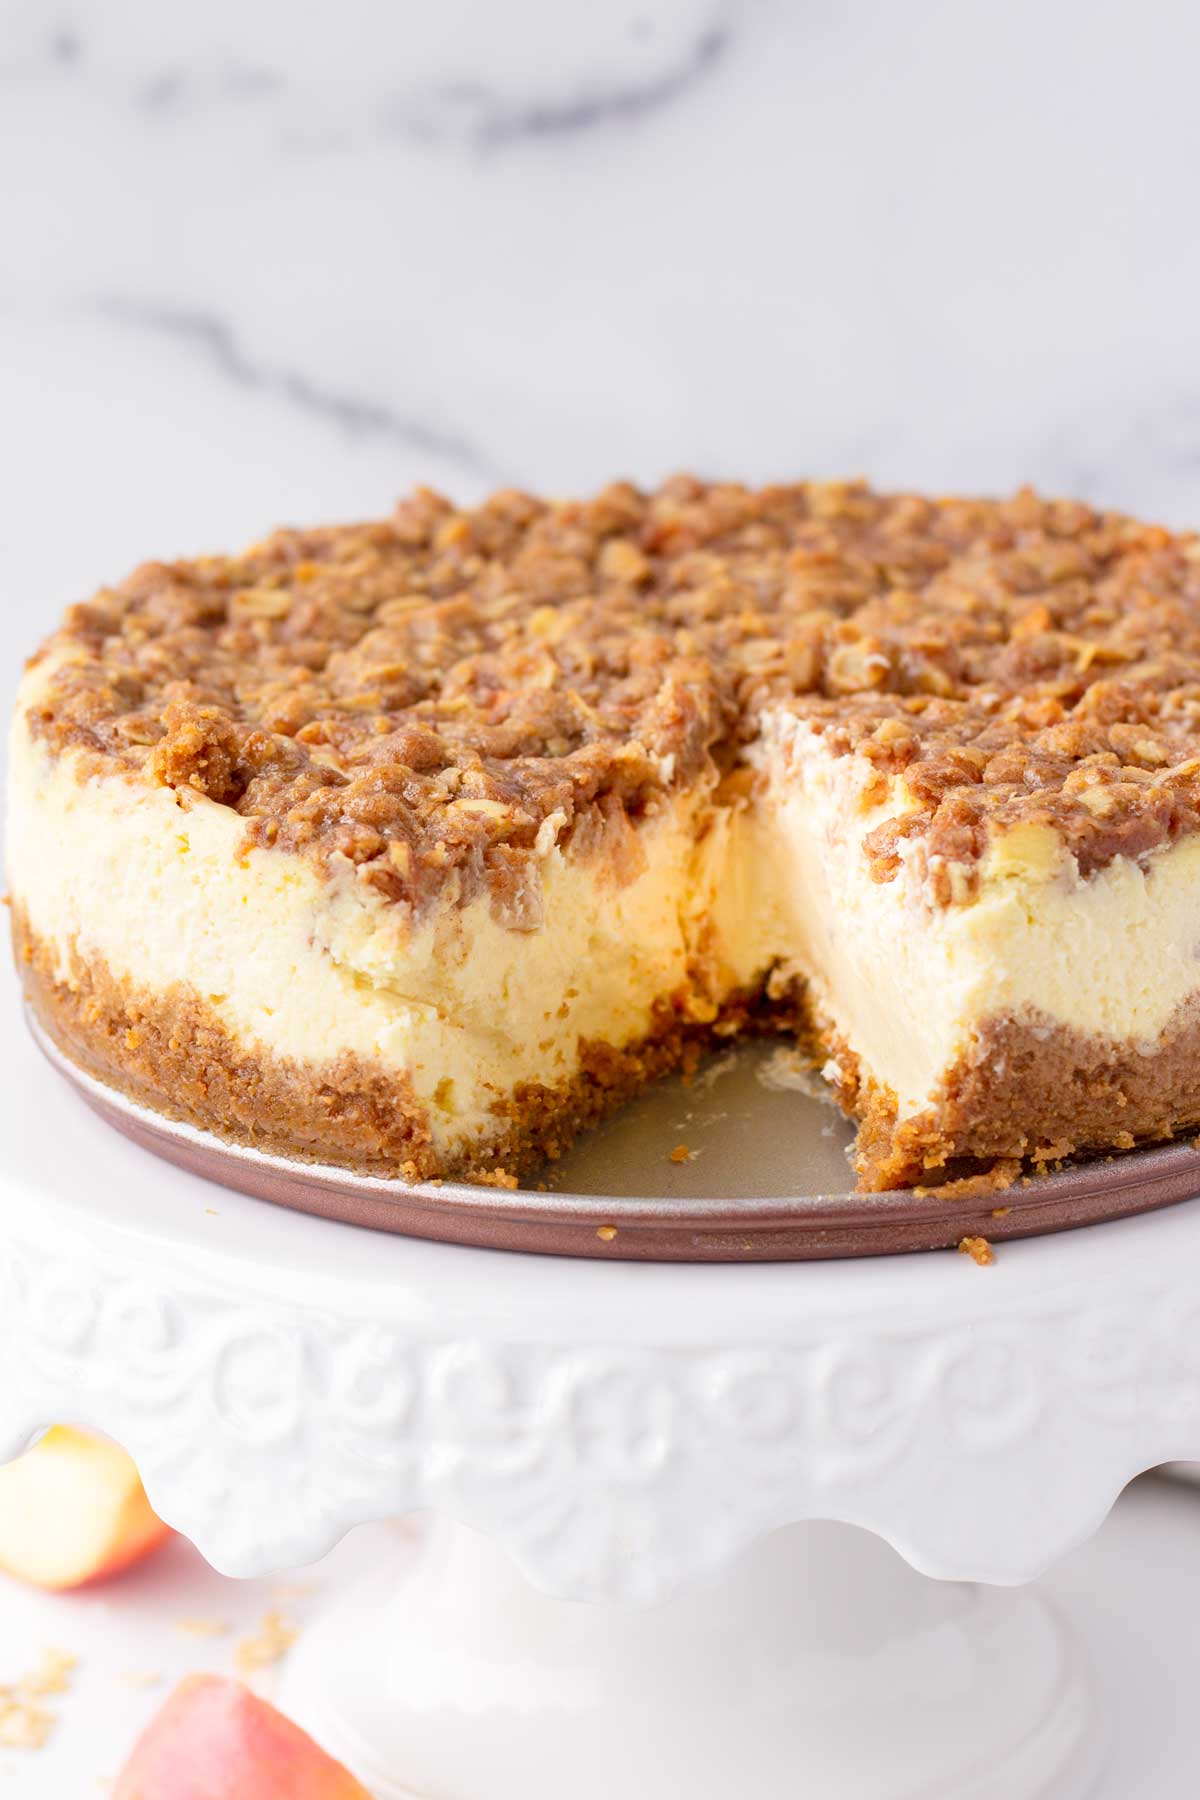
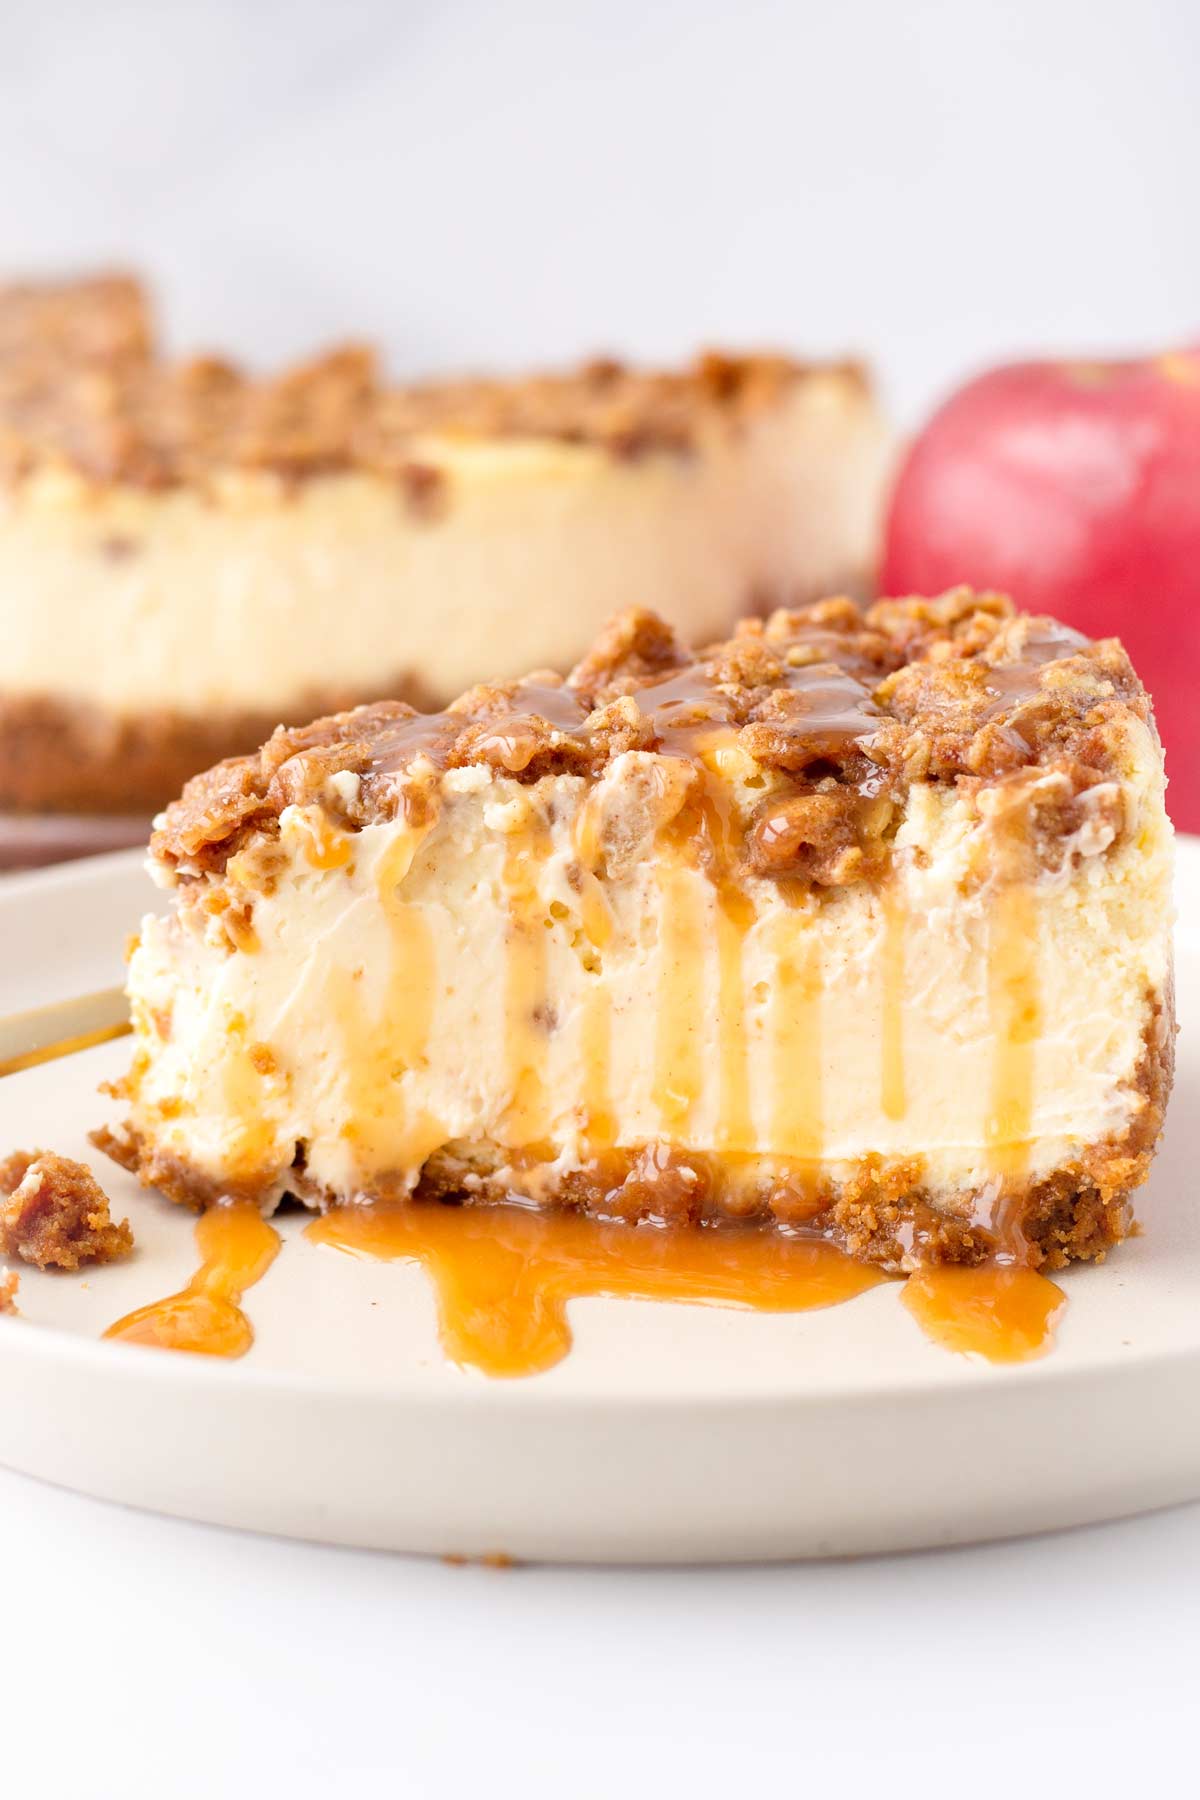
This apple crisp cheesecake is the perfect combination between cozy fall apple flavors and smooth and creamy cheesecake.
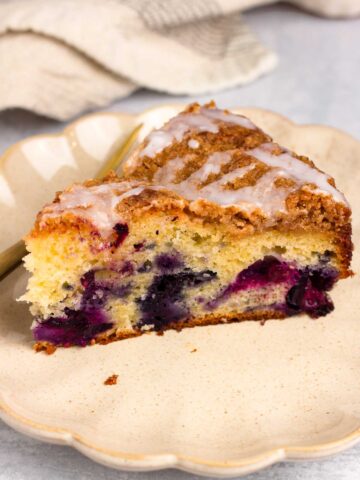
The topping has a nice crispy texture with a layer of cinnamon apples underneath. The cheesecake filling is perfectly creamy and so smooth, just like a great cheesecake should be. Oh, and the cinnamon graham crust is just amazing…you’ll love everything about it!
Holiday season is almost here, so if you’re looking for something to complement an apple pie, puff pastry apple turnovers, easy apple tarts, or pumpkin cheesecake bars, you have to make this apple crisp cheesecake!
Jump to:
Baking the Perfect Cheesecake: What You Need to Know
- Use room temperature ingredients: This is SUPER SUPER important! It’s necessary to achieve a smooth and creamy batter without over-mixing.
- Use full-fat cream cheese and sour cream for richness and the right texture.
- Don’t over-mix, otherwise the cheesecake to crack or sink in the middle.
- Don’t over-bake: Usually a cheesecake is done with the edges are set and the center is jiggly, but you won’t be able to tell with this one because of the topping. Instead, use an instant read thermometer – it’s done when the center reaches 150 degrees F.
- Use a water bath: This is a full 9-inch cheesecake, so you need a water bath to prevent cracks and to get a smooth and velvety texture.

Cheesecake Water Bath
You need a water bath for this cheesecake recipe. Setting up a water bath takes 5 extra minutes, but it’s so worth it. It’s like insurance for the cheesecake.
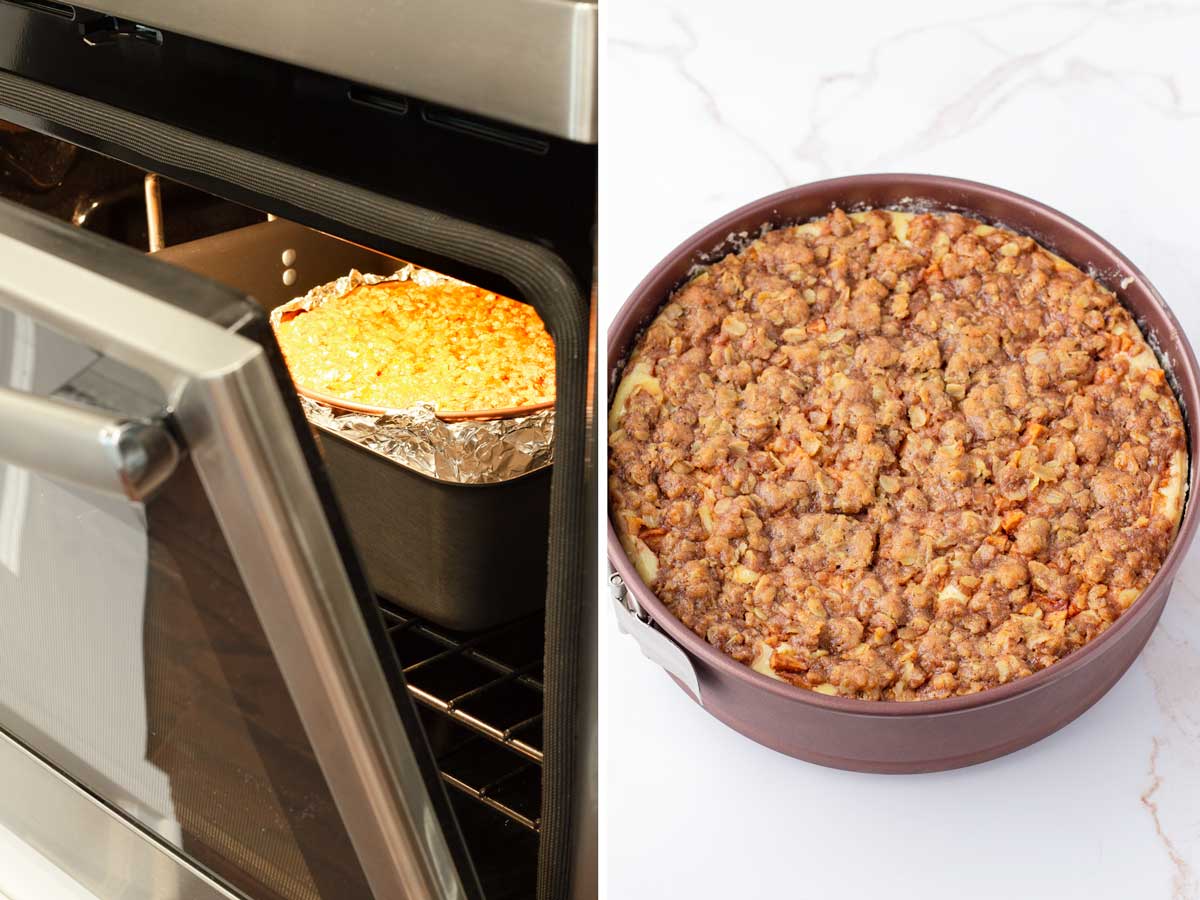
The apple crisp cheesecake is a full 9-inch cheesecake, so it’s quite thick. This means, it needs a lot more time in the oven, and to prevent it from drying out and cracking, you need to add moisture to the oven. You can achieve that with a water bath.
A water bath basically consists of placing the cheesecake on a large roasting pan filled with about 1 inch of hot water. The water will create steam in the oven and create the perfect moist environment for the cheesecake to bake properly.
To prevent water leakage, wrap the exterior of the springform pan with aluminum foil to seal the bottom. Use 4 layers of foil to ensure all sides and edges are tightly sealed.
Benefits of a cheesecake water bath:
- Prevents cracks
- Ensures the center doesn’t sink
- Ensures it comes out smooth and creamy
Ingredient Notes
Making an apple crisp cheesecake does take quite a few ingredients because it has several components.
This should definitely be a weekend baking project because it takes time to make and to let everything cool down and refrigerate overnight. It’s definitely a great make-ahead cheesecake recipe!
For the graham crust:
- Graham crackers: I use regular honey graham crackers.
- Granulated sugar: For sweetness.
- Ground cinnamon: For flavor.
- Kosher salt: To balance out the sweetness.
- Unsalted butter, melted: Creates a moist crumb so you can turn it into a crust.
For the crisp topping:
- Flour: To give the crisp topping structure.
- Light brown sugar: For sweetness.
- Old fashioned oats: Adds great texture.
- Ground cinnamon: For flavor.
- Unsalted butter: Slightly softened, cut into small cubes. You’ll rub the flour into the butter to form crumbles.
For the apple topping:
- Apples: Use firm apples, such as Honeycrisp, Fiji, or Gala. Dice them very small, about ½ inch cubes.
- Light brown sugar: For sweetness.
- Ground cinnamon: For all the fall flavors!
For the cheesecake filling:
- Full-fat cream cheese: NEEDS to be softened and at room temperature. Take them out of their packaging and let them sit on the counter for 1.5-2 hours (less time if your kitchen is hot).
- Granulated sugar: This is the perfect amount of sugar, not too sweet, not too bland.
- Full-fat sour cream: Also at room temperature. It will add tanginess and extra creaminess.
- Eggs: At room temperature. Eggs provide structure and allow the cheesecake to firm up nicely.
- Vanilla extract: Flavor.
Step-by-Step Instructions
Step 1 | Room temperature ingredients
Mixing cold ingredients will create lumps and lead to overmixing. If you start with soft, room temperature cream cheese, you’ll ensure your filling is smooth and not overmixed at all.
Tip: Start with room temperature ingredients to ensure a smooth mixture. Remove cream cheese from packaging and let it sit on the counter for about 1.5 hours (less time if your kitchen is hot). The sour cream and eggs can be taken out for 30 minutes before you start.
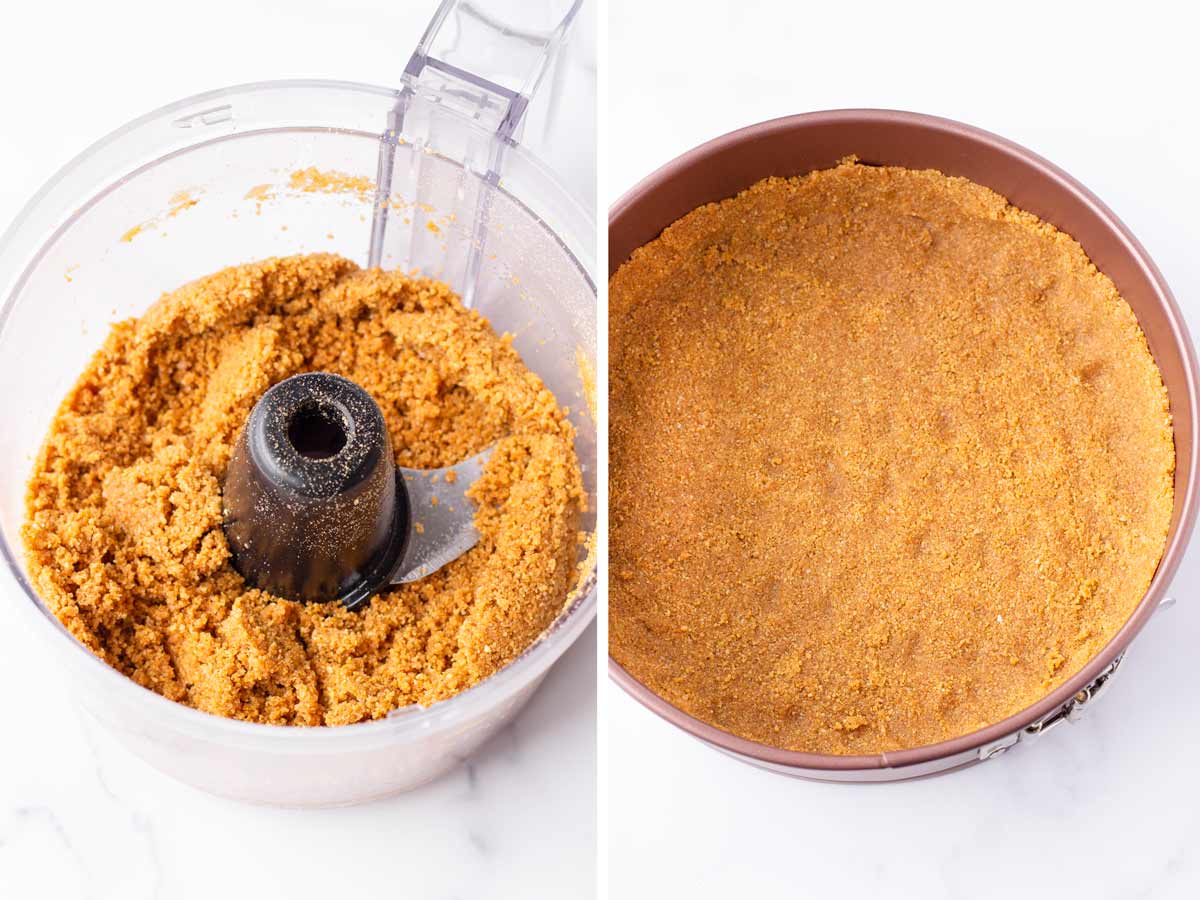
Step 2 | Make the graham crust
Preheat oven to 325 degrees F.
In a food processor, pulse graham crackers until you get fine crumbs. Add sugar, salt, cinnamon, and pulse. Drizzle in melted butter and pulse again until moist crumbs form. It should feel like wet sand.
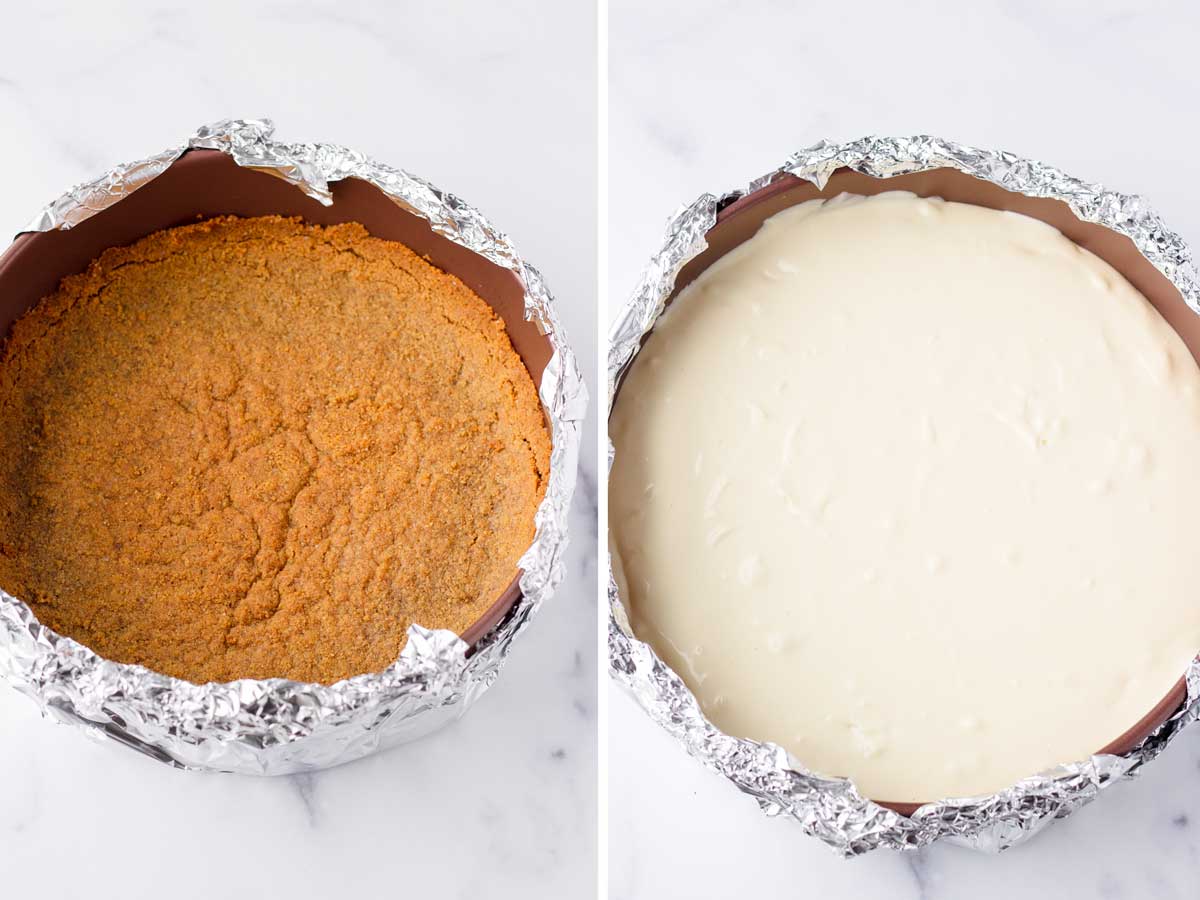
Then, tightly and firmly press the crumb mixture into a 9-inch springform pan. Pre-bake crust for 8 minutes or until golden brown. Remove from oven and let it cool down.
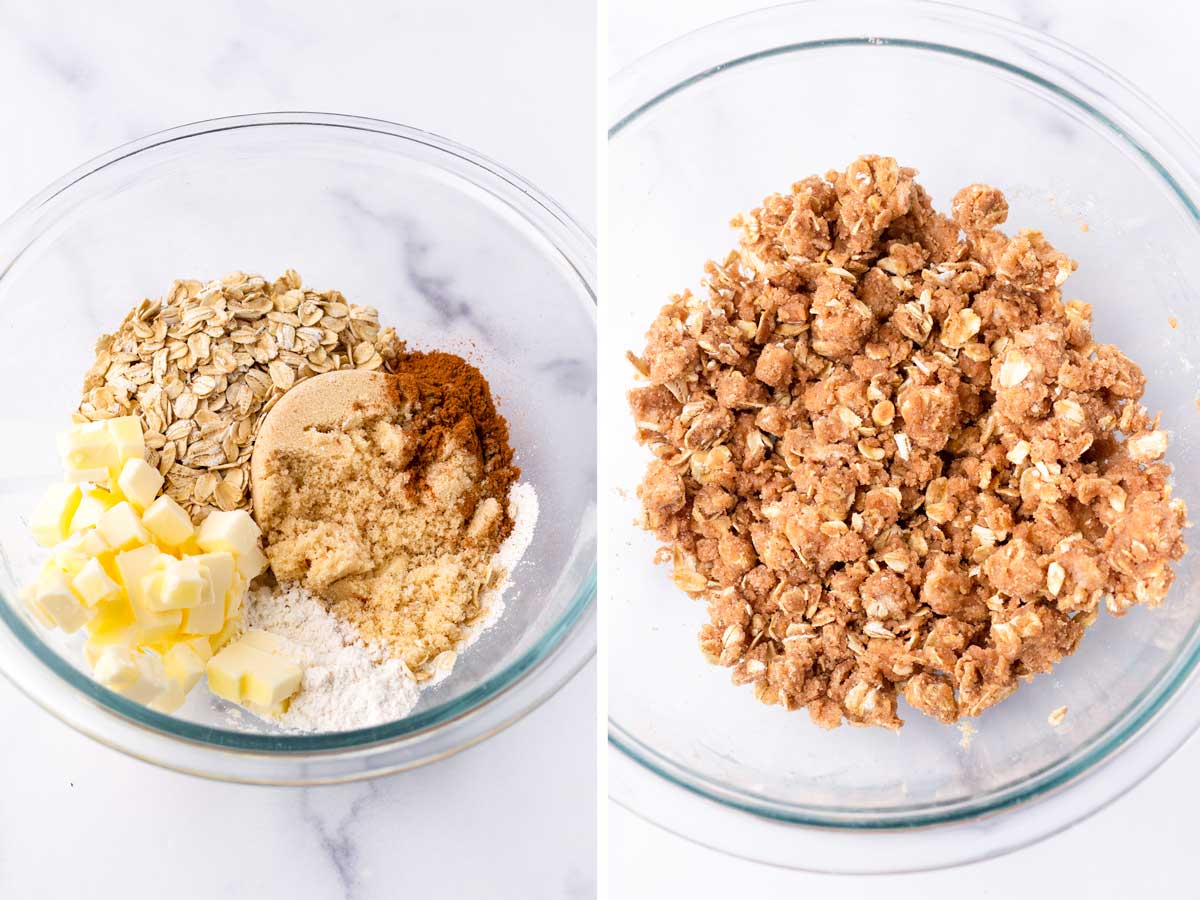
Step 3 | Make the crisp topping
In a bowl, mix oats, sugar, flour, and cinnamon. Add cubed butter (slightly softened), and press the dry mixture into the butter with your fingers until you get pea-sized crumbles. Set aside.
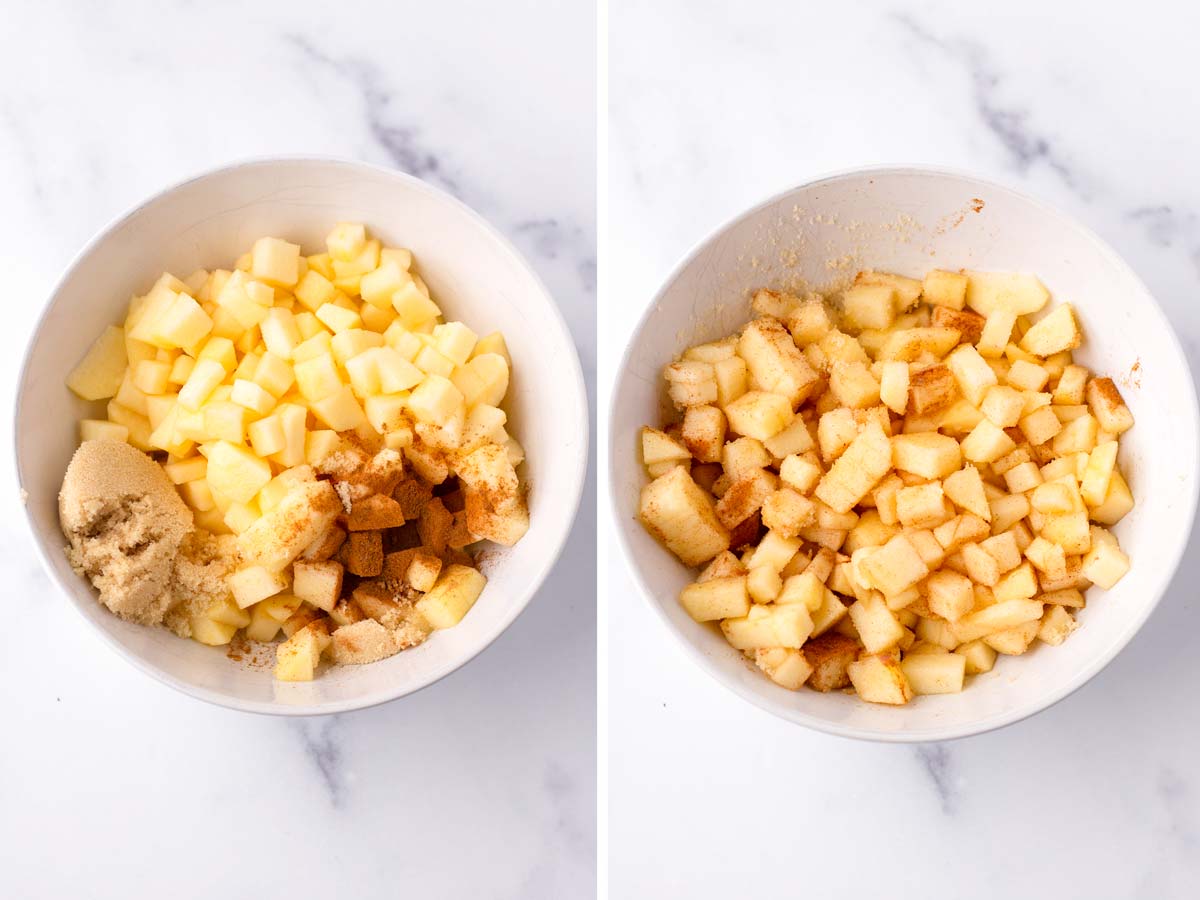
Step 4 | Make the apple topping
Mix the diced apples with brown sugar and cinnamon. The apples should cut into about half inch cubes. Set aside.
Tip: Use firm apples, such as Honeycrisp, Fiji, or Gala.
Step 5 | Make the cheesecake filling
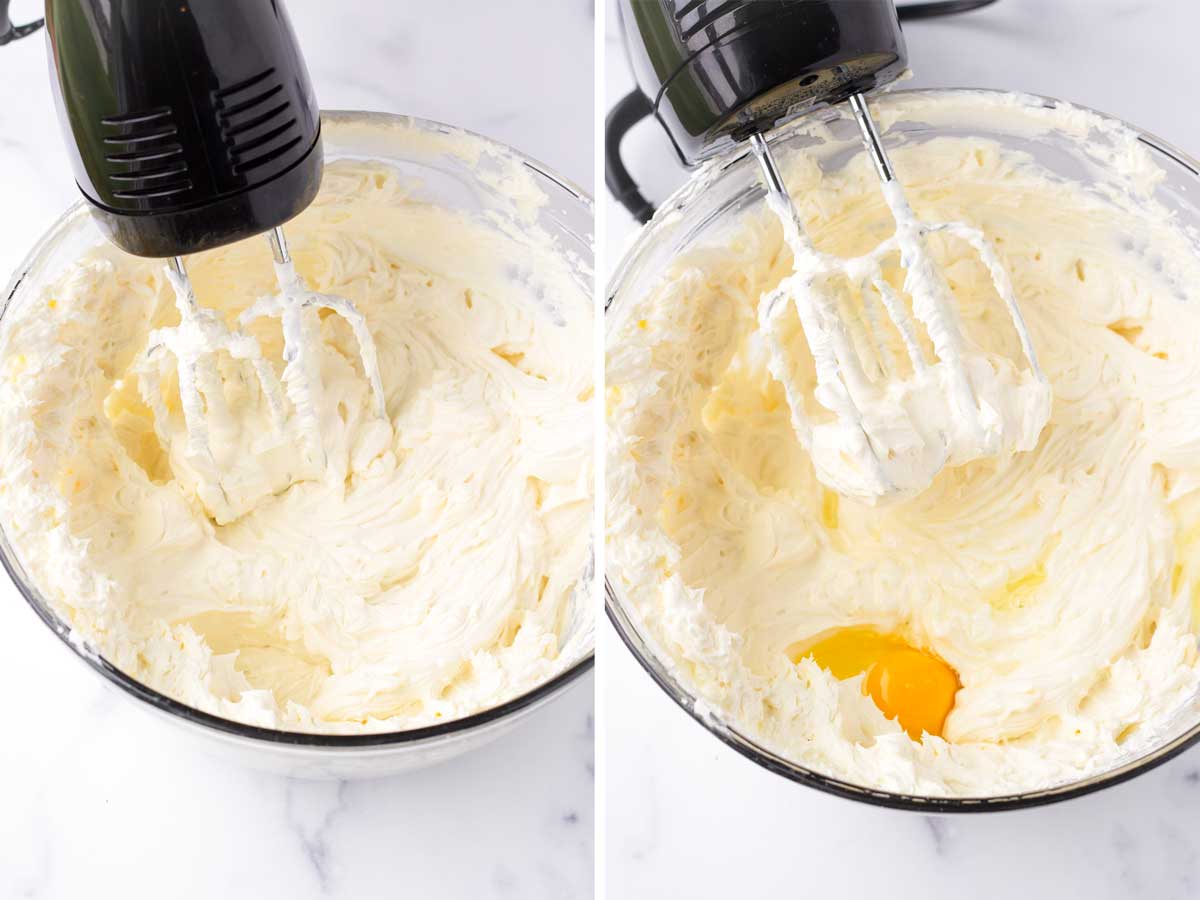
Beat softened cream cheese (at room temperature) and sugar over medium-high speed until creamy and smooth, about 2 minutes. Do not overmix.
Add sour cream and vanilla and mix over medium speed until just combined, scraping the sides of the bowl as needed.
Beat in the eggs, one at a time, until just combined. Again, don’t overmix.
Step 6 | Assemble the cheesecake
At this point, boil enough water to cover about 1 inch of a roasting pan, where you’ll place the cheesecake.
Wrap the exterior of the springform pan with 4 layers of aluminum foil, making sure it’s sealed tight around the edges to prevent leakage.
Pour the cheesecake filling on top of the pre-baked crust and smooth out the top.
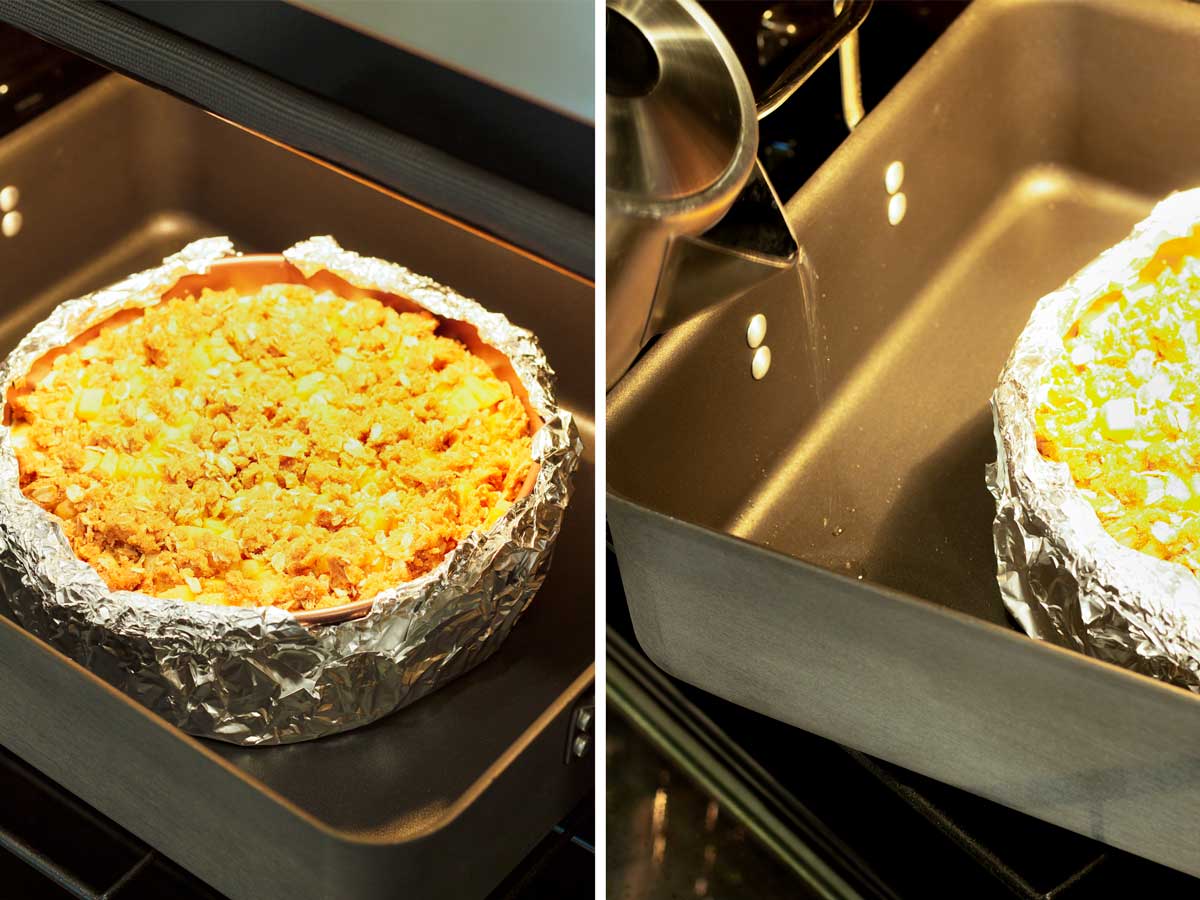
Remove any excess liquid from the diced apples. Carefully and gently, top the filling with the apples and the crisp crumble topping.

Step 7 | Get the water bath ready
Carefully place the cheesecake on top of a large roasting pan. Transfer to the oven, in the middle rack. Pour the hot boiled water into the roasting pan to cover about 1 inch of the pan. Don’t splash any water on the cheesecake.
Tip: It’s much easier to pour the water into the roasting pan once everything is set up in the oven.
Step 8 | Bake and let cool
Bake for 70 to 75 minutes. It’s ready when a thermometer inserted in the middle reads 150 degrees F. It will feel jiggly in the center.
After it’s done, let the cheesecake cool INSIDE the oven with the door cracked open for 1 hour. This ensures that the cheesecake cools down slowly, which prevents further cracks.
Finally, remove from the oven and run a knife around the edges to loosen it up. This step also helps to prevent cracks. Let it cool completely on the countertop. Don’t remove it from the pan yet.
Then, wrap with foil on top and refrigerate overnight. The day next, run a knife around the edges one more time. Loosen the springform pan to release. Slice and serve!
Recipe FAQs
Remove cream cheese from packaging and let it sit on the counter for 1.5 hours, or less if your kitchen is hot. The sour cream and eggs can be taken out 30-45 minutes prior.
Yes, the edges of a springform pan release very easily. It will make slicing the cheesecake a lot easier and cleaner.
Yes. Because it’s a full 9-inch cheesecake, it needs to bake for over an hour. A water bath ensures the cheesecake doesn’t crack or turn out dry.
Some of the apples will slightly sink into the batter, but not by much. Make sure the apples are small diced. The crumble topping won’t sink, it’s not heavy.
Because this cheesecake has a topping, you won’t be able to do the wobble test (when the edges are set but the center is jiggly). Instead, after 70-75 minutes, insert an instant read thermometer – it’s ready when it reaches 150 degrees F.
This apple crisp cheesecake is seriously the perfect treat for fall or holiday baking. If you’re an apple and cheesecake lover, you will absolutely love this recipe. Happy baking!
Tips for Success
- Make sure the ingredients for the cheesecake filling, especially the cream cheese, sour cream, and eggs are at room temperature. This is a must. Otherwise, the batter will be lumpy and over-mixed.
- You need a cheesecake water bath for this recipe because it’s a full 9-inch cheesecake. A water bath will ensure that the filling comes out smooth and creamy, and will also prevent cracks.
- To check if the cheesecake is done, insert an instant read thermometer in the center after 70-75 minutes. It’s done when it reaches 150 degrees F.
I’d love to hear from you! If you loved my recipe, please consider leaving a 5-star rating and a comment down below. Sign up for my newsletter and follow along on Instagram, Facebook, or Pinterest
Apple Crisp Cheesecake
Ingredients
Graham crust
- 14 graham crackers
- 2 tablespoons granulated sugar
- ½ teaspoon ground cinnamon
- ¼ teaspoon Kosher salt
- 7 tablespoons unsalted butter, melted
Crisp topping
- ⅓ cup all-purpose flour
- ⅓ cup light brown sugar
- ⅓ cup old-fashioned oats
- 1 ½ teaspoon ground cinnamon
- 6 tablespoons unsalted butter - slightly softened and cut into small cubes
Apple topping
- 2 cups peeled and small-diced honeycrisp apples - cut into about ½ inch cubes
- 2 tablespoons light brown sugar
- ¾ teaspoons ground cinnamon
Cheesecake filling
- 32 ounces full-fat cream cheese, softened at room temperature - (four 8-ounce blocks)
- 1 cup granulated sugar
- ⅔ cup full-fat sour cream, at room temperature
- 4 large eggs, at room temperature
- 2 teaspoons vanilla extract
Instructions
- Make sure all ingredients are at room temperature, especially the cream cheese, sour cream, and eggs. This is important to ensure a smooth batter.
Make the graham crust:
- Preheat oven to 325 degrees F.
- In a food processor, pulse graham crackers until you get fine crumbs. Add the sugar, cinnamon, and salt, and pulse a few more times. Drizzle in the melted butter and pulse until moist crumbs form. It should feel like wet sand.
- Transfer the graham crust mixture onto a 9-inch springform pan (locked). Press it tightly and firmly until you form a compact crust on the bottom and slightly up the sides.
- Pre-bake for 8-10 minutes or until golden brown. Remove the crust from the oven and let it cool. Do not turn off the oven.
Make the crisp topping:
- In a bowl, combine flour, sugar, cinnamon and oats. Add the butter and work it with your fingers until you get pea-size crumbs. Set aside.
Make the apple topping:
- In a bowl, combine the apples with the 2 tablespoons brown sugar and ¾ teaspoon cinnamon. Set aside.
Make the cheesecake filling:
- Using a handheld electric mixer, beat the softened cream cheese with the granulated sugar over medium-high speed until smooth and creamy for 2 minutes. If needed, scrape down the sides of the bowl. Don’t overmix.
- Reduce mixer to medium speed. Add the sour cream and vanilla extract and mix until just combined.
- Beat in the eggs, one at a time. Again, don’t overmix, or the cheesecake will crack or sink in the middle. Give it a final mix with a rubber spatula, scraping the sides of the bowl if needed. Set aside.
Assemble and bake in a water bath:
- At this point, boil water, enough to cover about 1 inch of a large roasting pan (for the cheesecake water bath). The roasting pan should be large enough to fit the springform pan.
- Tightly wrap the exterior of the prepared 9-inch springform pan (bottom and sides) with 4 layers of aluminum foil to prevent any water leakage from the water bath. Pour the cheesecake batter into the pre-baked crust.
- Remove any excess liquid from the prepared apples. Top the cheesecake with the apples and the crisp/crumble topping evenly. Tip: Make sure to remove excess liquid from the apples to prevent a pool of water from forming. I drain the prepared apples through a colander and pat it dry with paper towel.
- Transfer the assembled cheesecake to a large roasting pan and place it in the oven. Then, pour the hot boiled water into the roasting pan to cover about ¾ to 1 inch.
- Bake for 70-75 minutes at 325 degrees F. Don't open the oven until time's up, otherwise the heat and moisture will escape. The cheesecake is ready when a thermometer inserted in the middle reads 150 degrees F. Note: I usually do the wobble test to check if it’s ready (edges set but wobbly still in the center), but you can’t tell with this one because of the topping. Use a thermometer instead – it will look jiggly in the center and set around the edges.
- Turn the oven off and crack open the oven door slightly. Let the cheesecake cool inside the oven for 1 hour. Then, remove it from oven and run a knife around the edges to slightly loosen up the edges. Let it cool completely on the counter. Cover the top with foil and refrigerate overnight or at least 5 hours, don’t remove it from the springform pan yet. Tip: Cooling down the cheesecake inside the oven helps prevent further cracks. Cheesecakes don’t like drastic changes in temperature.
- Once it’s fully chilled, run a knife around the edges again. Release the cheesecake from the springform pan. Slice and serve. If desired, drizzle with caramel sauce or serve with whipped cream.
Notes
- Use room temperature ingredients to prevent lumps and over-mixing. You’re looking for a smooth and glossy batter.
- What kinds of apples to use: Use firm apples, such as Honeycrisp, Fiji, or Gala. Don’t use Red Delicious apples.
- Make-ahead: The cheesecake can be made 1 day in advance. It needs to refrigerate overnight anyway.
- Storing: Refrigerate for up to 3 days, covered.
- Freezing: You can freeze it, but the topping will not be crispy anymore though. Wrap the completely cooled cheesecake with layers of plastic wrap and then with aluminum foil. Freeze for up to 2 months. Thaw in the refrigerator overnight or until defrosted.
- Water bath: Another alternative to a water bath is placing a large pan of water, filled to about 1 inch, in the lower rack of the oven. This way, the cheesecake won’t sit directly in the hot water. This is a great option if you’re nervous about water leaking into the pan. My preference is to let the cheesecake sit directly in the water bath though – as long as you tightly wrap the springform pan with multiple layers of aluminum foil, no water should seep in.


Dawn M Migliore says
Question am I able to make the cheesecake and an apple crisp separately since I have a packaged shortcut for Apple crisp? then when the cheesecake is bakes add the apple topping and put back in the fridge
Tania says
Yes, you can do that! Let it cool a bit before adding your topping.
Reagan says
Love this recipe! Do you think that it would do well baking without the apple crumb topping if I wanted just a plain cheesecake?
Tania says
Yes, absolutely! The base is a basically a plain cheesecake filling.
lesley taylor says
The first time I made this it was perfect and amazing….. this time my crumb topping burnt. baked at 325. I can’t figure our why
Tania says
Hi Lesley! Because you’ve made it one and turned out great, it makes me think that it’s an oven issue. Some ovens can be mis-calibrated. I’d recommend using an oven thermometer to make sure the oven is reading the temp right.
Carol says
Hi. This looks so good! I’m not a fan of graham crust but wanted to try anyway. Have you ever made this with cinnamon graham crackers instead of the honey ones? Thank you!
Tania says
Hi! Yes, either one will work great!
maude mack says
also.. can you freeze it?
Tania says
Yes! You can find frezeing instructions in the recipe card notes.
maude mack says
how far in advance can i make this?
Tania says
1 or 2 days in advance
Tara Stipick says
I made this for my Mom and Dad and it turned out really really really good. I mean great
Susan says
I’m unsure about the amount of graham crackers. Does one graham cracker have 1, 2, or 4 parts. They come packaged in various sizes.
Tania says
Great question! I use Nabisco’s Honey Maid graham crackers. They come in sheets and I used 14 cracker sheets. For reference, 14 graham cracker sheets would be equivalent to about 1.75 cups of graham cracker CRUMBS.
Donna says
Can this recipe be downsized for a 6” cheesecake?
Tania says
Yes! You may not even need to reduce the baking time, assuming the thickness of the cheesecake is the same as a 9-inch, but check after 60 or 65 minutes in the oven using an instant read thermometer (should be 150 degrees F in the center).
Kelly says
I made this recipe – hands down the most compliments I’ve ever had! Followed the recipe to a tee. Very important to pat dry the apple filling!!
Thank you so much!!! I will definitely be making this again!
Patty says
It did take some time to make but it’s so DELICIOUS! It’s very smooth and the apple crisp topping was fab. Everyone loved it! Thank u for the recipe.
Michelle says
I can my own apple pie filling could I substitute that instead of fresh apples ?
Tania says
Hi Michelle! I haven’t tried making it with canned apple filling, so I can’t say for sure. I’d imagine it would make the top very soggy, so I’d probably stick to using fresh apples.