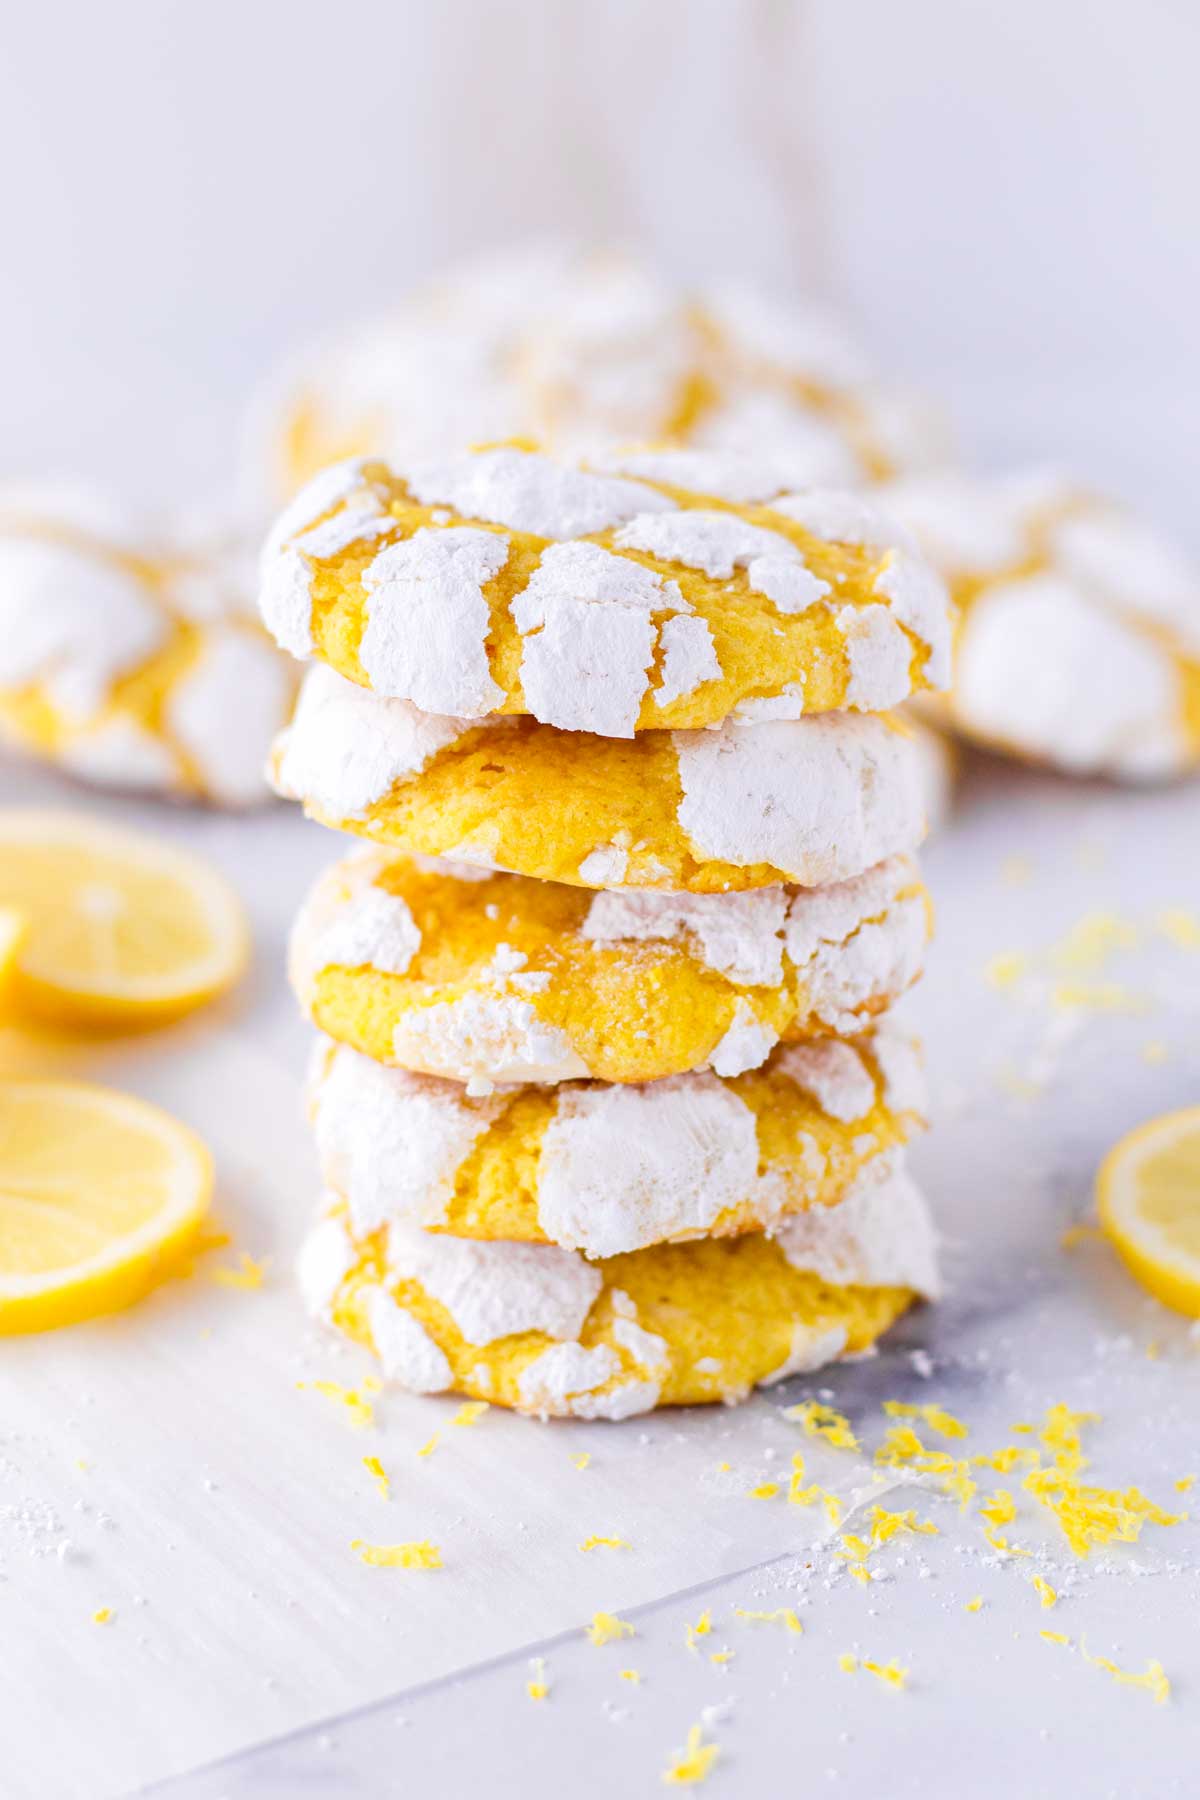
These Lemon Crinkle Cookies are pillowy soft, tender, moist, perfectly sweet, and packed with fresh and vibrant lemon flavors!
Lemon crinkle cookies are very popular around the holidays. They are so pretty, festive, and absolutely delicious. We love gifting these cookies into gift boxes for friends and family!
I’ll show you all the tips and tricks you need to know to get that perfect crinkled top with powdered sugar. Let’s get baking!
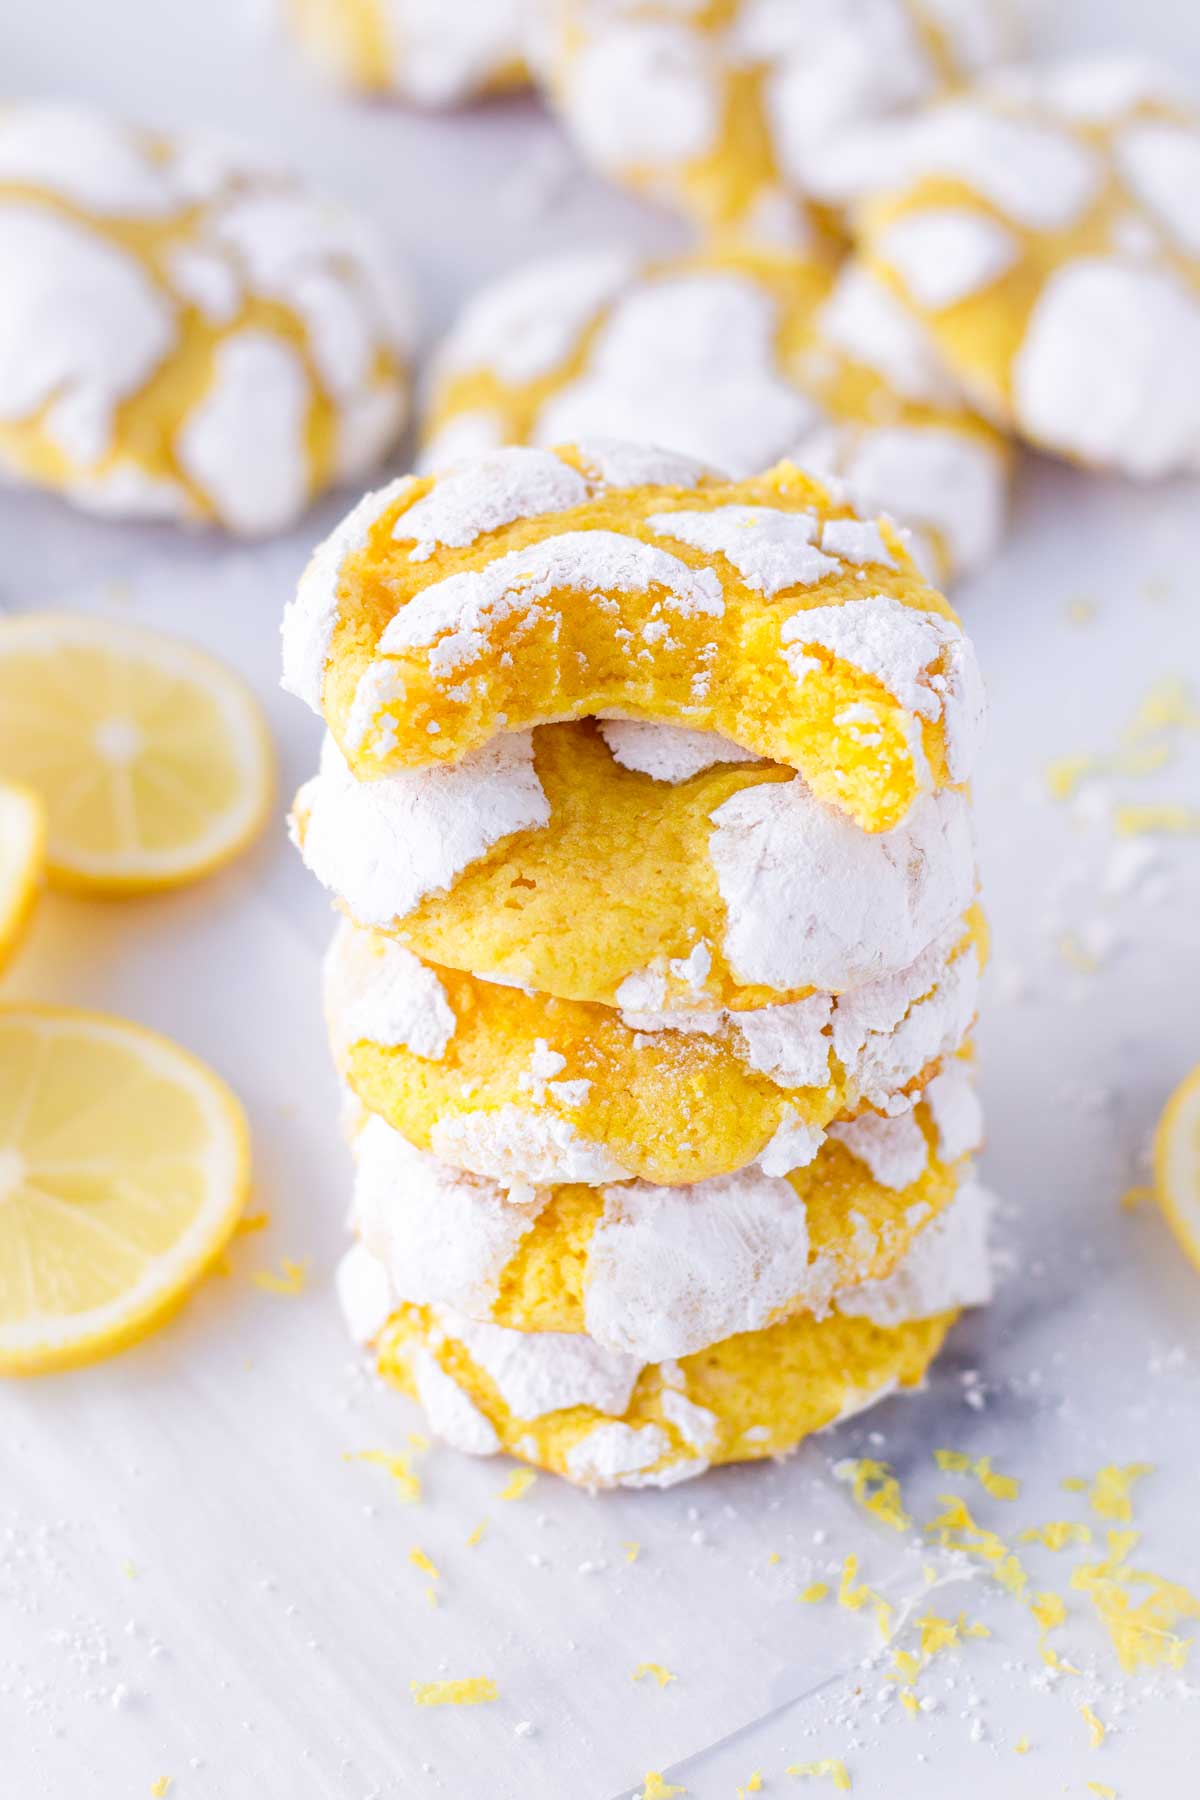
I love baking with fresh lemon. Lemon makes baked goods so vibrant, aromatic, and fresh-tasting. We love our Ricotta Lemon Cookies, Lemon Pound Cake, Lemon Blueberry Bread, and Strawberry Lemon Cupcakes!
Today I’m sharing this easy lemon crinkle cookie recipe! They are seriously the best holiday-inspired cookies ever.
Here’s what we love about these lemon crinkle cookies:
- They are pillowy soft
- They are moist
- They are packed with vibrant lemon flavors
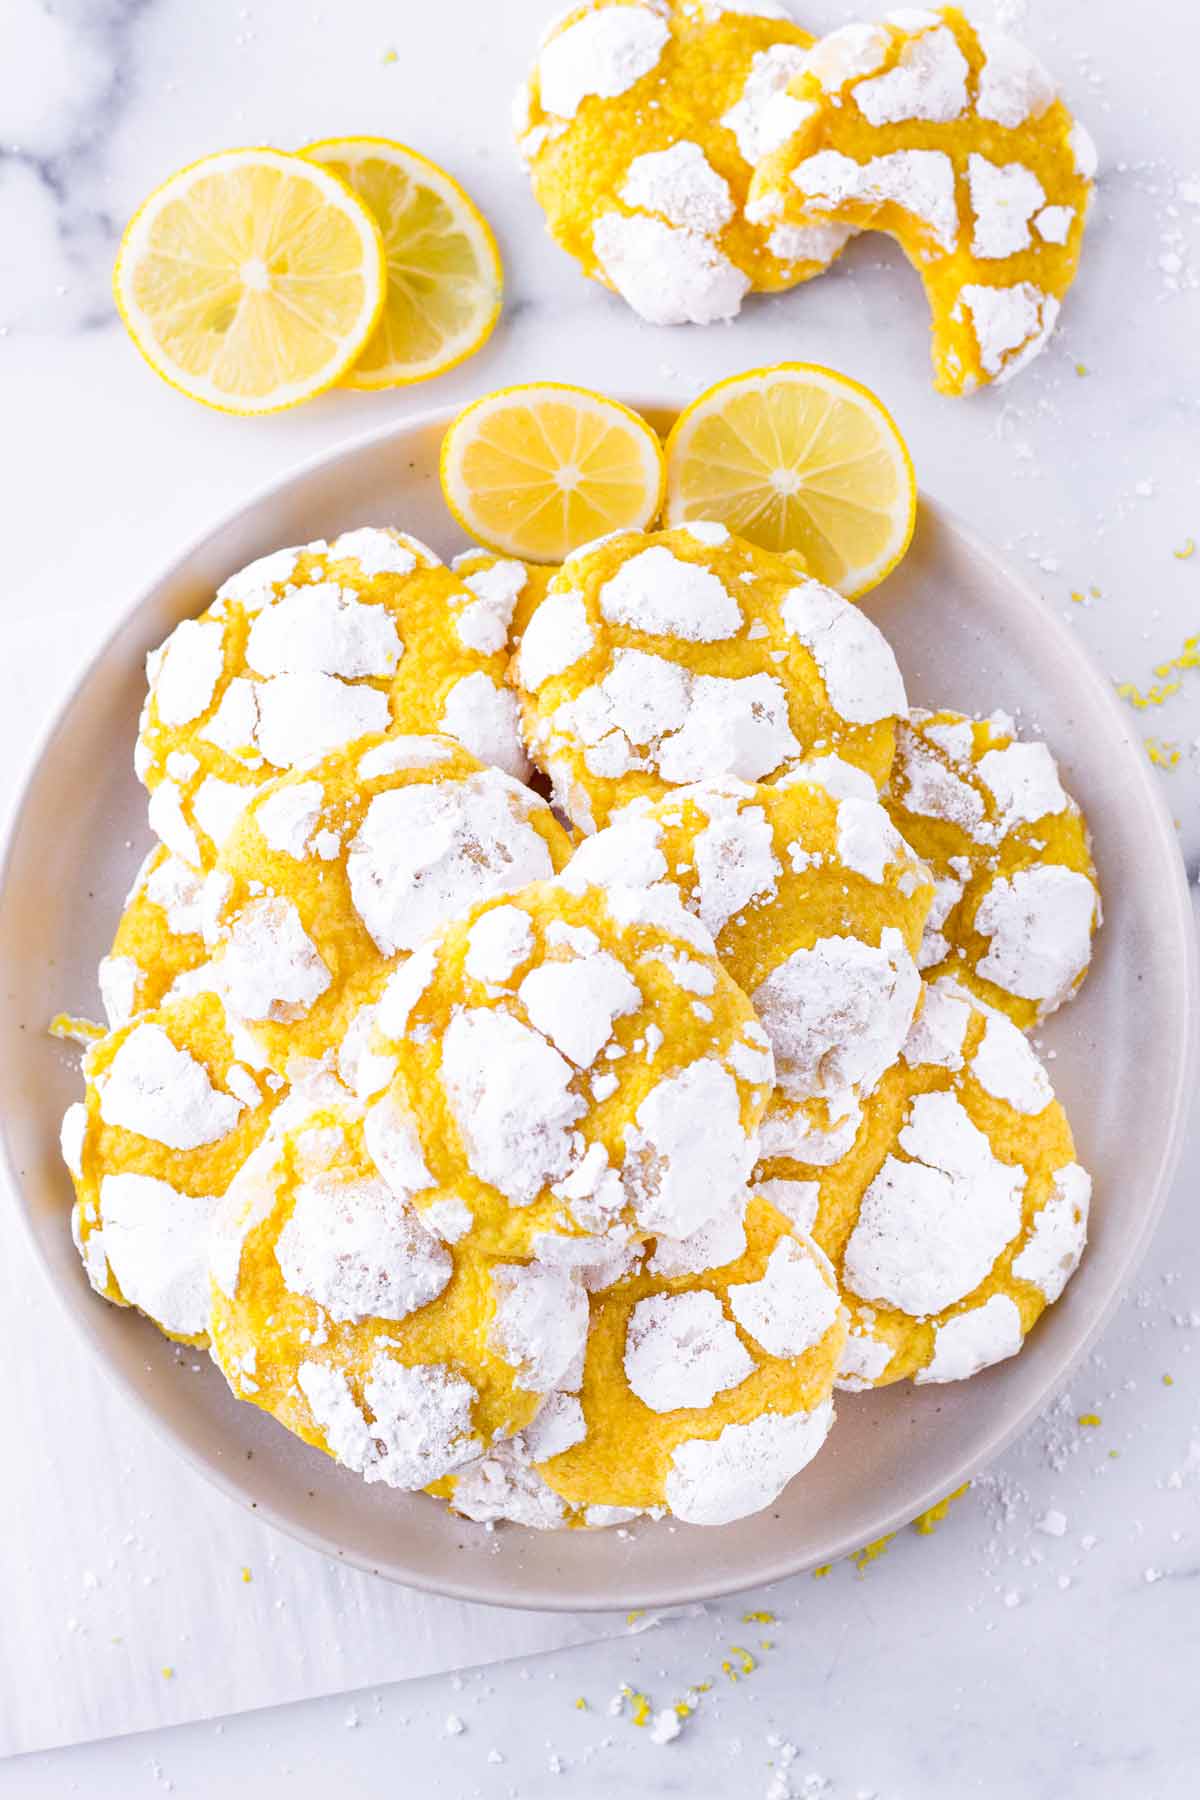
- They have beautiful crinkled patterns with powdered sugar

Jump to:
What Creates That Beautiful Crinkled Top?
There are 2 factors that create those beautiful cracks in these lemon crinkle cookies.
1. Rolling the cookie dough balls in sugar
Here’s why: sugar draws out moisture and creates cracks when the surface dries out faster than the rate the interior is cooked. Because there is less moisture, the surface pulls apart and creates those beautiful cracks.
Either granulated sugar or powdered sugar will accomplish this, but granulated sugar does a better job due to its texture.
For this lemon crinkle cookie recipe, I coat the cookie dough balls with a layer of granulated sugar first, and then with powdered sugar. This helps to create a crinkled top without melting out the powdered sugar.
2. Fully refrigerating the dough
Without refrigeration, the dough will be too soft and the cookies will come out very flat and with no cracks. The cold dough gives enough time for the sugar to draw out moisture before the interior is fully baked.
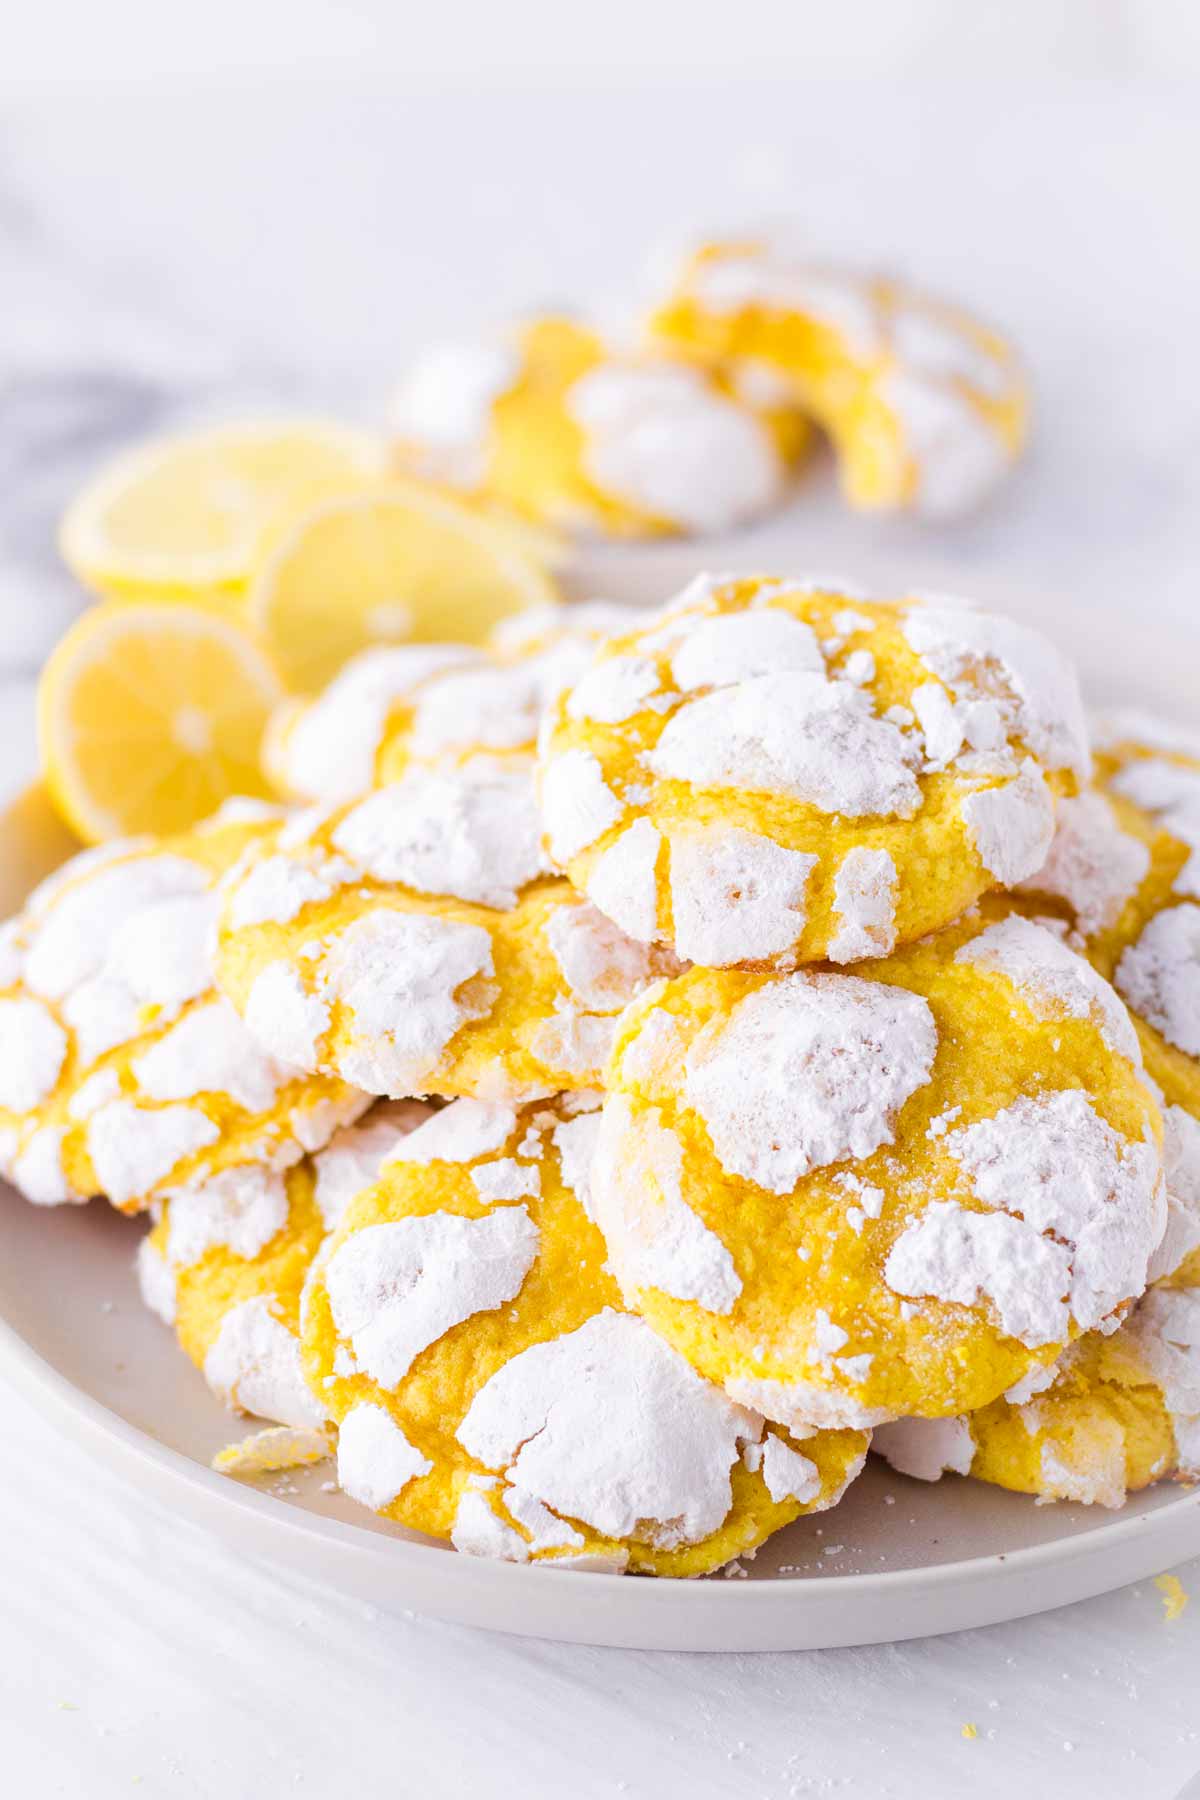
How to Prevent the Powdered Sugar from Melting
The trick is to coat the dough with granulated sugar first, and then with powdered sugar.
This way, the granulated sugar draws out moisture from the surface to create that crinkled exterior while the powdered sugar remains on top.
My recommendation: Coat the lemon crinkle cookie balls with a normal layer of granulated sugar (not too little but not too heavy either). Then roll them on a GENEROUS layer of powdered sugar, packing it in with your the palm of your hands so make sure it stays in place. In fact, I roll them in powdered sugar twice.
Ingredient Notes
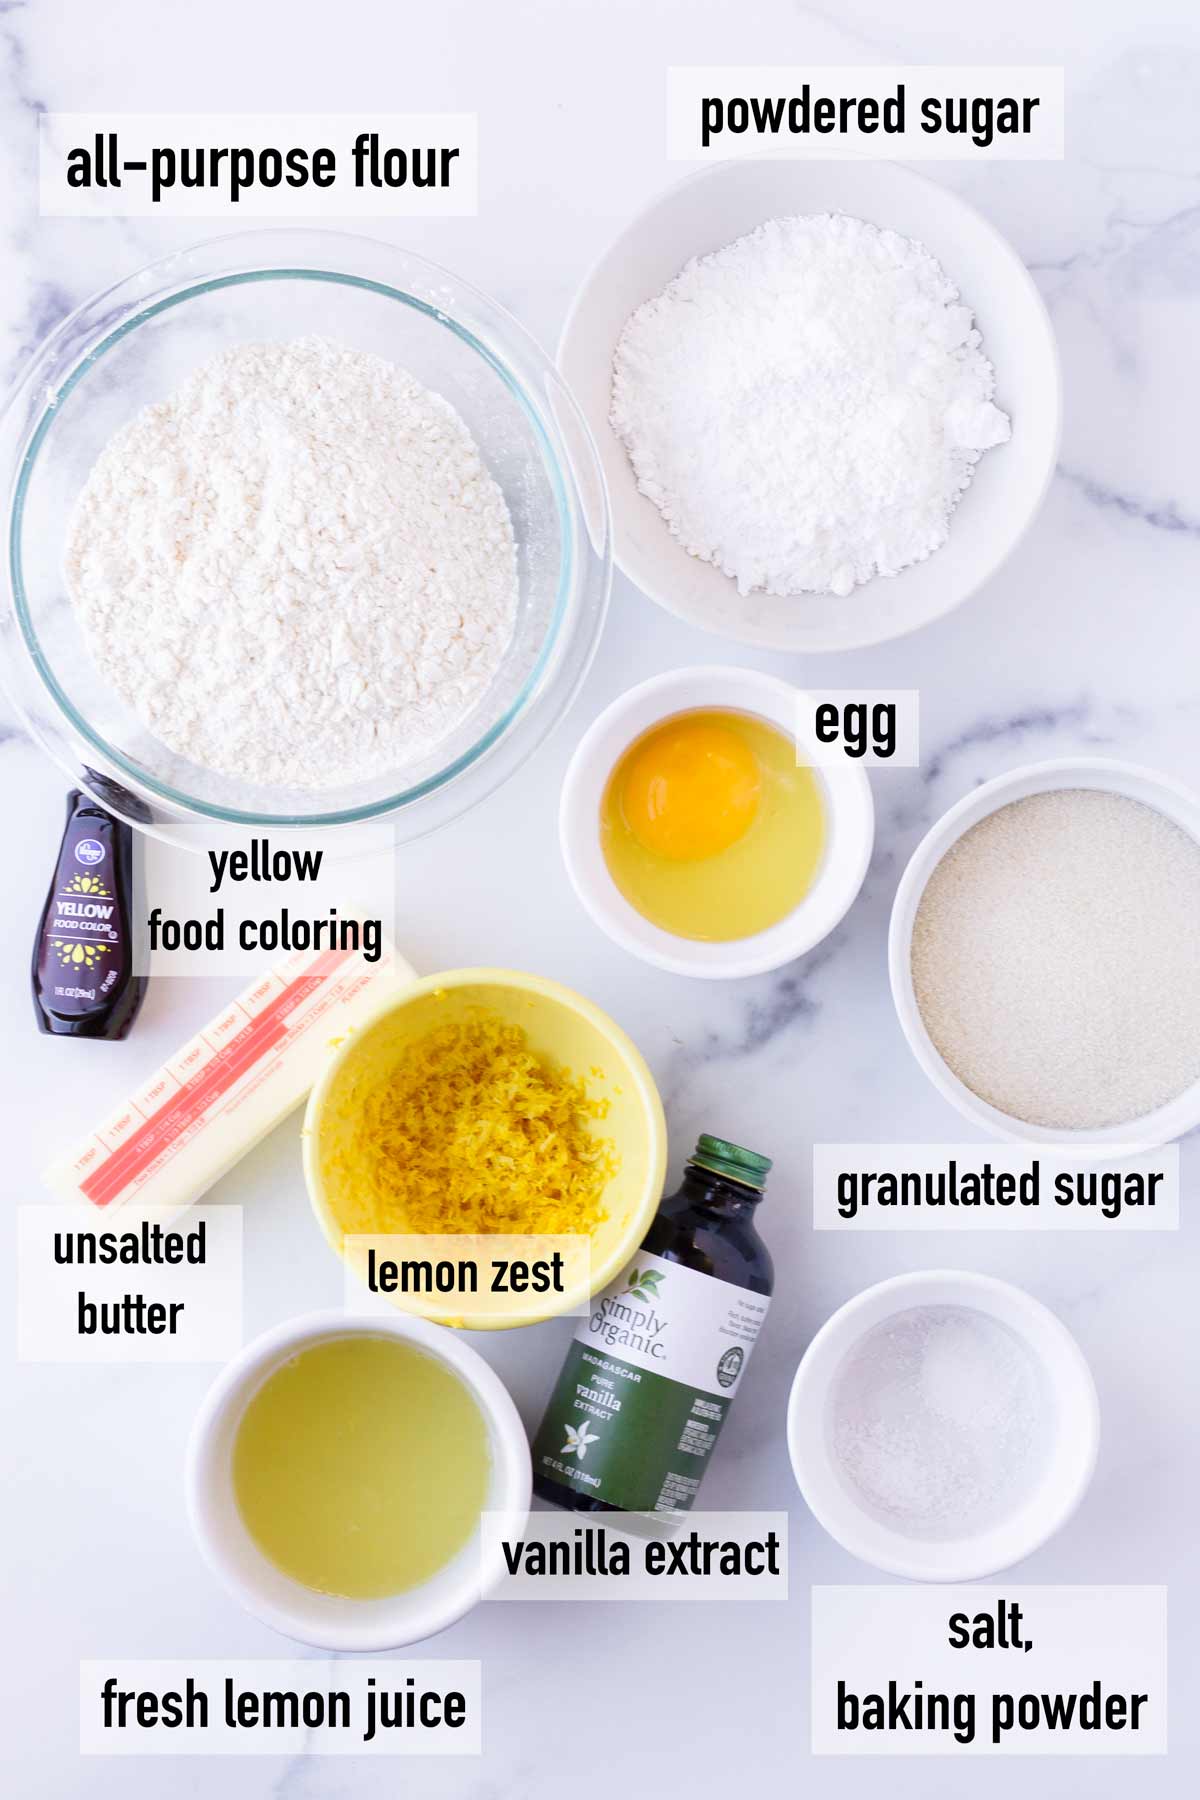
Making lemon crinkle cookies at home takes only a few ingredients, many of which you may already have in your pantry.
As always, specific ingredient quantities can be found in the recipe card down below, but I wanted to share a few helpful ingredient notes here:
- Flour: all-purpose flour works great here.
- Baking powder: To create lift and airiness.
- Salt: Brings out flavors in baked goods.
- Unsalted butter: It needs to be softened at room temperature.
- Granulated sugar: For sweetness.
- Large egg: Provides structure.
- Vanilla extract: For flavor.
- Lemon zest: Remember to zest the lemon before squeezing.
- Lemon juice: Freshly squeezed!
- Yellow food coloring: Without it, the cookies will look very pale. It does not affect the flavor.
- Granulated sugar: for coating the cookies
- Powdered sugar: for coating the cookies.
Step-by-Step Instructions
1. Whisk dry ingredients
In a medium bowl, whisk flour, baking powder, and salt. Set aside. Also, make sure your butter is softened at room temperature first.
2. Cream butter and sugar
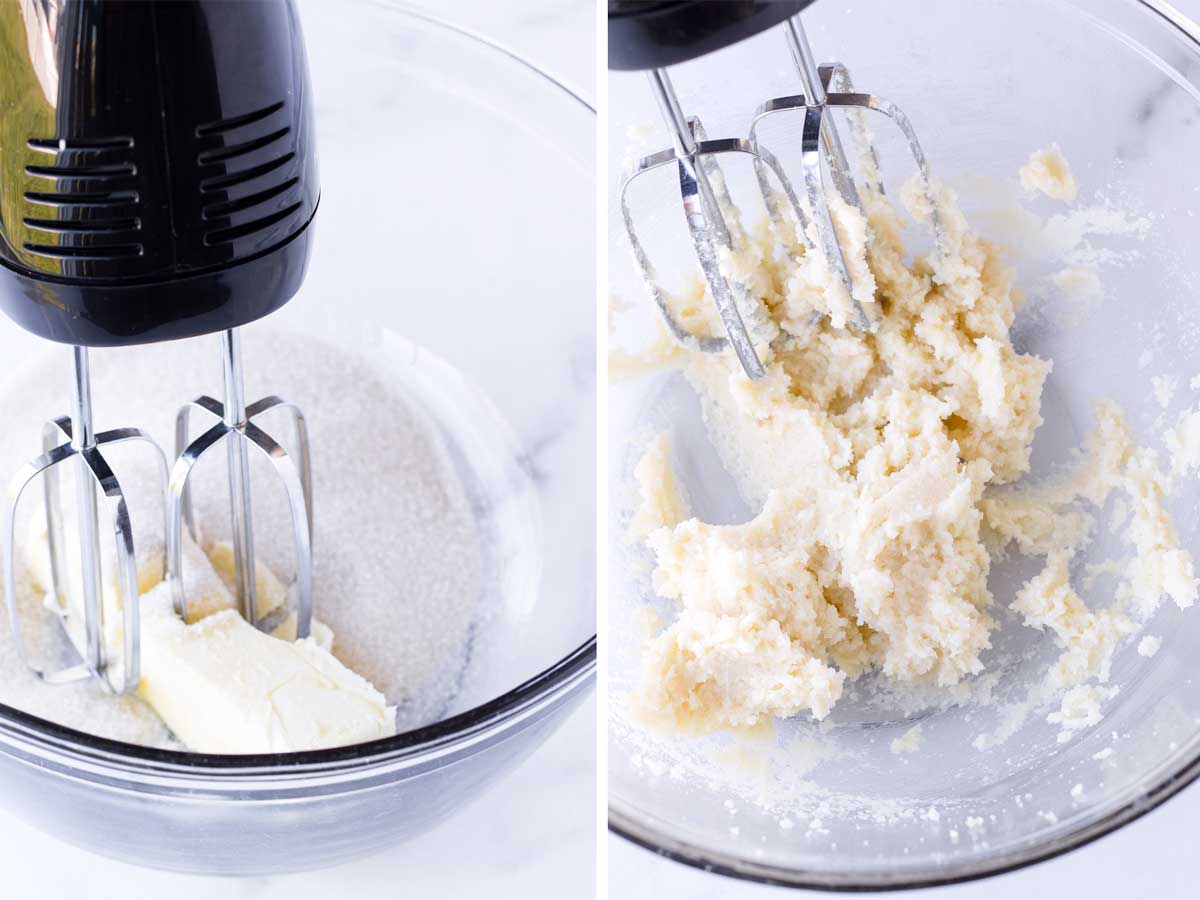
Using an electric mixer or a stand mixer, beat the softened butter with granulated sugar (¾ cup) for about 2 minutes over medium-high speed until creamy.
Tip: The butter MUST be softened at room temperature. If you forgot to soften it in advance, remove from packaging and microwave it 5-10 seconds at a time until softened, checking the consistency each time. Keep a very close eye on it!
3. Mix wet ingredients
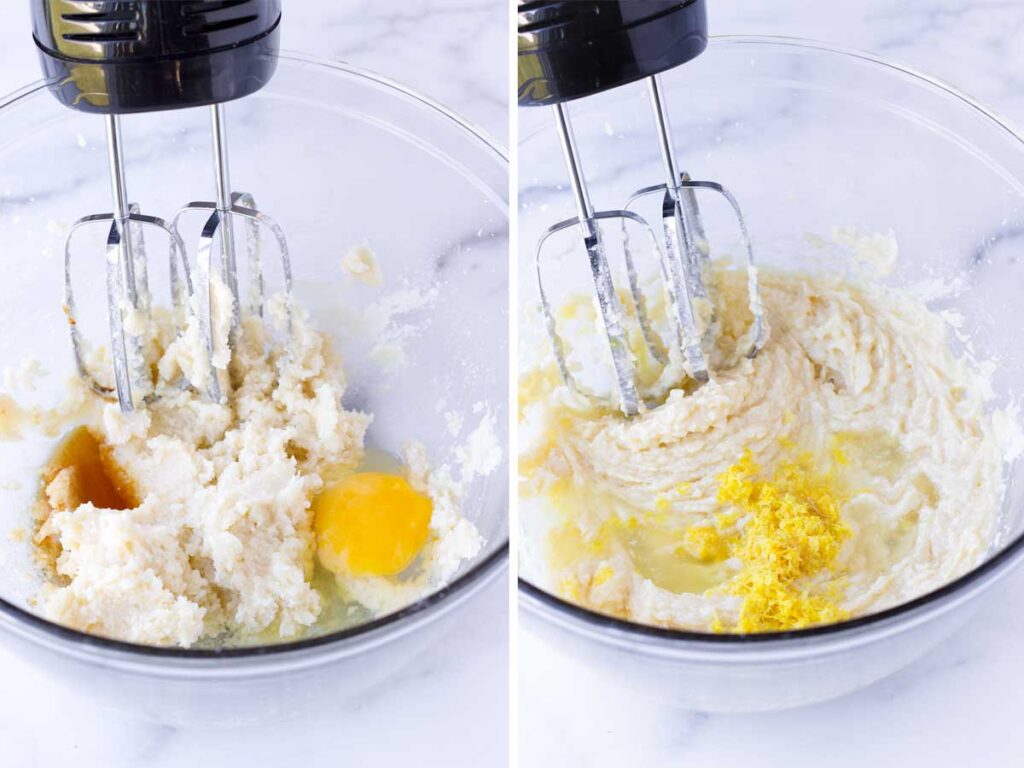
To the creamed butter and sugar, mix egg and vanilla over medium speed until fully combined. Then add freshly squeezed lemon juice and lemon zest. Mix until evenly combine, scraping the sides of the bowl as needed.
4. Mix dry and wet ingredients
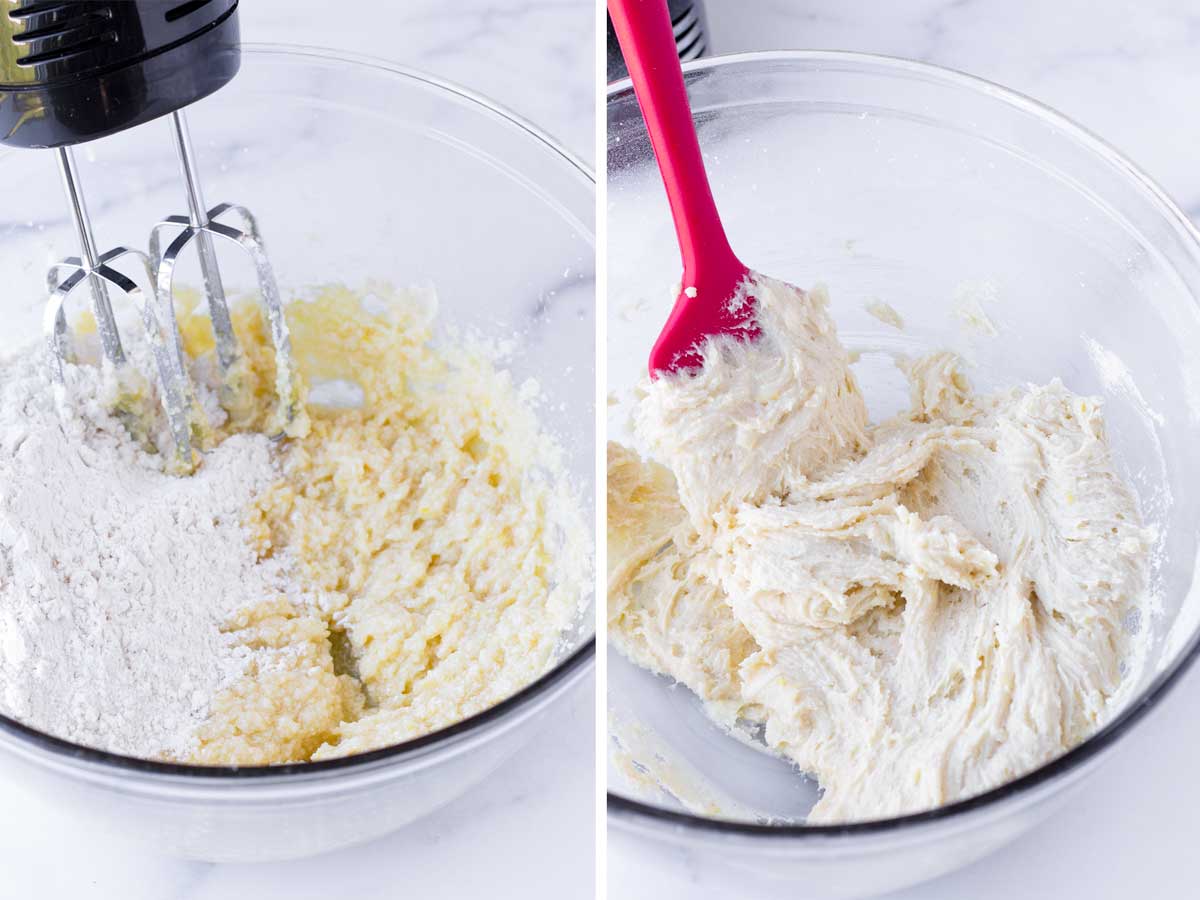
Mix dry ingredients with wet ingredients over medium speed, scraping the sides of the bowl as needed, until evenly combined and no pockets of flour remain. Do not overmix.
5. Add food coloring, chill dough
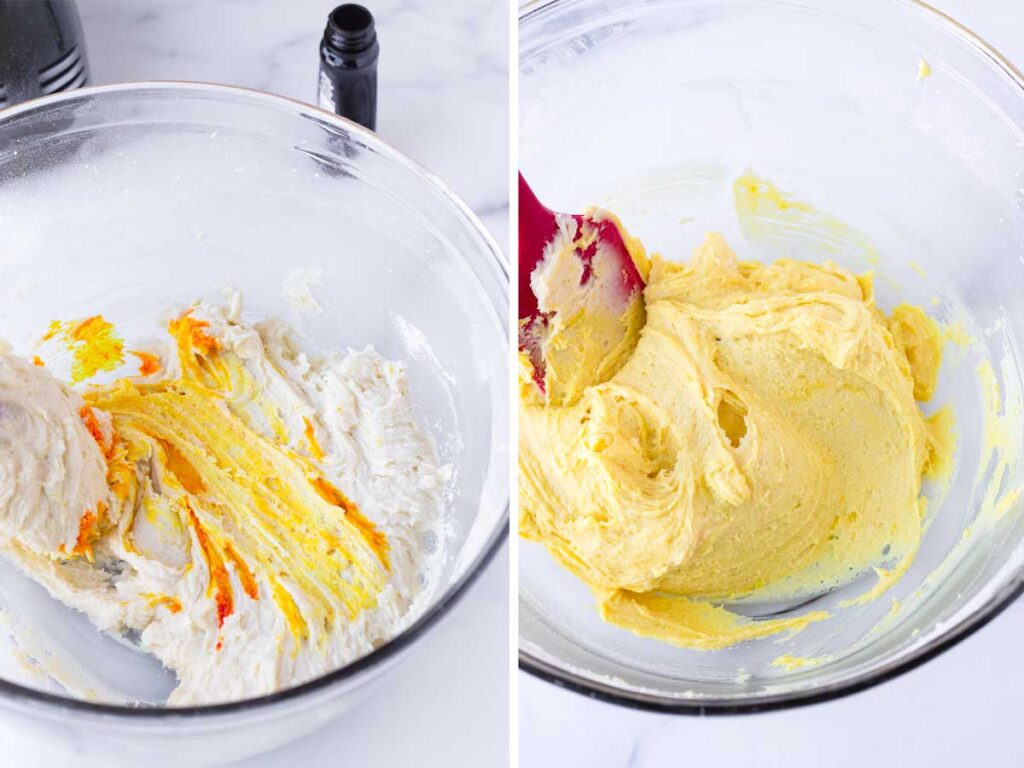
Add 3-4 drops of yellow food coloring and mix. You don’t need much. It will look orange first, but will make the dough turn yellow.
Tip: Go easy on the food coloring. You only need a few drops (I ended up using 3-4 drops) to get the right color.
Place plastic wrap directly over the dough. The dough will be soft and sticky, so we need to refrigerate it for at least 2 hours or preferably overnight. Without refrigeration, the cookies will be flat and not crinkled.
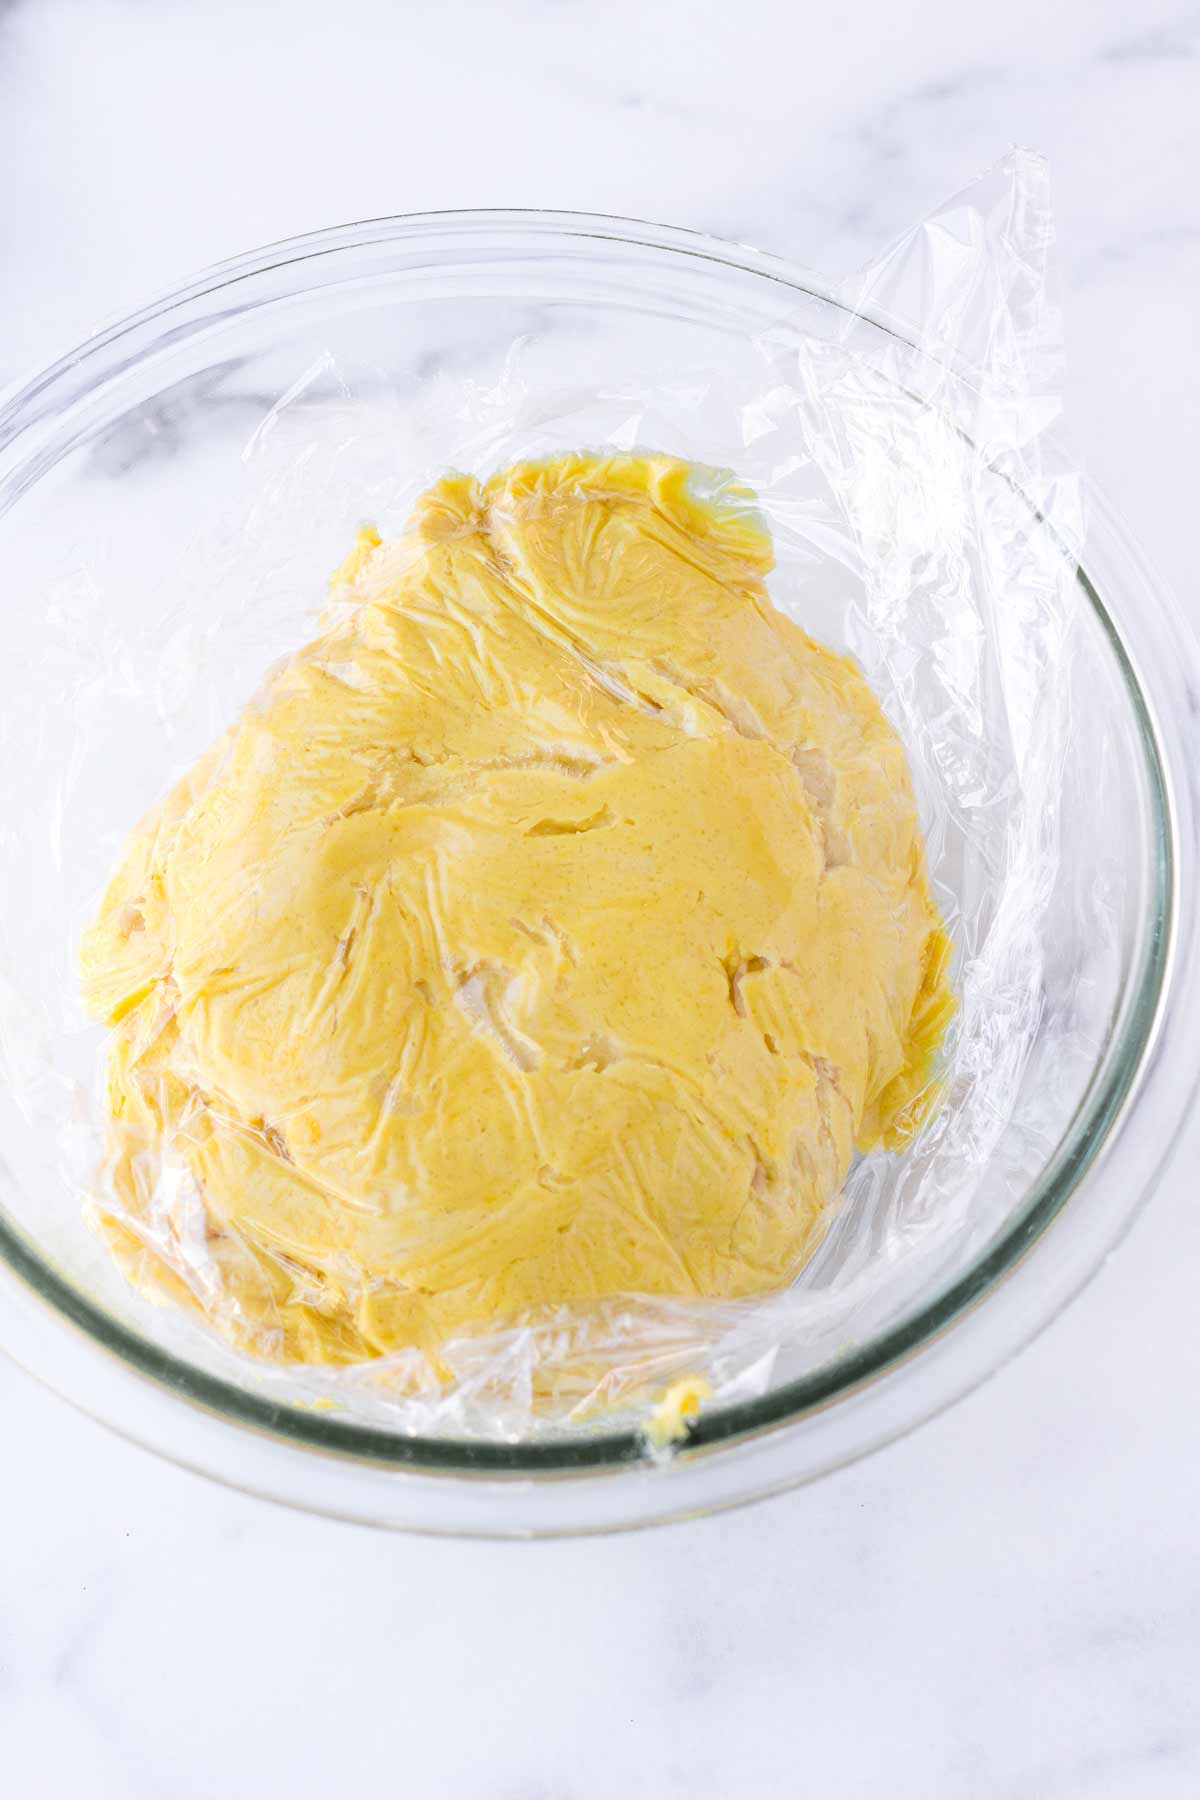
6. Assemble cookies
Once the dough has fully chilled for at least 2 hours, scoop the cookie dough into 1.5-tablespoons and roll with the palm of your hands.
Coat the cookie balls with a normal layer of granulated sugar (not too little but not too heavy). Then roll them on a GENEROUS layer of powdered sugar, packing it in with your the palm of your hands to make sure it stays in place. In fact, I coat them in powdered sugar twice.
Arrange them 2-3 inches apart on a large baking sheet pan lined with parchment paper.
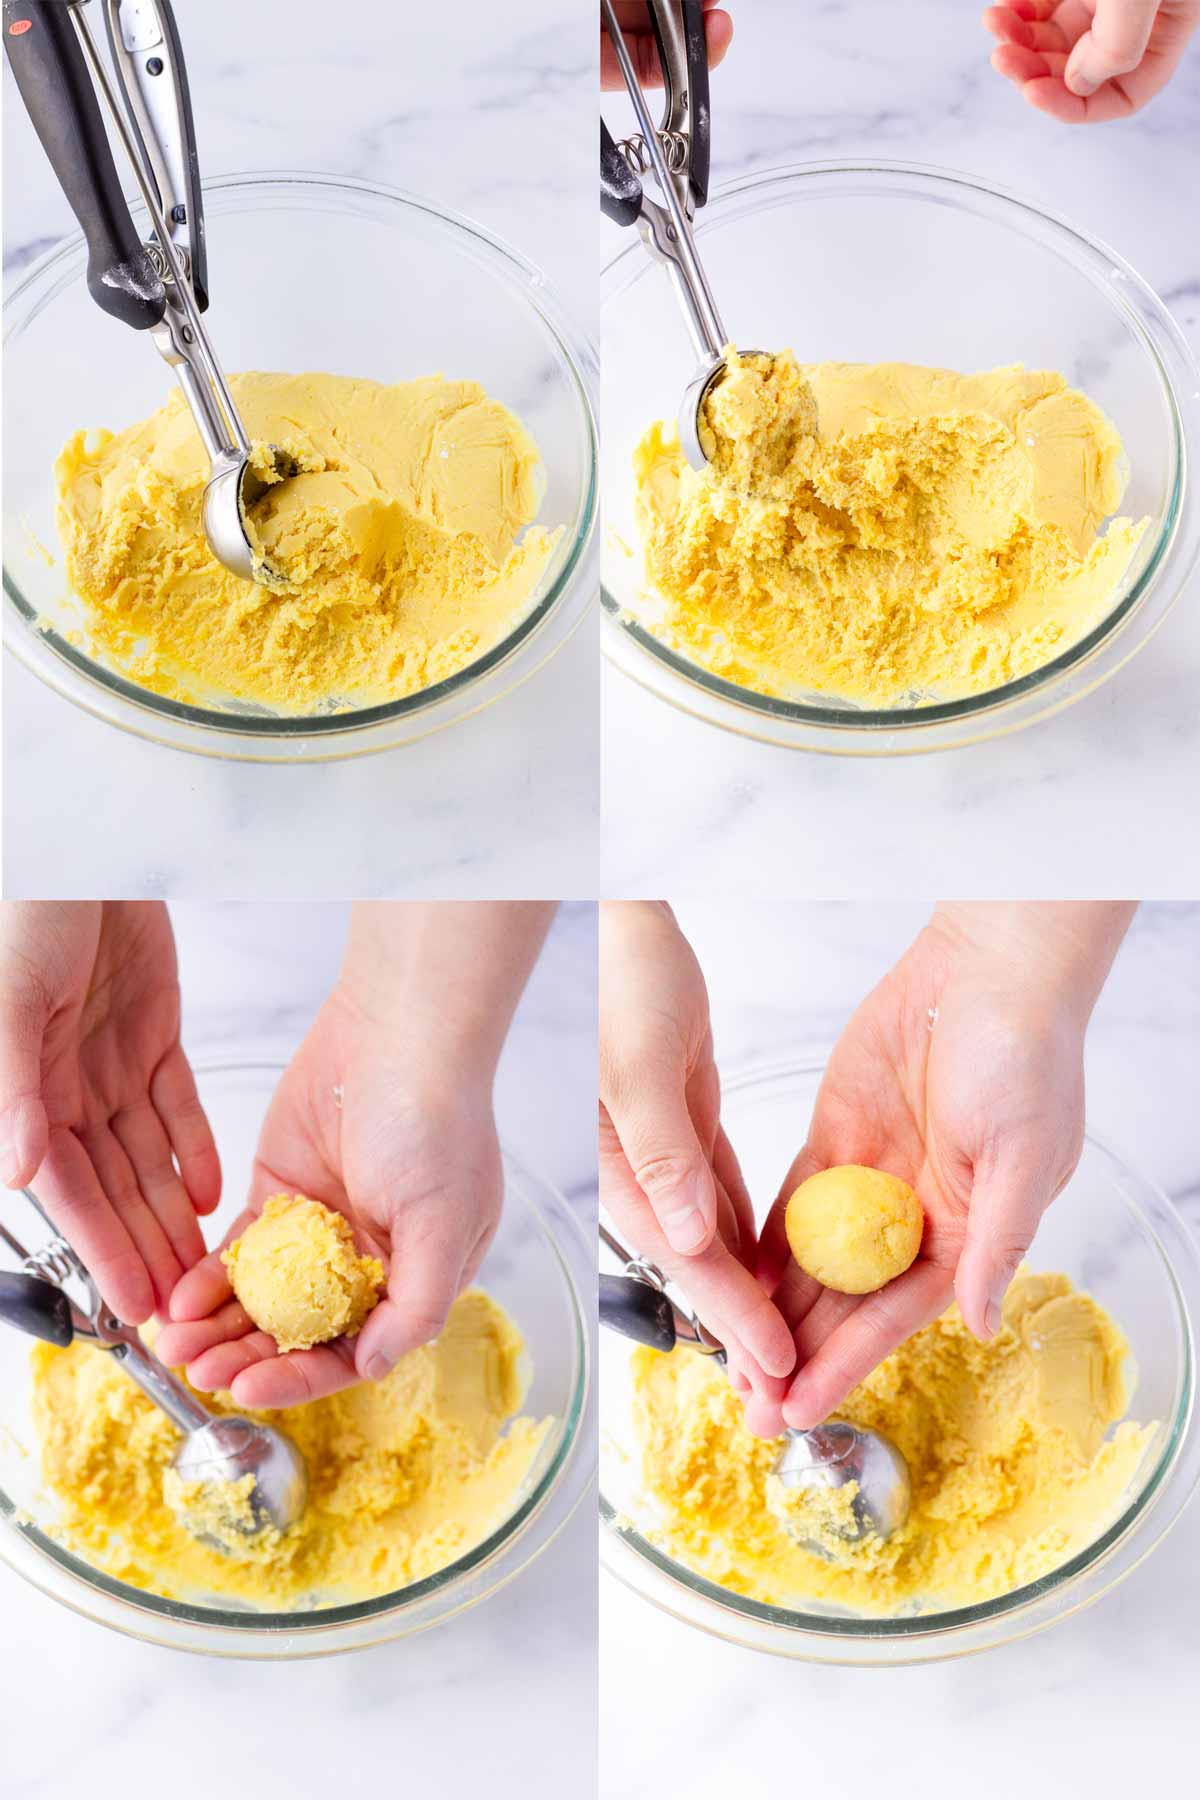
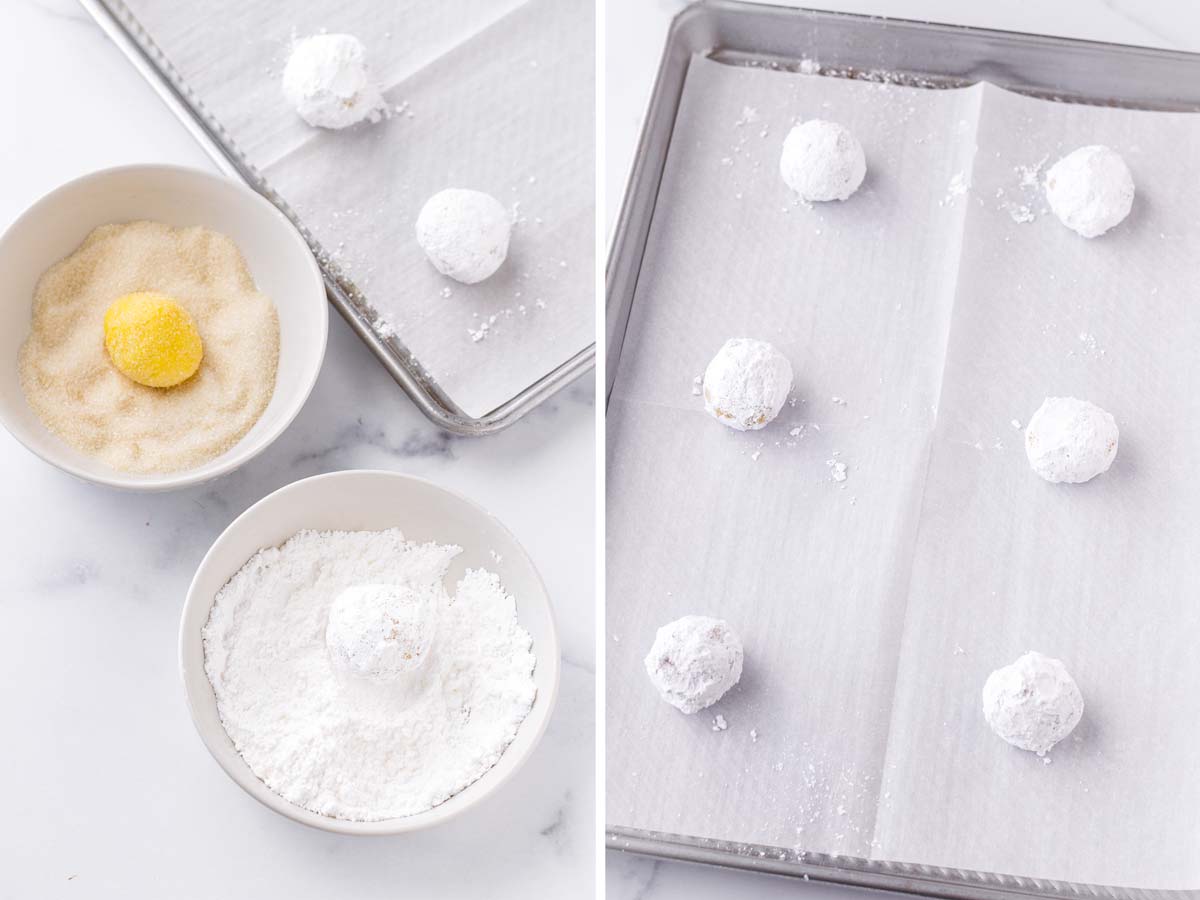
7. Bake
Bake in a preheated 350 degree F oven for 11-12 minutes, until they are crinkled on top and the edges look slightly golden brown. Let them cool for 5 minutes on the sheet pan and then transfer cookies to a cooling rack.
The lemon crinkle cookies will be pillowy soft, tender, and moist…with vibrant lemon flavors.
Tip: You may need to bake them in multiple batches. Place the dough in the fridge in between batches so it stays cold.
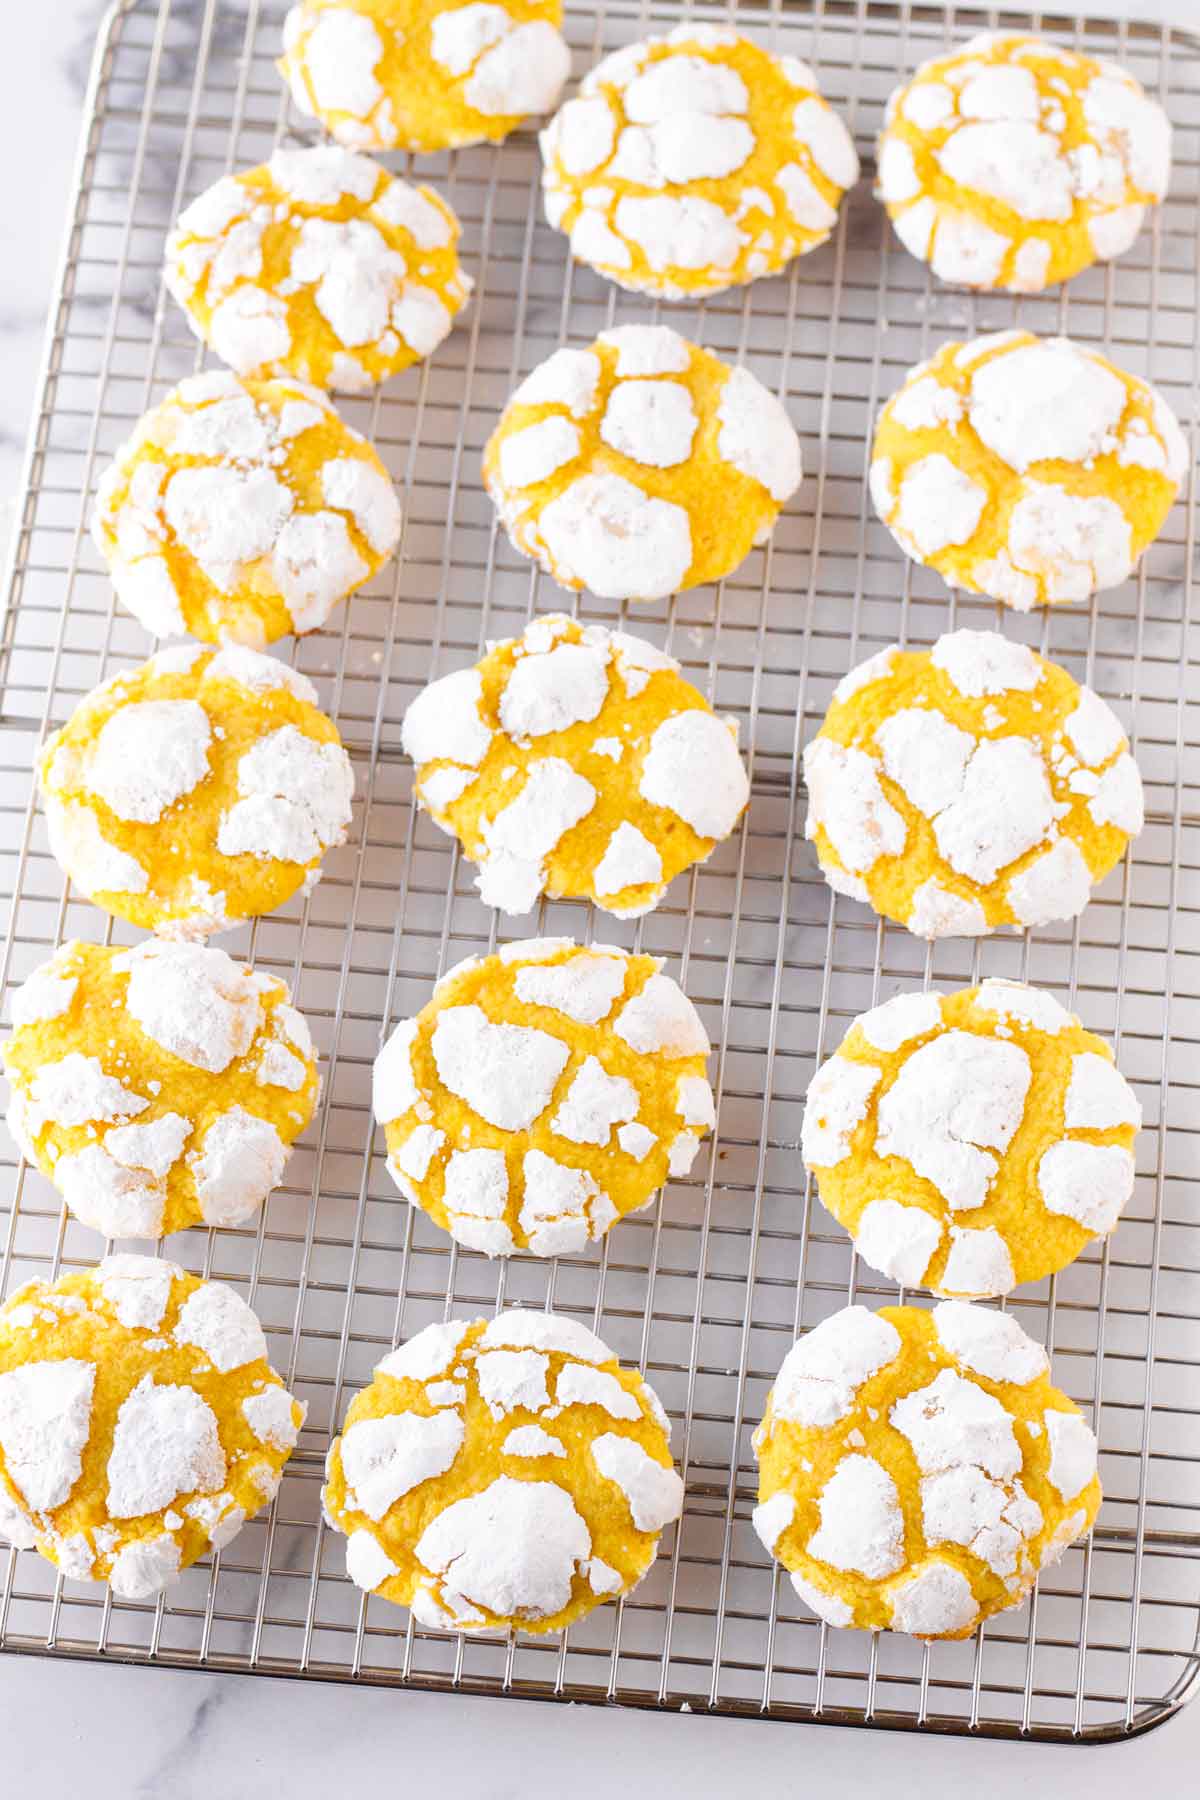
Recipe FAQs
Roll the cookie dough balls in granulated sugar first. Then, roll in a heavy coating of powdered sugar. This creates a barrier between the dough and the powdered sugar, and produces a crinkled exterior.
Technically, no. The only thing food coloring does is add vibrant colors to the dough. It doesn’t affect taste. If you choose not to use food coloring, the cookies will look pale.
Yes! This step is mandatory. Without refrigeration, the cookies will be flat and not crinkled on top. Refrigerate for at least 2 hours or overnight.
Yes! First chill the dough for at least 2 hours or overnight. Then roll into 1.5-tablespoon balls and then chill those cookie balls again for a few hours. Once they are very cold (so they don’t squish together), transfer a freezer-friendly resealable bag and freezer for up to 3 months. Thaw in the fridge overnight, roll them in sugar as directed, and bake.
Store in an airtight container at room temperature. Do NOT store in the fridge since the sugar will melt with the humidity.
Thanks for reading! I hope you like these lemon crinkle cookies as much as I do. Also, be sure to check out these other amazing cookie recipes, especially the Nutella Stuffed Cookies!
Tips for Success
- Use room temperature ingredients where applicable. And remember to let the butter soften at room temperature for 1-2 hours prior to using.
- To ensure the powdered sugar does not melt, the trick is to roll the cookie dough balls in granulated sugar first and then in powdered sugar.
- Make sure the cookies are generously coated and packed with powdered sugar. You can pack the powdered sugar onto the cookie dough with the palm of your hands. In fact, I roll them in powdered sugar 2-3 times to ensure they are thoroughly coated.
- Chill the dough for at least 2 hours or overnight. If the dough is not cold, the cookies will be flat and not crinkled.
Lemon Crinkle Cookies
Equipment
- Cookie scoop (1.5-tablespoon)
- Stand mixer or electric hand mixer
- Large baking sheet pan
Ingredients
Cookie dough
- 1 ½ cups all-purpose flour - spooned and leveled
- ½ teaspoon baking powder
- ¼ teaspoon salt
- ½ cup unsalted butter, softened at room temperature
- ¾ cup granulated sugar
- 1 large egg, at room temperature
- 1 teaspoon vanilla extract
- 1 tablespoon lemon zest
- 2 tablespoons freshly squeezed lemon juice
- 3 to 4 drops yellow food coloring - or as needed
For rolling
- ⅓ cup granulated sugar for coating - or as needed
- ½ cup powdered sugar for coating - or as needed
Instructions
Make the cookie dough
- Dry ingredients: In a medium bowl, whisk flour, baking powder, and salt. Set aside.
- In a stand mixer or using an electric hand mixer, beat softened butter with ¾ cup granulated sugar over medium-high speed until creamy, about 2 minutes.
- Turn down the mixer to medium speed, and mix in the egg and vanilla extract until combined. Then, add lemon zest and fresh lemon juice and mix until evenly combined, scraping the sides of the bowl if needed.
- Gradually mix in the dry ingredients into the wet ingredients on medium or medium-low speed, scraping the sides of the bowl, until fully incorporated and no pockets of flour remain. Do not overmix. The dough will be sticky.
- Add about 3-4 drops of yellow food coloring and use a rubber spatula to fold in and combine. Do not overmix. Note: The food coloring liquid will look orange at first, don’t worry. You only need a few drops – if you prefer, start with 2 drops and keep adding more until you get the tone of yellow you like.
- Cover with plastic wrap (the plastic should be directly touching the dough) and chill in the fridge for at least 2 hours or preferably overnight. The colder the dough, the better.
Assemble and bake
- Once the dough has fully chilled for at least 2 hours, preheat oven to 350 degrees F. Line a large baking sheet pan with parchment paper.
- Note: Depending on the size of your sheet pans and oven, you may need to bake these cookies in multiple batches. If so, I’d recommend placing the dough back in the fridge in between batches.
- Scoop the cookie dough into 1.5-tablespoons and roll with the palm of your hands. Tip: Use a cookie scoop for ease and convenience.
- Coat the cookie balls with a normal layer of granulated sugar (not too little but not too heavy). Then roll them on a GENEROUS layer of powdered sugar. In fact, I roll them in powdered sugar twice to ensure they are thoroughly coated.
- Arrange on the prepared baking sheet pan about 2-3 inches apart.
- Bake at 350 degrees F for 11-12 minutes until crinkled on top and the edges start to turn golden brown. Let them cool on the pan for about 5 minutes, then transfer cookies to a wire rack to cool. Enjoy!
Notes
- Important: Chill the dough for at least 2 hours or overnight. If the dough is not cold, the cookies will be flat and not crinkled.
- Use room temperature ingredients. Remember to let the butter soften at room temperature for 1-2 hours prior to using. Do NOT use melted butter.
- If you forgot to take out the butter, you can soften it in the microwave oven in 5 to 10 second intervals. Keep a very close eye on it so it doesn’t melt though!
- How to prevent powdered sugar from melting: The trick is to roll the cookie dough balls in granulated sugar first and then in powdered sugar. The granulated sugar acts as a barrier and creates crinkles.
- Make sure the cookies are generously coated and packed with powdered sugar. You can pack the powdered sugar onto the cookie dough with the palm of your hands. In fact, I coat them in powdered sugar twice just in case.
- Yellow food coloring: It won’t affect the taste of these cookies – it just adds a vibrant yellow color. If you prefer, you can skip it but the cookies will look pale.
- Prep ahead: The dough can be made the day before and chilled overnight.
- Freezing: First chill the dough for at least 2 hours of overnight. Then roll into 1.5-tablespoon balls and refrigerate again for a few hours. Once they are very cold (so they don’t squish together), transfer a freezer-friendly resealable bag and freezer for up to 3 months.
- Make ahead and storing: These can be made ahead and will keep well in an airtight container at room temperature for up to 7 days. Do NOT store in fridge, the powdered sugar could melt.










Marjorie says
These came out so good! Made them for dessert tonight and they were a hit. Baked them for 15 -18 minutes to get the bottom a little crunchy and thought that was amazing!
Tania says
Thank you, Marjorie! Happy holidays!