

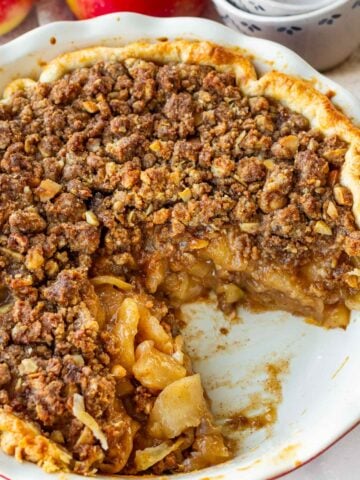
My homemade apple pie filling is my go-to way to make sure your apple pie turns out perfect every time. The apples are tender but still hold their shape, with the warm flavors of cinnamon and other spices, and a perfectly thickened sauce that sets up beautifully.
I’m sharing all my best tips and tricks, including how to make it ahead, store, and freeze, plus a few delicious ways to use it even beyond apple pie.

Quick Look at the Recipe
- Prep Time: 10 minutes, Cook Time: 15 minutes
- Total Time: 25 minutes
- Method: Stovetop
- Main Ingredients: Apples, sugar, cinnamon, cornstarch
- Flavor Profile: Warm, spiced, sweet-tart
- Ideal for: Apple pie, make ahead baking

Jump to:
- Quick Look at the Recipe
- My Tried-and-True Apple Pie Filling Recipe
- Why Pre-Cook Apple Pie Filling
- Best Apples For Apple Pie
- Ingredient Notes
- How to Make Apple Pie Filling
- Tips for Success
- Make Ahead, Storage, and Reheating
- Freezing Tips
- Recipe FAQs
- What to Make with Apple Pie Filling
- More Fall Baking Recipes
- Homemade Apple Pie Filling
Why Pre-Cook Apple Pie Filling
- Prevents gaps: Raw apples shrink as they bake, which can leave a gap between the crust and filling. This doesn’t happen if you make the apple pie filling separately.
- Better consistency: Cooking apples releases excess moisture and thickens the filling, helping prevent a watery or runny pie.
- Better overall texture: It helps the apples hold their shape instead of turning mushy.
- No soggy bottom crust: With less excess juice, there’s less moisture to seep into the bottom crust.
- Make-ahead friendly: Prepare in advance and refrigerate until ready to assemble, which is especially helpful during the busy holiday season!
Best Apples For Apple Pie
Some apples hold their shape much better during baking, while others break down and turn mushy. Honeycrisp and Granny Smith are two of my favorites for apple pie because they don’t lose their shape. I’d skip softer varieties like Red Delicious, which tend to break down too much.
This combination also gives you the perfect balance of sweet and tart. Honeycrisp apples are naturally sweet, while Granny Smith apples bring a bright, tart flavor.
My recommendation: Use a 3:1 ratio of Honeycrisp to Granny Smith. For a 9-inch pie, that’s roughly 7 medium-to-large Honeycrisps and 2 Granny Smiths.
Ingredient Notes

- Honeycrisp and Granny Smith apples: Find ones that are not bruised or wrinkly. Apples come in various sizes, so weigh about 4 pounds.
- Unsalted butter: Adds richness and helps everything cook down evenly.
- Brown sugar and granulated sugar: Using both adds depth of flavor along with that classic caramel-like sweetness.
- Cinnamon, nutmeg, and allspice: The essential warm spice blend for apple pie!
- Lemon: You need both the zest for extra flavor and the juice to prevent the apples from browning much.
- Cornstarch: Dissolved into a slurry with water, this is what thickens the filling into that glossy, sliceable consistency.
Ingredient quantities in recipe card down below.
Substitutions and Variations
- You can also chop or dice apples instead of slicing, as long as they are cut to about the same size for even cooking.
- Cornstarch: You can also use all-purpose flour to make the slurry.
- Spices: Feel free to add more warm spices to taste. A small pinch of ground cloves goes a long way, and cardamom or a touch of ground ginger are both great additions.
How to Make Apple Pie Filling

- Peel and slice apples. Peel apples and remove the core. Cut into about ⅓ inch slices, as long as they are about the same size so they cook evenly. Set aside.

- Combine. In a large deep skillet over medium heat, melt 2 tablespoons of the unsalted butter. Add the sliced apples, brown sugar, granulated sugar, cinnamon, nutmeg, allspice, salt, lemon zest and lemon juice. Gently fold in to combine.

- Cook down apples. Cook uncovered, stirring occasionally, for about 12-15 minutes or until apples have tender and softened, but not mushy. The apples should release their own juices naturally. Note: If you like your apple pie filling very soft, continue cooking until desired consistency.

- Thicken. Dissolve 2 tablespoons of cornstarch with 3 tablespoons of water and gradually stir it in evenly with the apples (you may not need all, add as needed). Bring to simmer for an additional 2 minutes until thickened.

- Let it cool down. Transfer to a large shallow bowl or spread it over a sheet pan, and let it cool down completely.

- Store or use. Once cooled, store in large mason jars or containers for up to 3-5 days. Or use immediately to make apple pie!
Tips for Success
- Don’t overcook. High heat or too much time on the stove can break down the thickened texture.
- Keep the apple slices uniform in size. Cutting them all to about the same ⅓ inch thickness means they’ll cook at the same rate, so you won’t end up with some slices soft while others are still firm.
- Taste and adjust as you cook. This homemade apple pie filling is hard to mess up, really. Taste it and tweak the sweetness or flavors before adding the cornstarch slurry.
- If you like a very soft apple filling, cook the apples a bit longer first. Give them a few extra minutes on the stove before thickening.
Make Ahead, Storage, and Reheating
- Make ahead: Make it up to 3 to 5 days before you plan to bake your pie.
- Storage: Once completely cooled, store the filling in large mason jars or an airtight container in the refrigerator.
- Very minimally reheat before assembling the pie, adding a splash of apple cider or unfiltered apple juice (Simply Apple Juice is great). This way, you give the apple pie a head start so the center cooks completely by the time the pie crust is golden.
Freezing Tips
Let the prepared apple pie filling cool completely, then transfer to reusable bags or containers. Seal and freeze for 2-3 months. Thaw in the fridge overnight before using. Let it sit at room temperature before using, and if needed, stir in a splash of apple cider or even water to loosen it up just a little.

Recipe FAQs
No, this recipe isn’t meant for canning. Canning requires a different and very specific process.
This usually happens if the cornstarch was simmered too long alongside the lemon juice, since the acid can start to break down the starch. Stick to a gentle 2-minute simmer once the cornstarch is added.
No. Since the filling is already thickened before it goes into the crust, there’s no excess liquid to make the bottom crust soggy, so blind baking isn’t necessary, but you can if you’d like.
What to Make with Apple Pie Filling
- Pies! This is the obvious one! Use my flaky buttermilk pie crust recipe. Try my homemade apple pie recipe, or make my Apple Crumble Pie (recipe coming soon!)
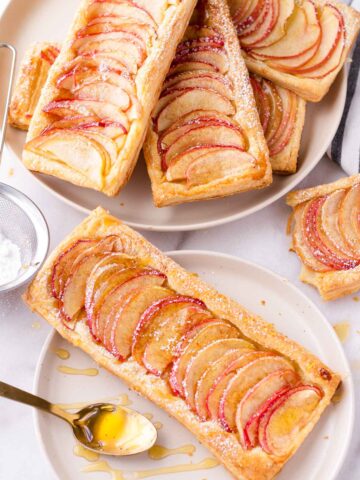
- Pastries: Puff Pastry Apple Turnovers are wonderful for fall baking!
- Use it as toppings: Apple Dutch Baby Pancake, Apple Cinnamon Pancakes, or Apple Cinnamon Rolls.
- Or my favorite, serve it warm over a big scoop of vanilla or salted caramel ice cream!
More Fall Baking Recipes

I’d love to hear from you! If you loved my recipe, please consider leaving a 5-star rating and a comment down below. Sign up for my newsletter and follow along on Instagram, Facebook, or Pinterest

Homemade Apple Pie Filling
Equipment
- 12-inch deep pan
Ingredients
- 4 pounds apples - about 9 large apples, I use honeycrisp and granny smith, see notes below
- 4 tablespoons unsalted butter - divided
- ½ cup brown sugar
- ¼ cup granulated sugar
- 1 teaspoon ground cinnamon
- ⅛ teaspoon ground nutmeg
- ¼ teaspoon ground allspice
- ½ teaspoon salt
- Zest of 1 lemon
- 2 tablespoons freshly squeezed lemon juice
- 2 tablespoons cornstarch - to make a slurry
Instructions
- Slice apples: Peel apples and remove the core. Cut into about ⅓ inch slices, as long as they are about the same size so they cook evenly. Set aside.
- Combine: In a large deep skillet over medium heat, melt 2 tablespoons of the unsalted butter. Add the sliced apples, brown sugar, granulated sugar, cinnamon, nutmeg, allspice, salt, lemon zest and lemon juice. Gently fold in to combine.
- Cook apples: Cook uncovered, stirring occasionally, for about 12-15 minutes or until apples have tender and softened, but not mushy. The apples should release their own juices naturally. As they cook, adjust the level of sweetness or spices to taste. Note: If you like your apple pie filling very soft, continue cooking until desired consistency.
- Thicken: Dissolve 2 tablespoons of cornstarch with 3 tablespoons of water (room temp), and gradually stir it in evenly with the apples. It will start to thicken. Bring to a low simmer and add the remaining 2 tablespoons of butter, for an additional 2 minutes until thickened.
- Adjust consistency: The amount of cornstarch slurry needed depends on the amount of juices released by the apples, so add it gradually. If not thick enough, add more of the slurry. If it’s too thickened, stir in some water to loosen it up.
- Let cool: Set aside and let cool at room temperature. Tip: to speed up the cooling process, transfer the apple pie filling to a large shallow bowl or a large pan.
- Store or use: Once cooled, store in large mason jars or containers for up 3-5 days. Or use immediately to make apple pie.
Notes
- My recommendation on apples: You need about 4 lbs of apples, which is about 8-9 medium-to-large apples. I use 7 Honeycrisps and 2 Granny Smiths for the perfect mix of sweet and tart flavors.
- The apples should be peeled. Slice into uniform ⅓-inch thick slices for even cooking.
- Avoid Red Delicious apples, as they won’t hold their shape well. They tend to turn mushy when cooked.
- To expedite the cooling process, transfer the finished filling into a large shallow bowl or sheet pan. Cool completely on a shallow bowl or sheet pan before using or storing.
- Make ahead: Store cooled filling in an airtight container for 3 to 5 days. Reheat just slightly and very minimally before using, adding a splash of apple cider or unfiltered apple juice. Or even some water will work in a pinch
- Store in mason jars or sealed containers in the fridge.
- Freezing: I actually would not recommend freezing thickened filling, as cornstarch can sometimes grainy or watery when frozen and thawed. Instead, freeze the cooked apples BEFORE thickening. When ready to make the pie: thaw, reheat, thicken with the slurry, and let it cool before assembling.
- Thickener: Substitute cornstarch with an all-purpose flour slurry.
- Spices: Feel free to add other warm spices like ground ginger, cardamom, or a pinch of ground cloves.
- Add a splash of water or apple cider (the beverage, not vinegar) if too thick.



Leave a Reply