
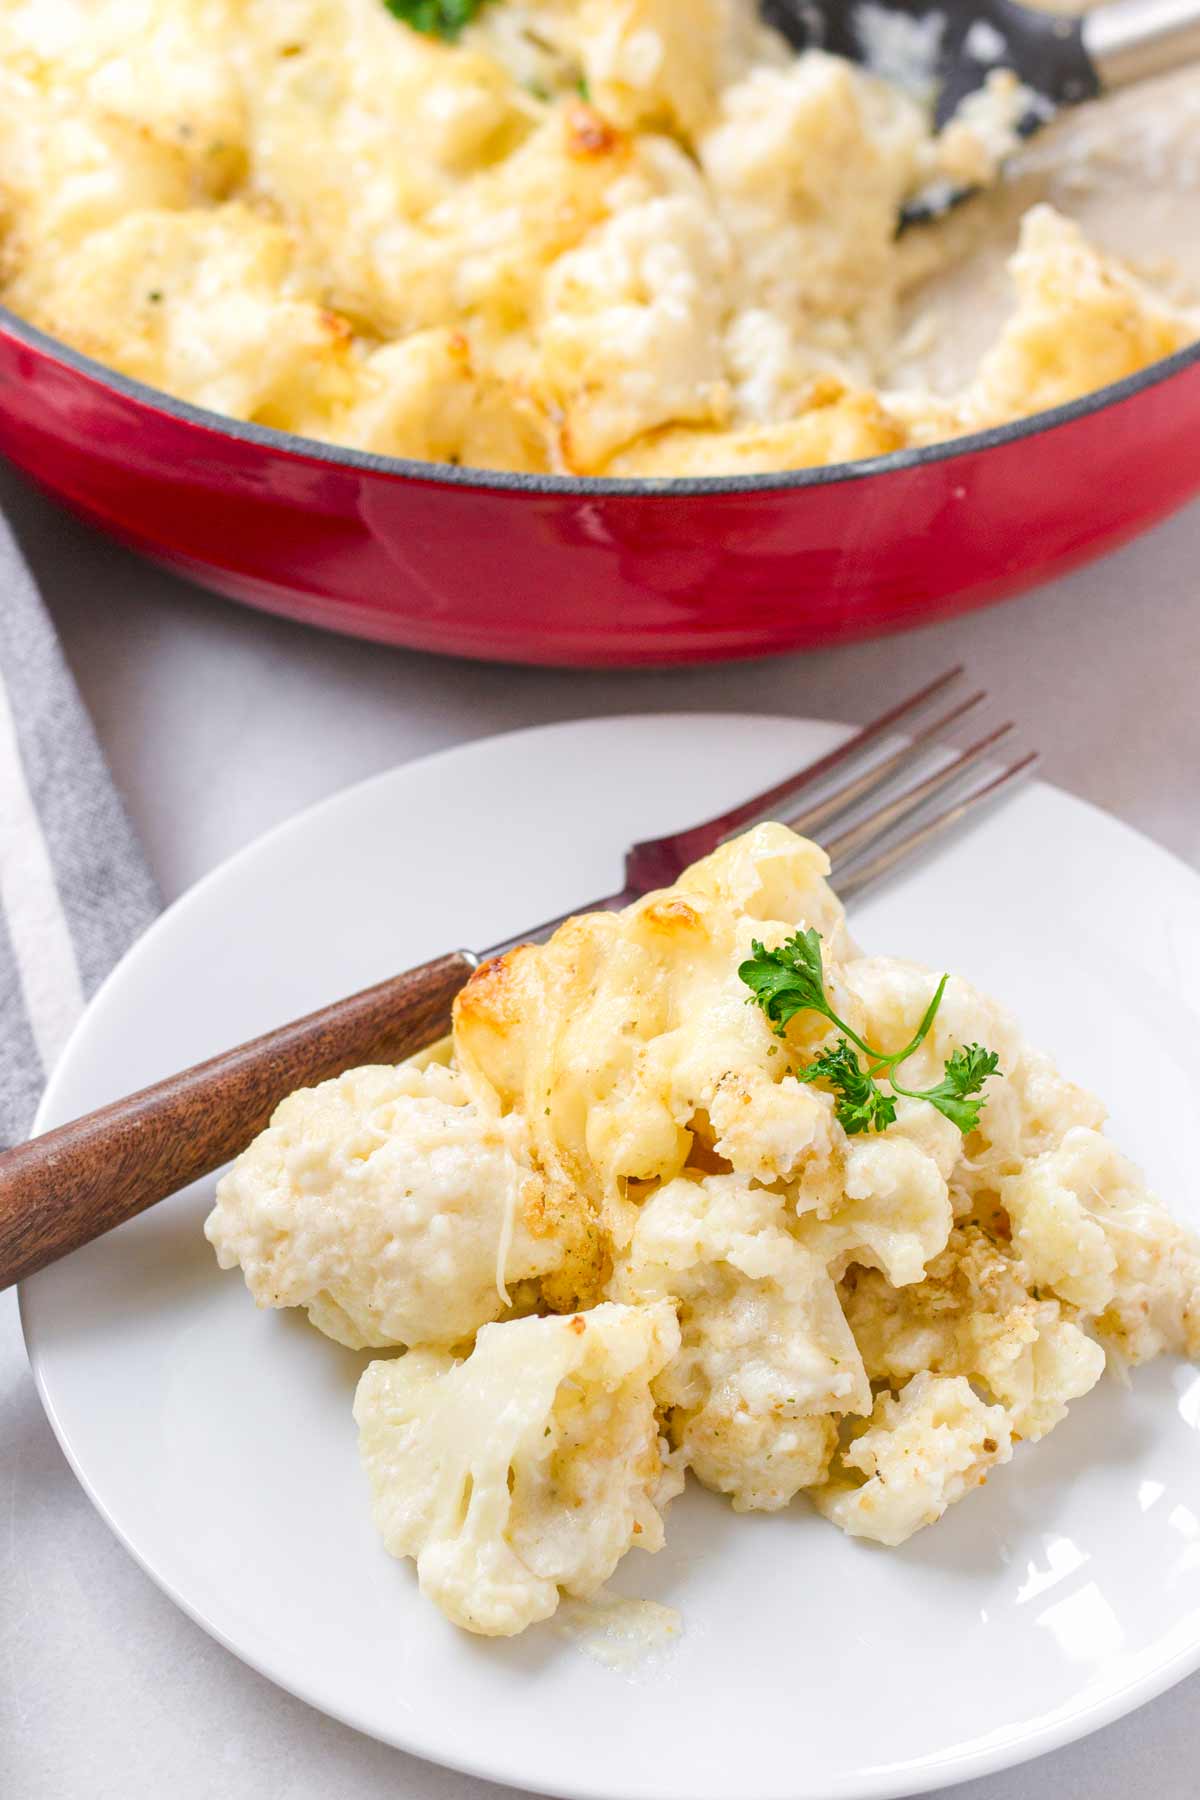
This cheesy Cauliflower Gratin is a fun way to serve veggies. It’s so good even cauliflower haters will love it!
You’ll love the tender cauliflower florets tossed in a savory cheese sauce, topped with more cheese and breadcrumbs, and then baked until perfection. It’s seriously incredible!
This cauliflower gratin is make-ahead and prep-ahead friendly! It’s great for hosting, potlucks, or parties.
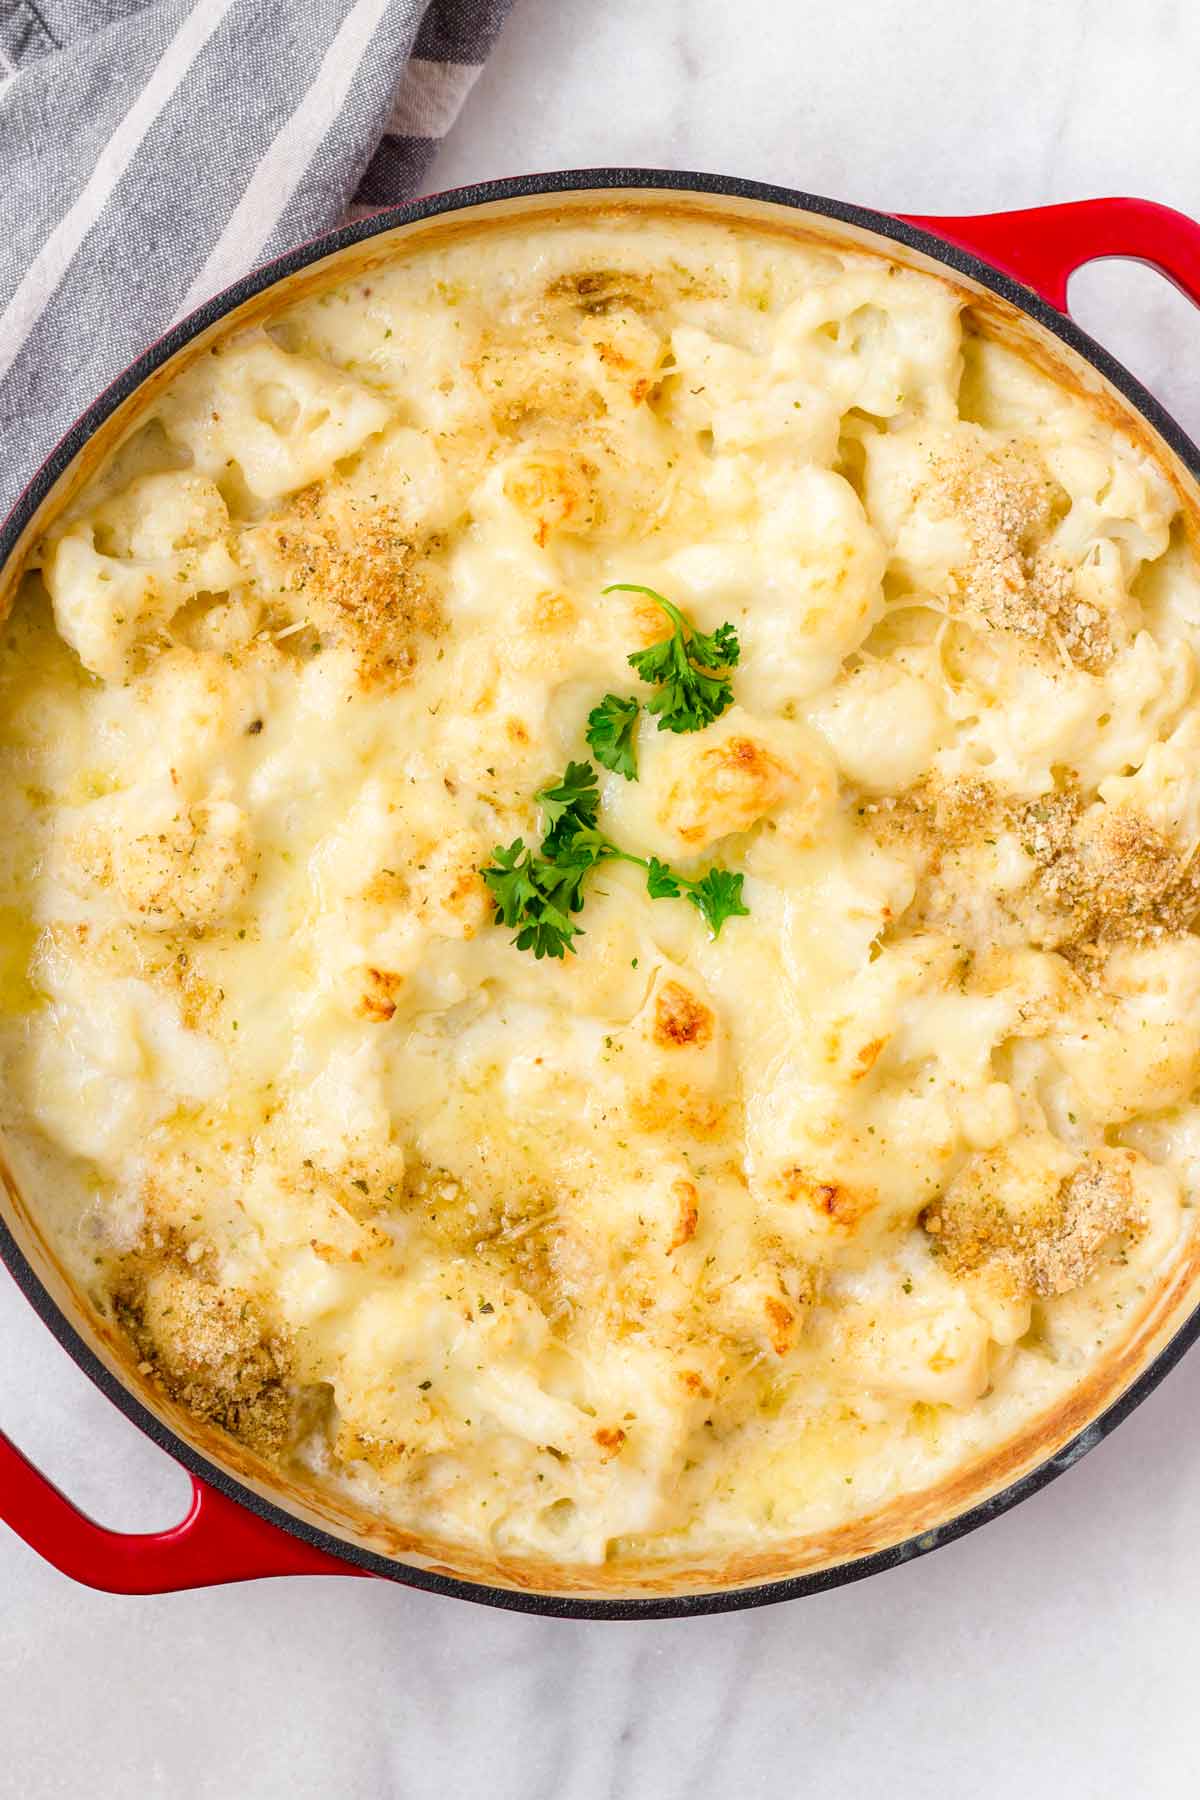
This amazing cauliflower gratin is one of my favorite ways to cook veggies. Au gratin is a cooking technique that consists of a top layer of cheese and breadcrumbs, and baked until golden brown and bubbly. Honestly, I’m up for anything golden brown and bubbly!
This is the kind of dish we like to serve during the holidays or when hosting. It’s impressive and incredibly delicious! Imagine tender crisp cauliflower coated in a rich gruyere cheese sauce, and topped with more melty cheeses and savory Italian breadcrumbs.
Why we love this cauliflower gratin:
- It’s extra cheesy! Cheese lovers rejoice!
- It’s a comforting side dish that goes well with almost any main course.
- Highly customizable! Use your favorite veggies and cheese, or add ham or bacon to make it a true casserole.
- Make-ahead and prep-ahead friendly. Make it up to 2 days in advance!
- Great for hosting, potlucks, or parties! Or just because.
Au gratin is the same cooking method I use to make these Brussels Sprouts Gratin. I love to serve these cheesy veggies with a good roast chicken, such as my Dutch Oven Whole Roast Chicken or this Lemon Herb Roast Chicken. For the holidays, pair it with a beautiful Brown Sugar Glazed Ham!
Jump to:
Extra Cheesy and Rich
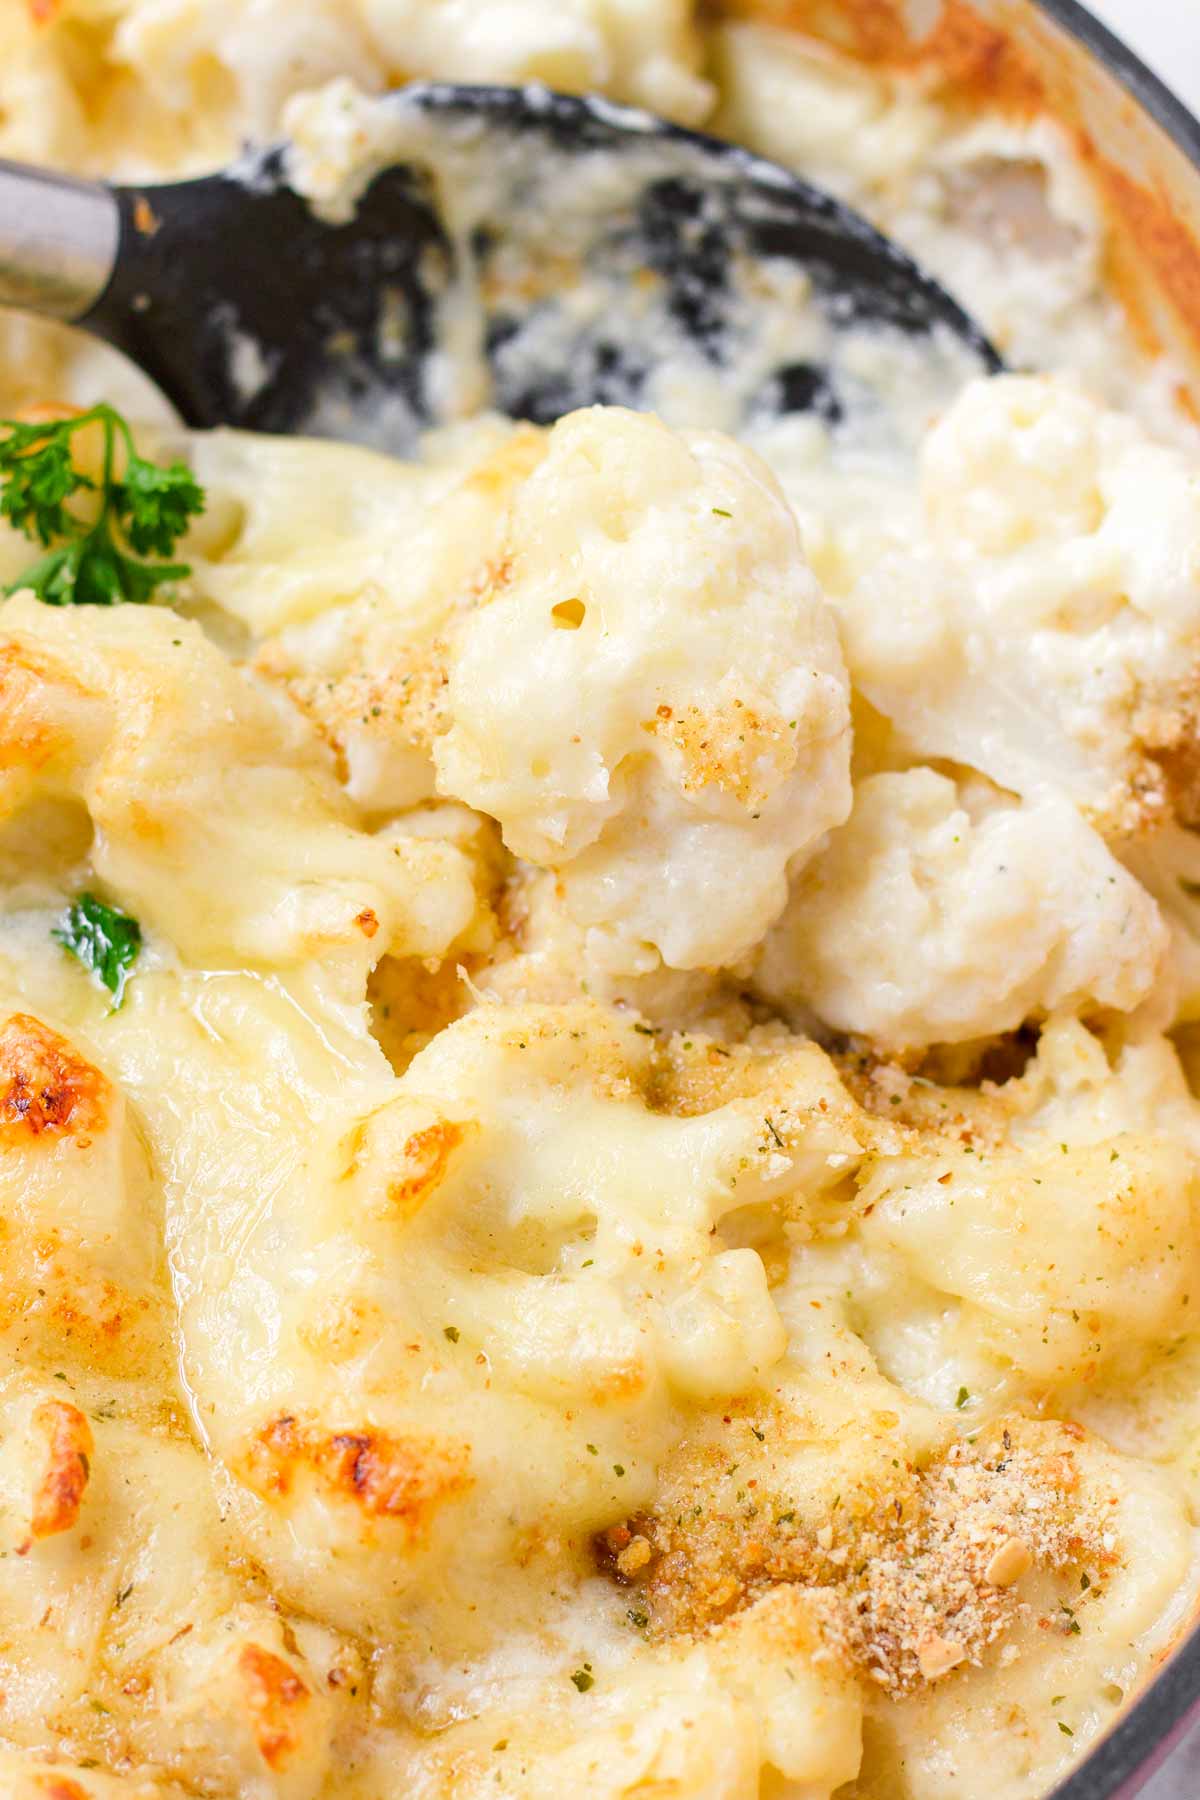
Let’s talk about how incredibly cheesy this cauliflower gratin is! There are 2 parts to how cheesy this dish is: the cheese sauce and the top layer of melty, golden brown cheese. I love the texture and flavors going on here!
About the cheesy sauce, it’s made with a base of bechamel (milk thickened with a roux, which is equal parts flour and butter) and Gruyere cheese, which is a creamy, savory, and nutty tasting cheese. The cheese sauce is perfectly smooth. Dreamy!
Also, you don’t have to use Gruyere for the sauce. Try sharp cheddar, white cheddar, fontina, or gouda.
As for the top cheese layer, I combined two different types of cheeses: Gruyere and parmesan. These melt really well and are flavor-packed.
Ingredient Notes
The ingredients in easy cauliflower gratin are pretty basic. Below are a few helpful ingredient notes from recipe testing. As always, the full ingredient list with quantities are located in the recipe card down below.
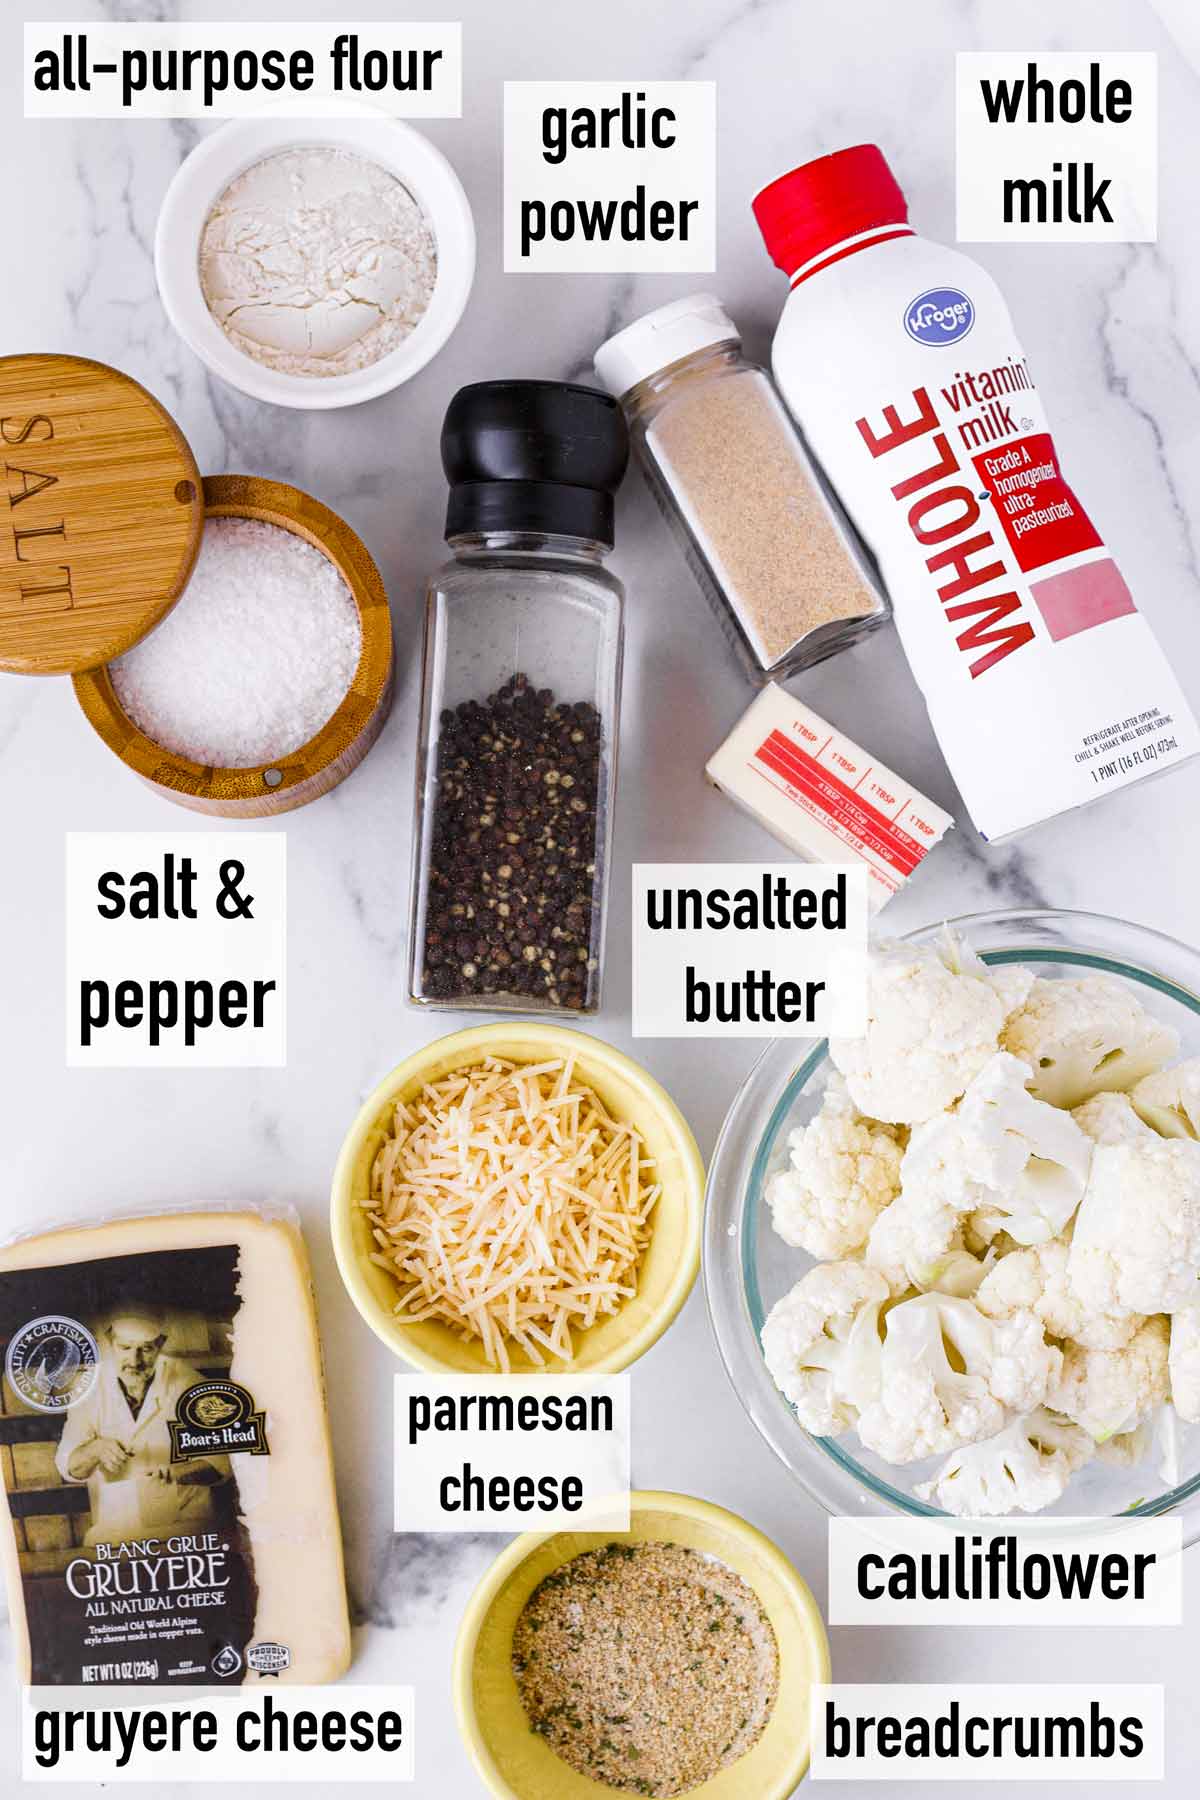
- Cauliflower florets: I’d recommend using fresh rather than frozen, as frozen cauliflower can make the sauce watery. A medium or large head yields about 4 to 5 cups of florets.
- Unsalted butter: For the cheese sauce.
- Flour: I use all-purpose flour to thicken the cheese sauce.
- Whole milk: For the sauce, make sure you use whole milk. Don’t use skim or 2 percent milk, as they can be quite thin. We want to make a rich, creamy sauce and whole milk is perfect for that.
- Gruyere and parmesan cheese: These cheeses have great flavor, and the gruyere makes an especially delicious and smooth sauce.
- Italian bread crumbs: Sprinkle the top with some Italian bread crumbs for added texture and flavor. It adds a nice touch, but can be omitted if necessary.
- Garlic powder, salt, pepper
- Parsley for garnish
Step-by-Step Tutorial
Below is a quick overview of the step-by-step process. You’ll see how easy and simple this recipe is!
Step 1 | Pre-cook the cauliflower
First, you need to par-cook, or partially cook, the cauliflower. The trick is to par-cook it until it’s about 75 to 80 percent tender, as it will finish cooking in the oven.
I like to steam it using a steamer basket placed on top of a pot with boiling water for about 5 to 6 minutes, or until tender but still crisp. You can also boil, but I find it harder to remove all the excess water from the florets.
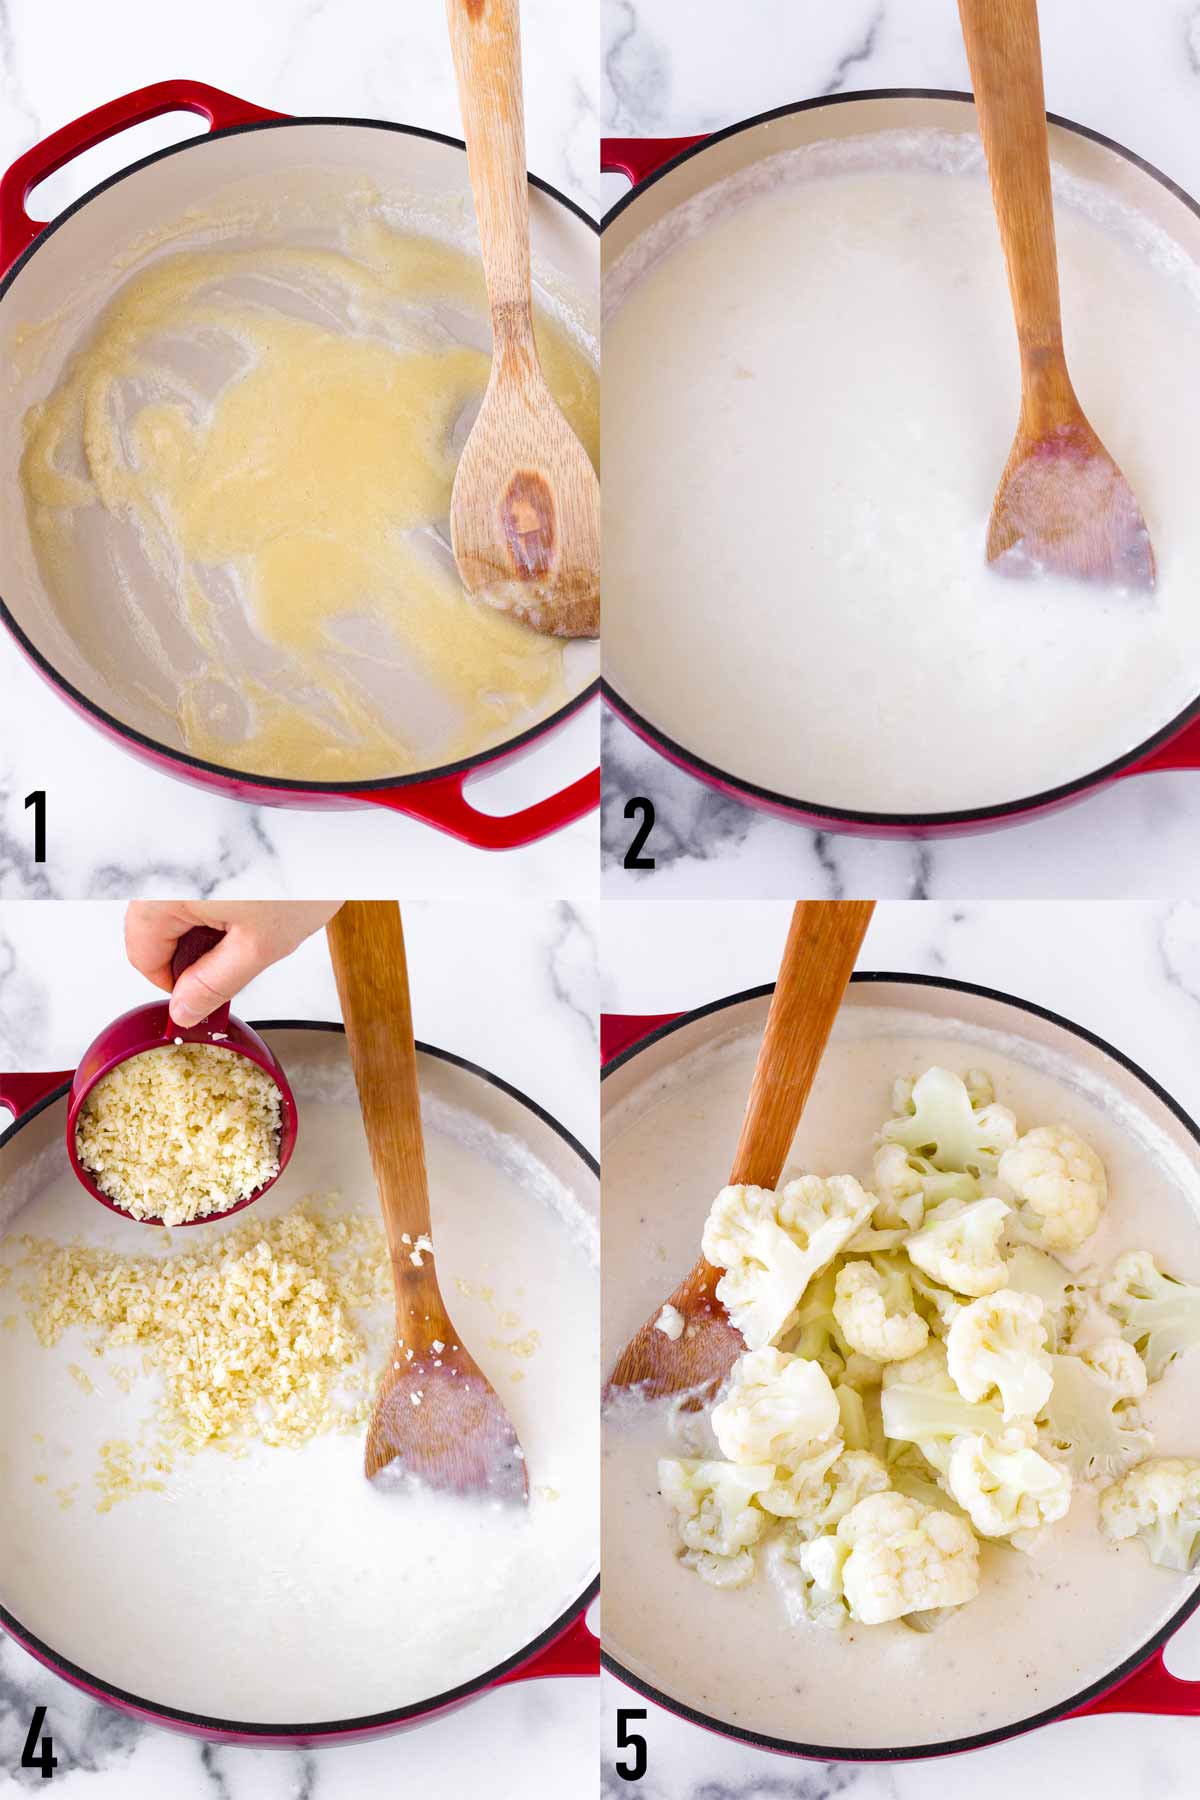
Step 2 | Make the sauce and add cauliflower
Now, as for the cheesy sauce, you can make to make:
- Make a roux: Melt butter in pan and add the flour, whisking constantly. Cook for about 3 minutes until it starts to thicken and smell a little nutty – this process removes the raw taste of flour.
- Then, add the milk gradually, breaking up any lumps. It will thicken as it heats up.
- Once thickened, stir in the shredded Gruyere cheese. Turn off the heat and stir to combine until melted.
- Toss the par-cooked cauliflower (patted dry) with the sauce.
Tip: To prevent lumps, add the milk in parts. Start with some of the milk and whisk to break up those lumps until incorporated. Then add the remaining milk gradually.
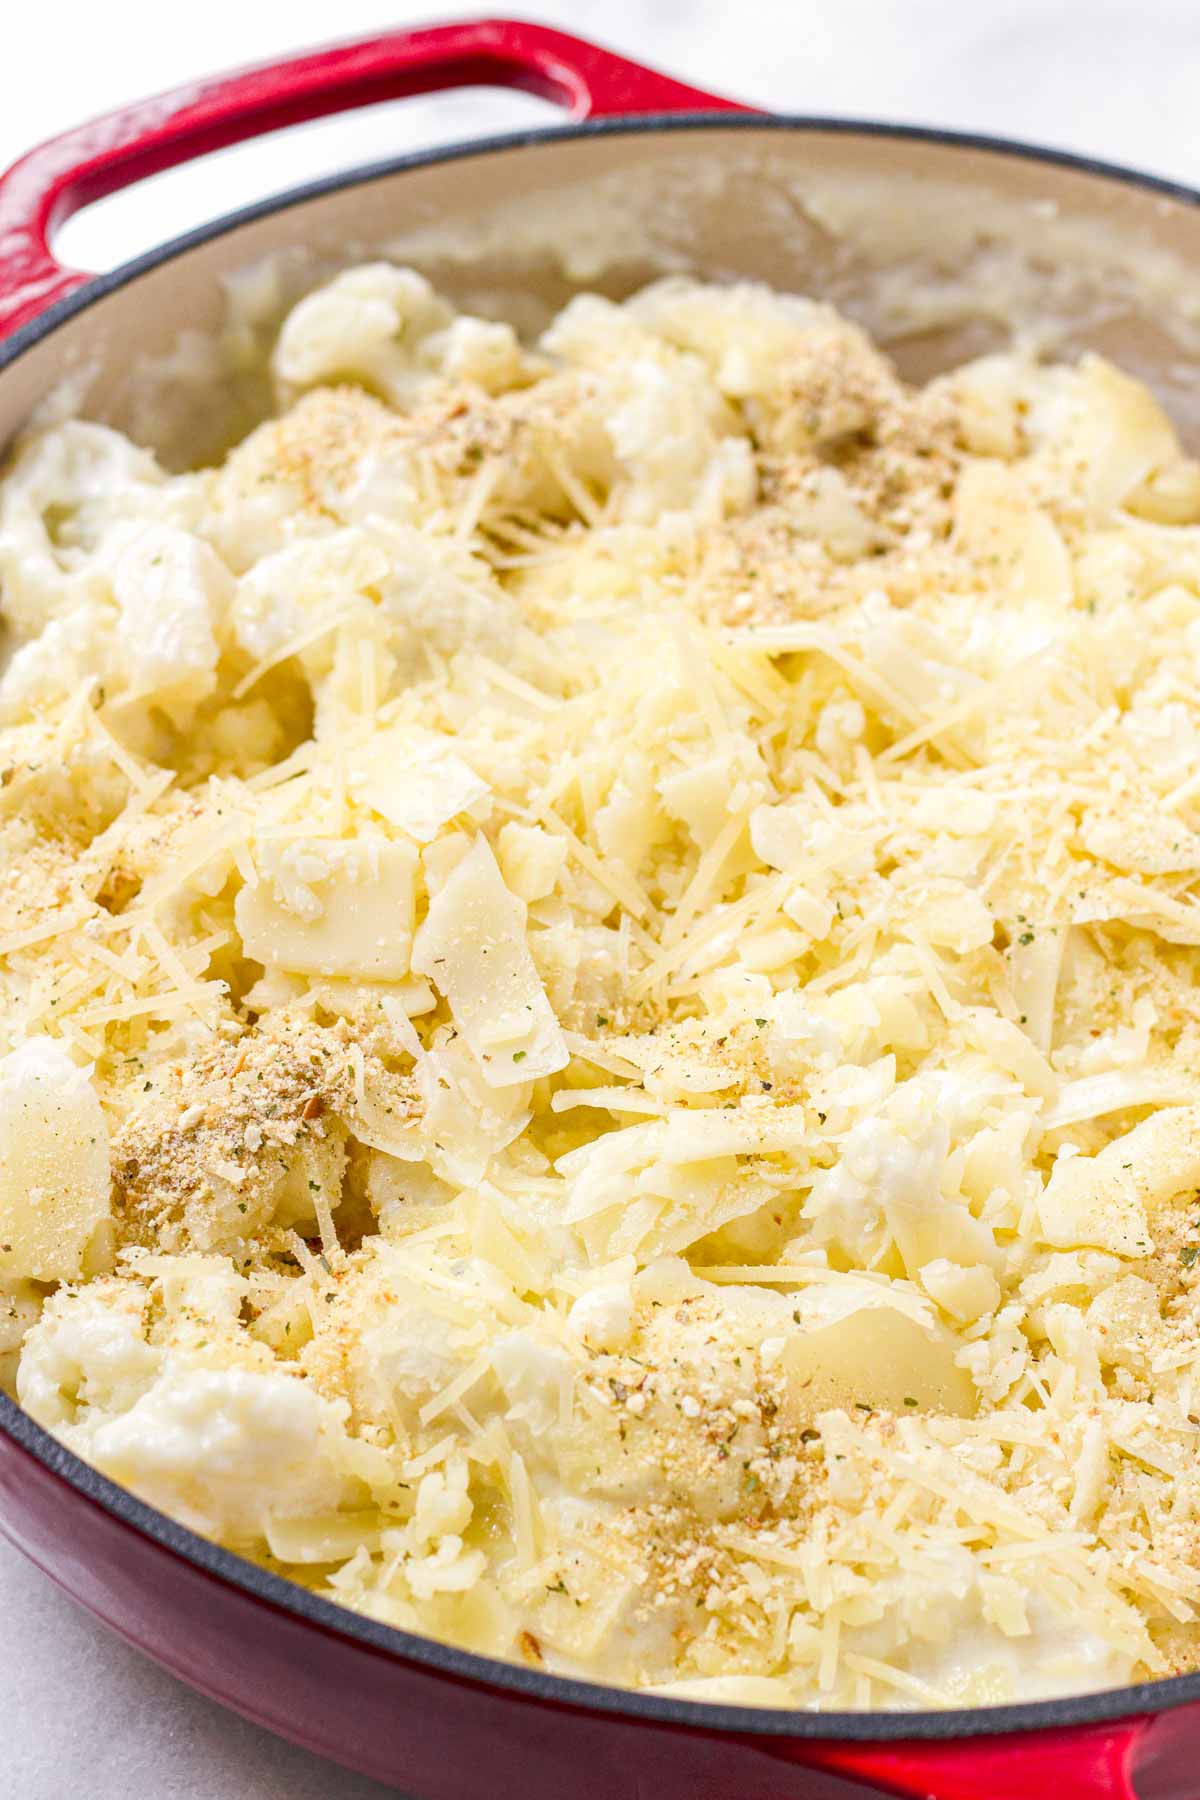
Step 3 | Top with cheese and breadcrumbs
Evenly top with the remaining gruyere, as well as the parmesan cheese and Italian breadcrumbs. Make sure you’ve got a good layer. The more cheese, the better!
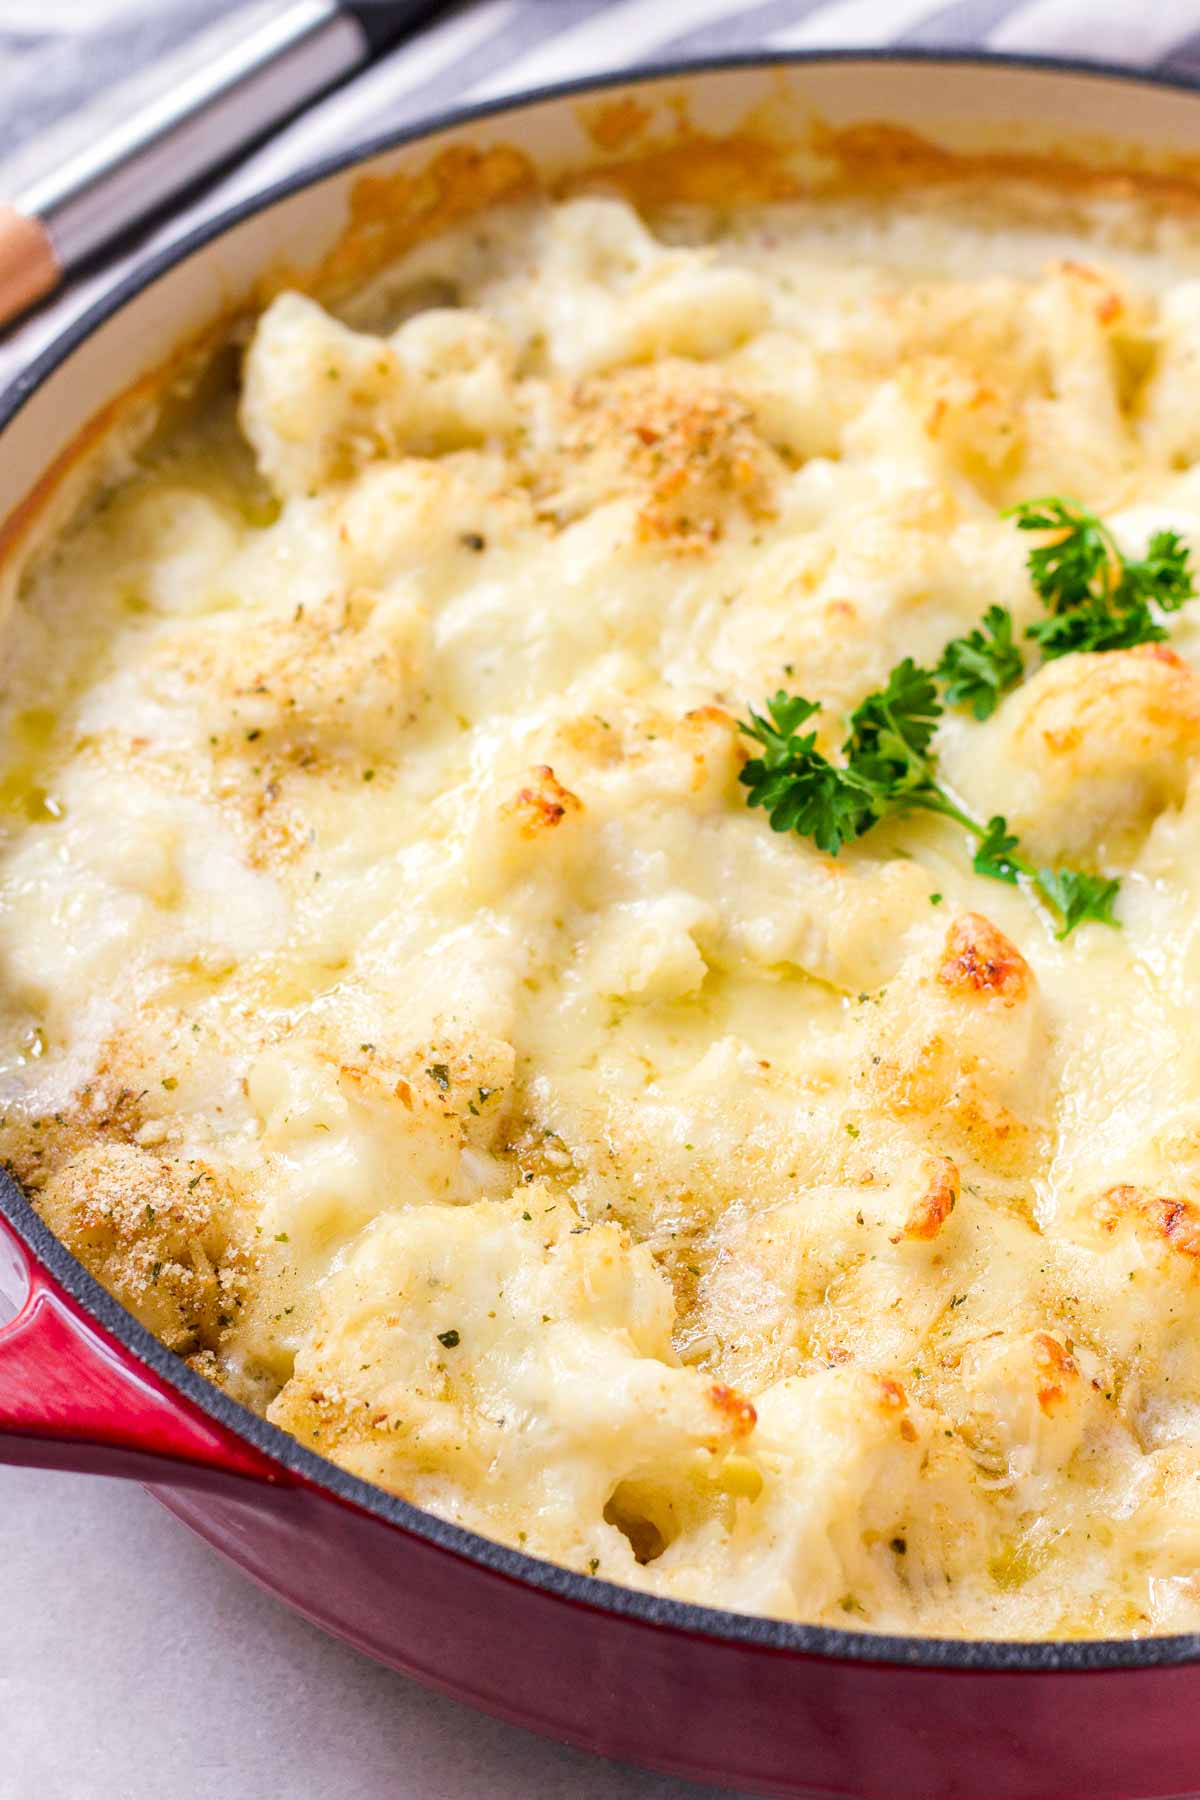
Step 4 | Bake until golden brown and bubbly
Bake in the preheated 400 degrees F oven for 18 to 20 minutes, or until golden brown and bubbly on top. Let cool for a few minutes and serve with parsley as garnish. And there you go…a beautiful baked cauliflower gratin!
Four Ways to Pre-Cook Cauliflower
My favorite way to par-cook the cauliflower is steaming because it retains less water and prevents the dish from getting soggy. Here are other ways to cook it:
- Steam: Place a large steamer basket over boiling water in a large pot. Steam with the lid covered for about 5 to 6 minutes, or until somewhat tender. Pat dry thoroughly.
- Boil: Cook the cauliflower in boiling water until almost tender. Drain and thoroughly pat the florets dry using paper towel.
- Microwave: Place florets in a microwave-safe bowl and add about ¼ cup water. Cover with a microwave safe lid. Microwave it until tender. Time depends on how potent your microwave oven is.
- Roast: This method imparts the most flavor! Toss with olive oil and seasoning and roast at 425 degrees F for 15 minutes or until almost tender.
Recipe Variations
What I love about this cauliflower gratin recipe is that it is highly customizable. There are so many ways to add extra flavor, texture, and dimension.
- Add other veggies, such as broccoli or Brussels sprouts.
- Make it a true casserole by adding diced ham or bacon, or caramelized onions.
- Use other types of cheeses. Gouda, fontina, sharp cheddar, or white cheddar are some of my favorite substitutes.
- Roast the cauliflower: As mentioned above, this adds so much more flavor that will make this dish irresistible! Toss with olive oil and seasoning, and roast at 425 degrees F for about 15 minutes until almost tender.
Make Ahead Instructions
Yes, you can make cauliflower gratin ahead of time! This is especially helpful if you are making it for the holidays or hosting.
Assemble as directed and top with the cheeses but don’t add the breadcrumbs yet. Cover with foil and refrigerate for up to 2 days.
When ready, preheat oven to 400 degrees F. Bake, covered with foil, for 15 minutes. Then, uncover and add the breadcrumb topping. Return to the oven and bake for another 15 to 18 minutes or until golden brown and bubbly on top.
If you’re looking to prepare part of the recipe in advance, you can pre-cook the florets and make the cheese sauce up to 2 days in advance, and assemble and bake the day of.
Can you freeze it? No. Dairy doesn’t freeze very well. The cheese will turn gritty.
Pairing and Serving Ideas
Cauliflower gratin is a great side dish! It’s incredibly delicious and a great low-carb option, and it pairs really well with almost anything. For a casual dinner at home, you can pair with a simple pan-seared chicken breast or this skillet pork chops with apples, or Dutch Oven Roast Chicken.
For the holidays, try this Roast Beef Tenderloin or Brown Sugar Glazed Ham.
Other side dishes to serve along cauliflower gratin:
- Maple Roasted Butternut Squash and Brussels Sprouts
- Lemon Green Bean Salad
- Green Beans with Bacon
- Apple Kale Salad
- Mashed Sweet Potatoes
Recipe FAQs
I’d highly recommend using fresh. Frozen cauliflower tends to get soggy and watery.
Preferably not. The pre-packaged stuff usually comes with added ingredients and starches, which make it hard to melt and grainy.
Yes! Assemble the cauliflower gratin in a baking dish, but don’t add the italian breadcrumbs yet. Cover with aluminum foil and refrigerate for up to 2 days. When ready to make, bake (covered) in a preheated 400 degree F oven for 15 minutes. Uncover and top with the breadcrumbs and return to the oven for another 15 to 20 minutes, until melted and golden brown.
Yes, or use a combination of both.
This recipe was published in 2020 and updated in January 2023 to include new photos and information, plus a few recipe modifications.
Tips for Success
- Don’t overcook the cauliflower, as it will finish cooking in the oven. You want to par-cook it about 75 to 80 percent through, until tender but still crisp in the center. This way, it won’t be too soft or mushy. Exact time will vary depending on the size of the florets, but about 5 to 6 minutes should do.
- Thoroughly pat dry the cooked cauliflower to remove excess water. This will prevent the sauce from turning watery. If you steam the cauliflower (instead of boiling it), it will be much easier to remove excess water.
- Use freshly shredded cheese, not pre-packaged shredded cheese. The pre-packaged stuff comes with extra starch and ingredients that make it harder to melt. I usually buy blocks of cheese and shred it with my box grater or food processor with the shredding attachment.
- For easier prep, I bake it in the same Dutch oven or pan where I cooked the cheese sauce. You can also transfer everything to a baking dish. Up to you.
I’d love to hear from you! If you loved my recipe, please consider leaving a 5-star rating and a comment down below. Sign up for my newsletter and follow along on Instagram, Facebook, or Pinterest

Cauliflower Gratin
Equipment
Ingredients
- 1 large head cauliflower, cut into florets - fresh, don’t use frozen
- 4 tablespoons unsalted butter
- ¼ cup all-purpose flour
- 3 cups whole milk - plus more as needed
- 1 ¾ cups freshly shredded Gruyere cheese, divided - plus more if desired
- ½ teaspoon garlic powder
- Salt and pepper to taste
- ¼ cup Italian bread crumbs
- ⅓ cup shredded or grated parmesan cheese
- Fresh chopped parsley for garnish
Instructions
- Preheat oven to 400 degrees F.
- Par-cook the cauliflower: Place a steamer basket over a pot with boiling water. Bring to a boil and steam the cauliflower florets, with the lid covered tightly, for 5 to 6 minutes or until somewhat tender (it will finish cooking in the oven). Pat the cauliflower dry thoroughly to remove excess water and moisture.
- In a medium pot or pan, melt the butter over medium heat. Once melted, add the flour and whisk constantly for about 3 minutes until thickened. It should be a bit pale in color and begin to smell nutty.
- Gradually add the milk, stirring and breaking up any lumps. Simmer on low heat for a few minutes until thickened, stirring. Tip: To prevent lumps, add the milk in parts. Start with some of the milk and whisk to loosen it until incorporated. Then add the remaining milk gradually. It will thicken as it heats up.
- Stir in 1 cup of the grated Gruyere cheese and stir until melted and creamy. Turn off the heat. Season with salt and pepper to taste.
- Transfer the cooked cauliflower to a baking pan and pour the prepared cheese sauce over it, stirring to combine. Top with the remaining ¾ cup of gruyere cheese, parmesan cheese, and bread crumbs.
- Bake in the preheated 400 degrees F oven for 18-20 minutes, or until bubbly and slightly golden brown. Garnish with chopped parsley. Enjoy!
Notes
- Don’t overcook the cauliflower, as it will finish cooking in the oven. I usually steam it for 5 to 6 minutes, or until slightly tender but still crisp in the center. Make sure the florets are about the same size so they cook evenly.
- Steaming the cauliflower is preferred over boiling because it traps less water, which helps prevent the sauce from getting watery. If you don’t have a steamer basket, you can boil it, but pat it dry thoroughly.
- Turn off the heat as soon as the cheese is melted. Don’t simmer the cheese sauce, as the cheese could get gritty.
- Make-ahead: Assemble as directed and top with the cheeses but don’t add the breadcrumbs yet. Cover with foil and refrigerate for up to 2 days. Bake, covered with foil, for 15 minutes at 400 degrees F. Then, uncover, add the breadcrumb topping, and bake for another 15 to 18 minutes or until golden brown and bubbly on top.
- Freezing: I would NOT recommend freezing this one. The cheese sauce will get grainy when frozen.
- Leftovers can be stored in the fridge for up to 3 days. Reheat in the microwave oven.
- Cauliflower: Mix and match with broccoli or Brussels sprouts.
- Gruyere cheese: Fontina, gouda, sharp cheddar, white cheddar.
- To amp up flavors, roast the cauliflower florets with olive oil and your favorite seasonings.


Elaine says
Hello,
Can I use heavy cream instead of milk? If so, how much?
Thanks!
Tania says
You can, but you will have to omit the flour. I’d start with 2 cups and then add more as needed after the cheese is melted into the sauce.
Mary Slining says
I have made your cheesecake and loved it. Now I would like to make one for xmas but have it eggnog flavoured. Do you have any suggestions to how I would change original recipe to achieve this.?
Thank you.
Going to make the cauliflower recipe for xmas. Already made the Hearty beef stew and the roasted chicken recipes . All very good.
Love all your tips and instructions.
Tania says
Thank you so much Mary! I’m so happy to hear! Unfortunately, I haven’t tested the cheesecake with eggnog flavor, so I can’t say for sure.