
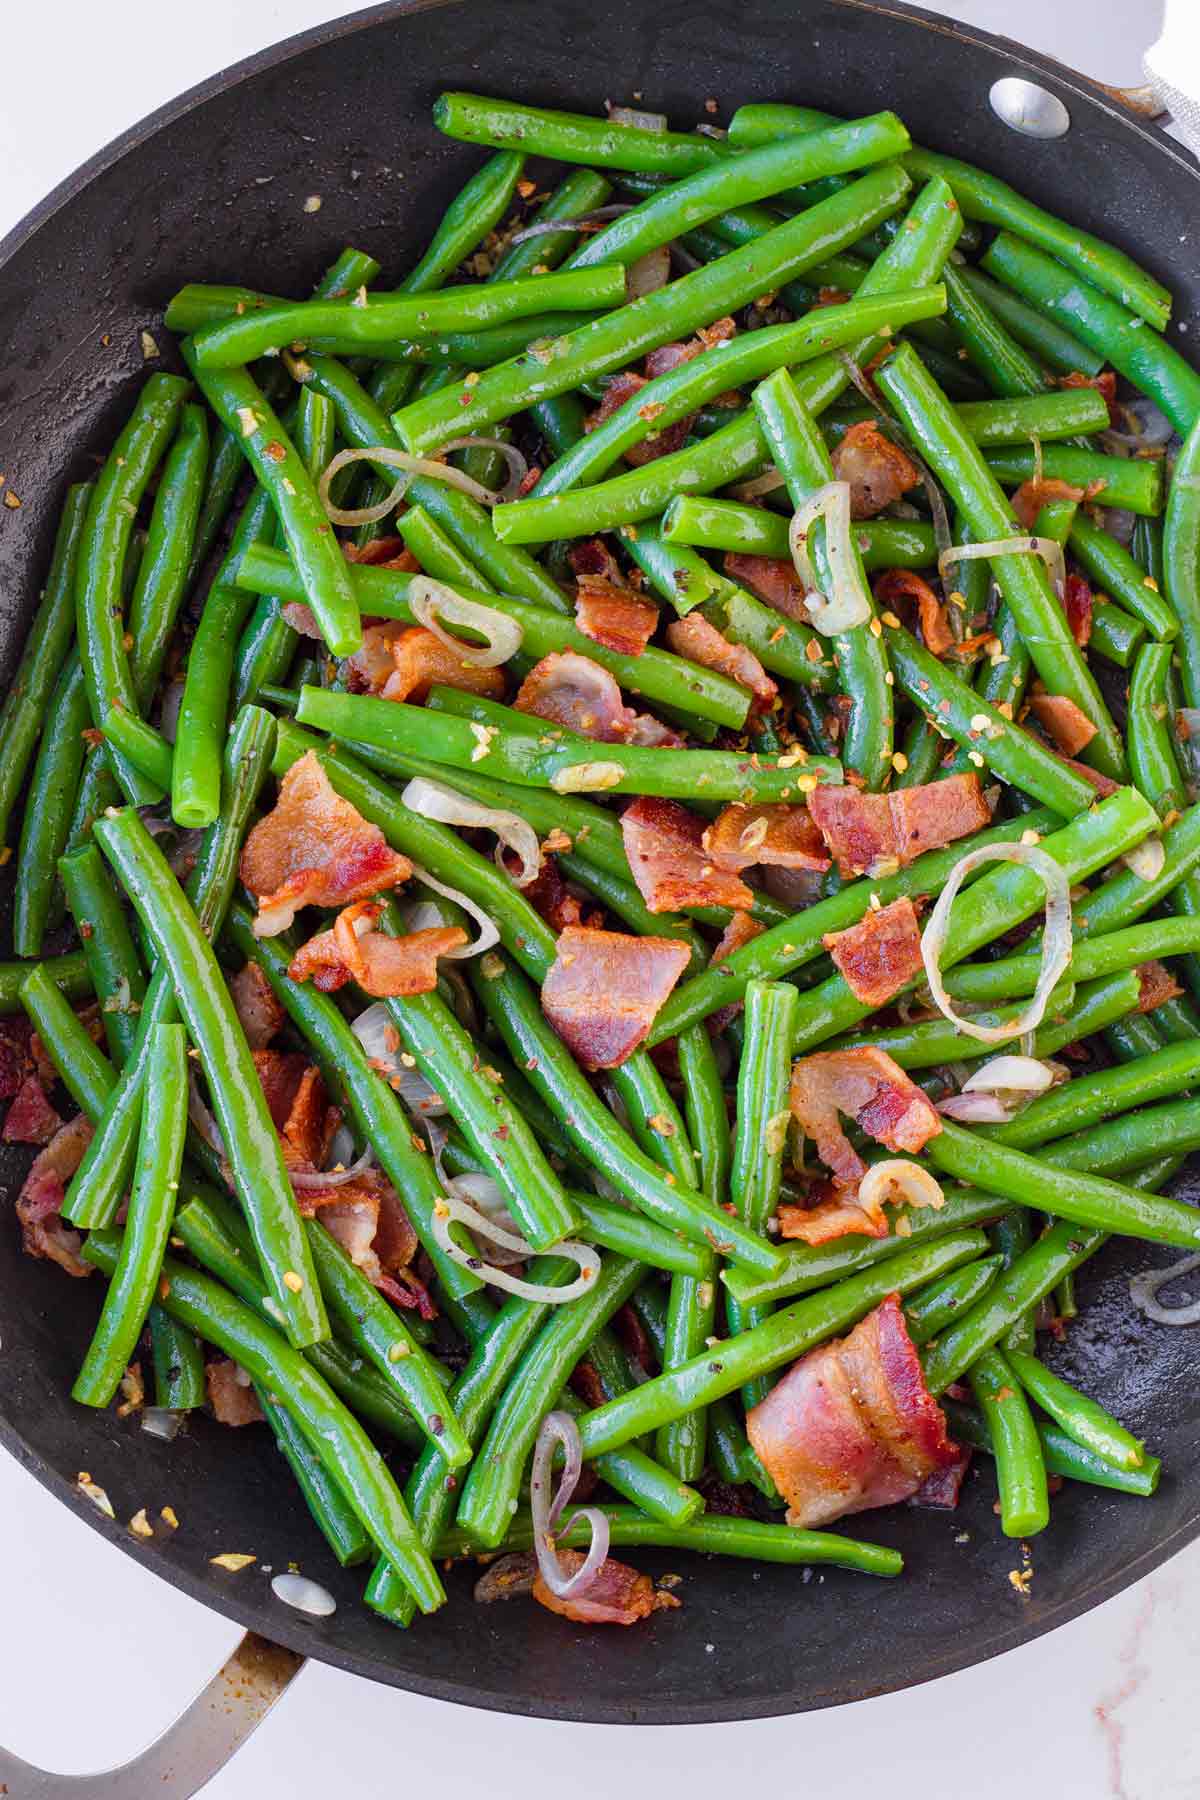
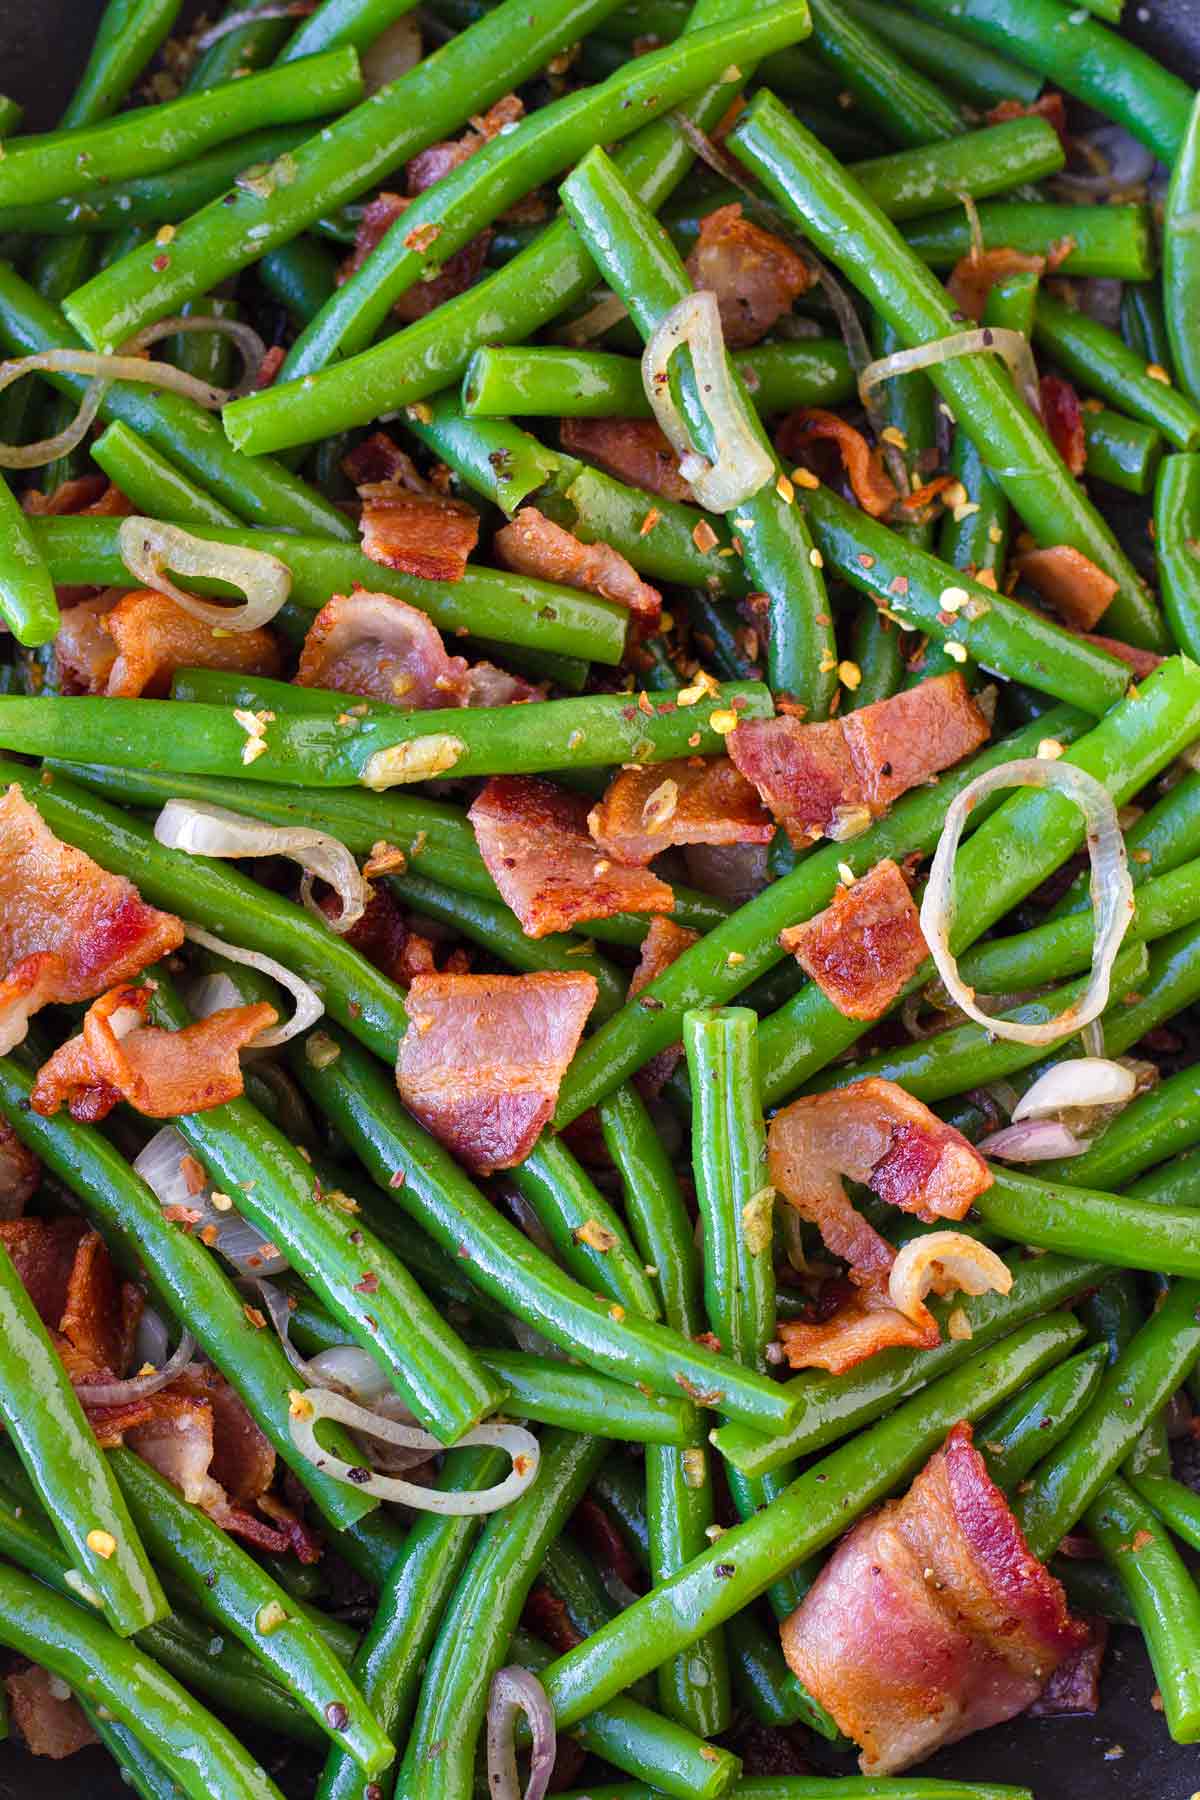
This quick and easy Green Beans with Bacon dish is one of my most popular side dishes for the holidays, but also great for any occasion. The green beans are sautéed until tender, and cooked with delicious bacon and aromatic garlic and shallots
Below I include my best tips on how to cook green beans perfectly so that they stay crisp and bright green and packed with incredible flavor!
Green beans with bacon is a classic side dish and a Thanksgiving favorite. There’s something I love about pairing green beans and bacon, which is why I also love making my bacon wrapped green bean bundles for the holidays!
Bacon is the secret to big flavor here. Cooking green beans in the rendered bacon fat, along with garlic and shallots, turns this simple vegetable into something special. So after crisping the bacon, make sure to reserve some of that fat!
My green beans with bacon recipe is super simple, made with easy to find ingredients that you may already have on hand. Speaking of green beans…check out my green bean casserole with fresh green beans recipe or my super simple lemon green beans!
Jump to:
Why I Love This Recipe
- Quick, easy and ultra delicious: Ready in under 30 minutes. Simple and loaded with flavor.
- Bright colors and texture: The ice bath technique ensures that the green beans remain vibrant green and perfectly crisp tender and crunchy.
- Great side dish for everyday dinners and for the holidays. Needless to say, it’s very popular for Thanksgiving!
Use an Ice Bath for the Green Beans
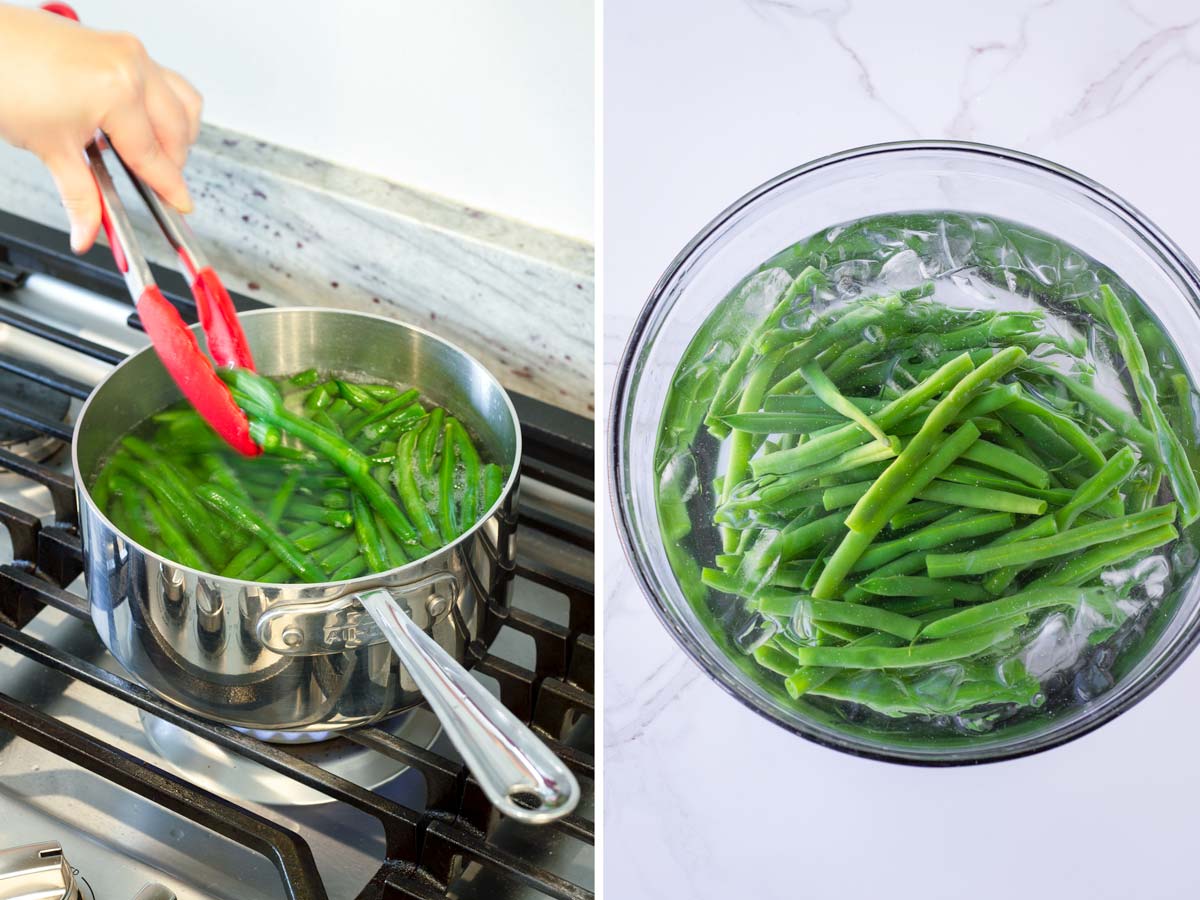
The key to maintaining the vibrant green color is a simple ice bath. By plunging the freshly cooked beans into icy water, you shock them and stop the cooking process immediately, preserving both the color and texture.
If you don’t have ice handy, run the cooked green beans under very cold water as soon as they are done. You may even want to undercook them by 1 minute or so.
Ingredient Notes
Only a few basic ingredients are needed to make this green beans with bacon side dish. Here are a few ingredient notes from recipe testing that I hope you find helpful!
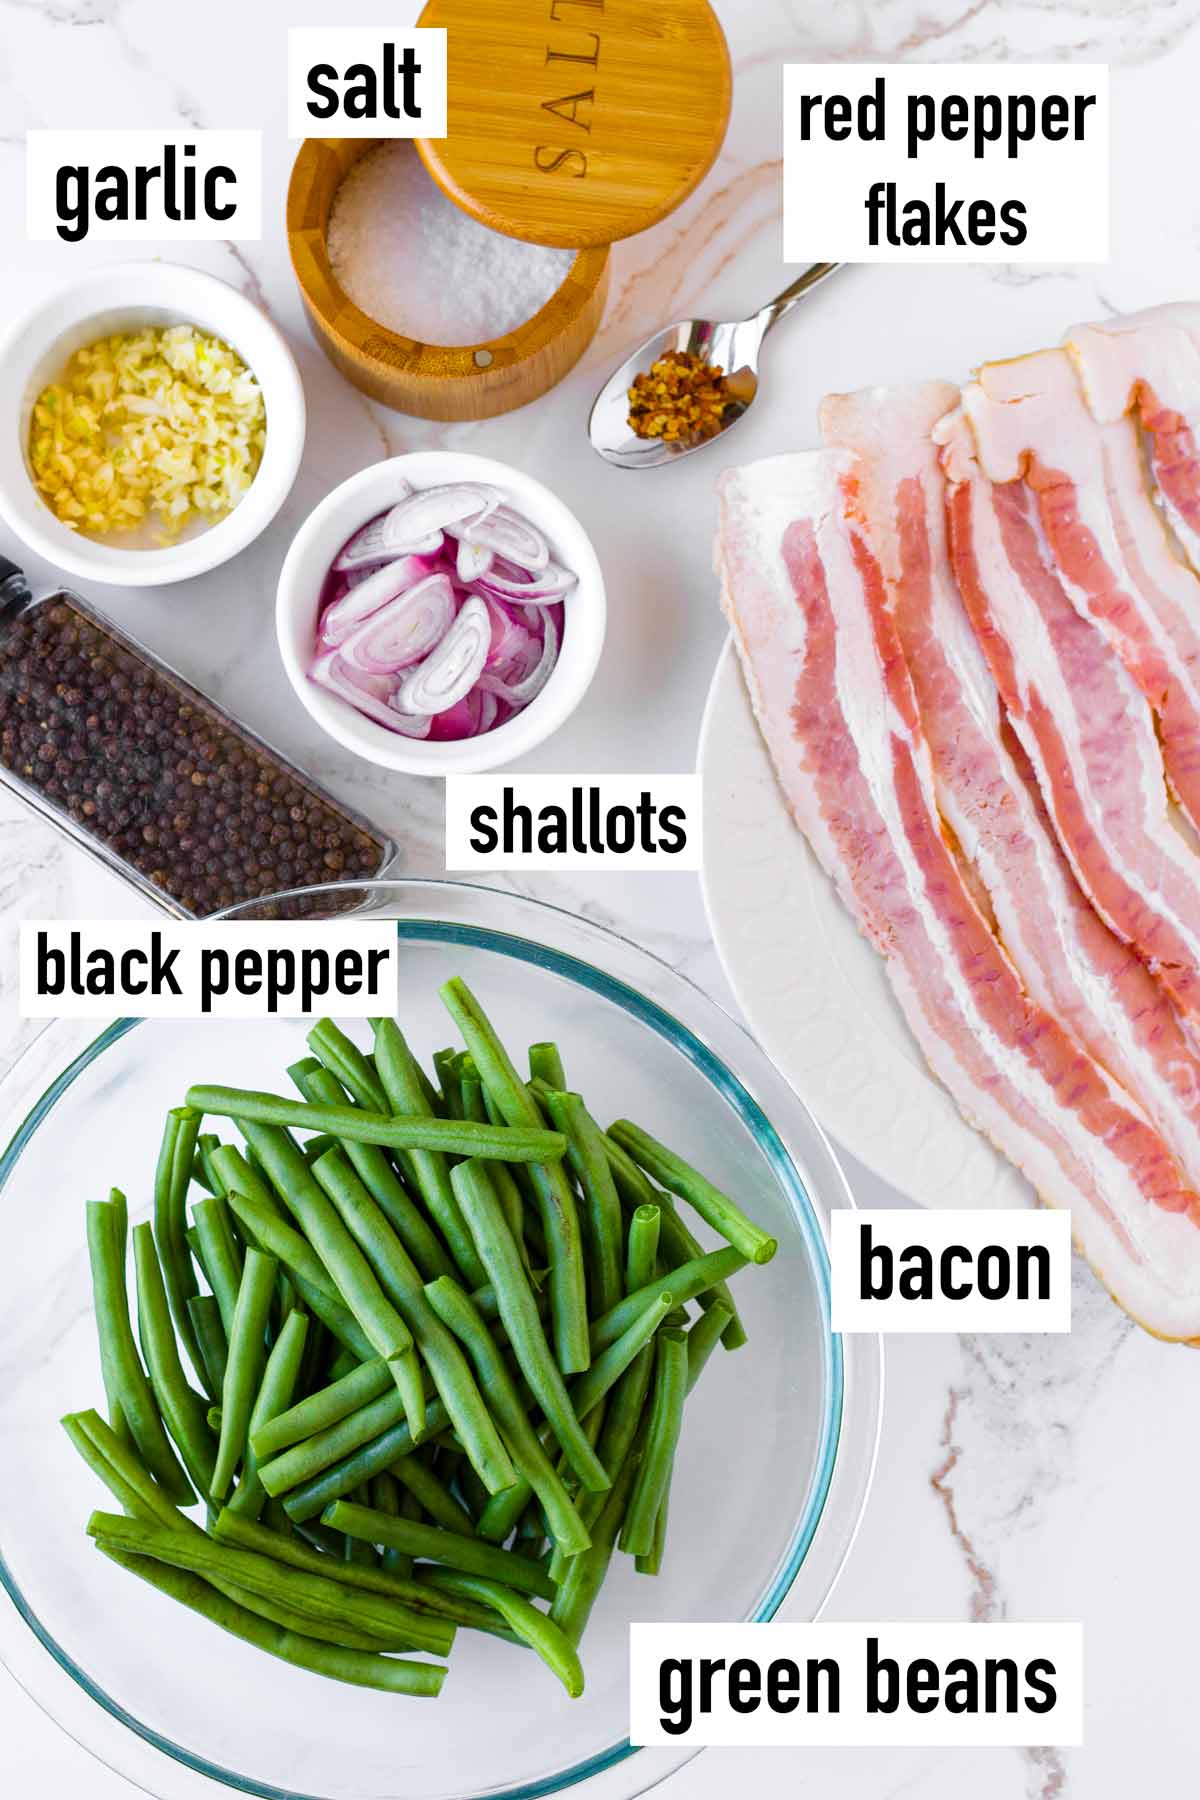
- Green beans: Washed and ends trimmed. You can use regular green beans, or French green beans.
- Bacon: The bacon is used in two ways in this dish. First, the crispy bacon is added to the green beans. Second, the bacon fat is used to cook the green beans, which is the key to the dish’s flavor.
- Garlic and shallots: These are our main aromatics for an extra punch of flavor.
- Salt and pepper to taste
- Red pepper flakes: Optional, if you prefer a touch of heat.
- Ice cubes and water for the ice bath: Essential for keeping the beans bright green.
As always, the quantities can be found in the recipe card down below.
How To Make Green Beans with Bacon
This recipe is really easy and comes together in just 30 minutes or less!
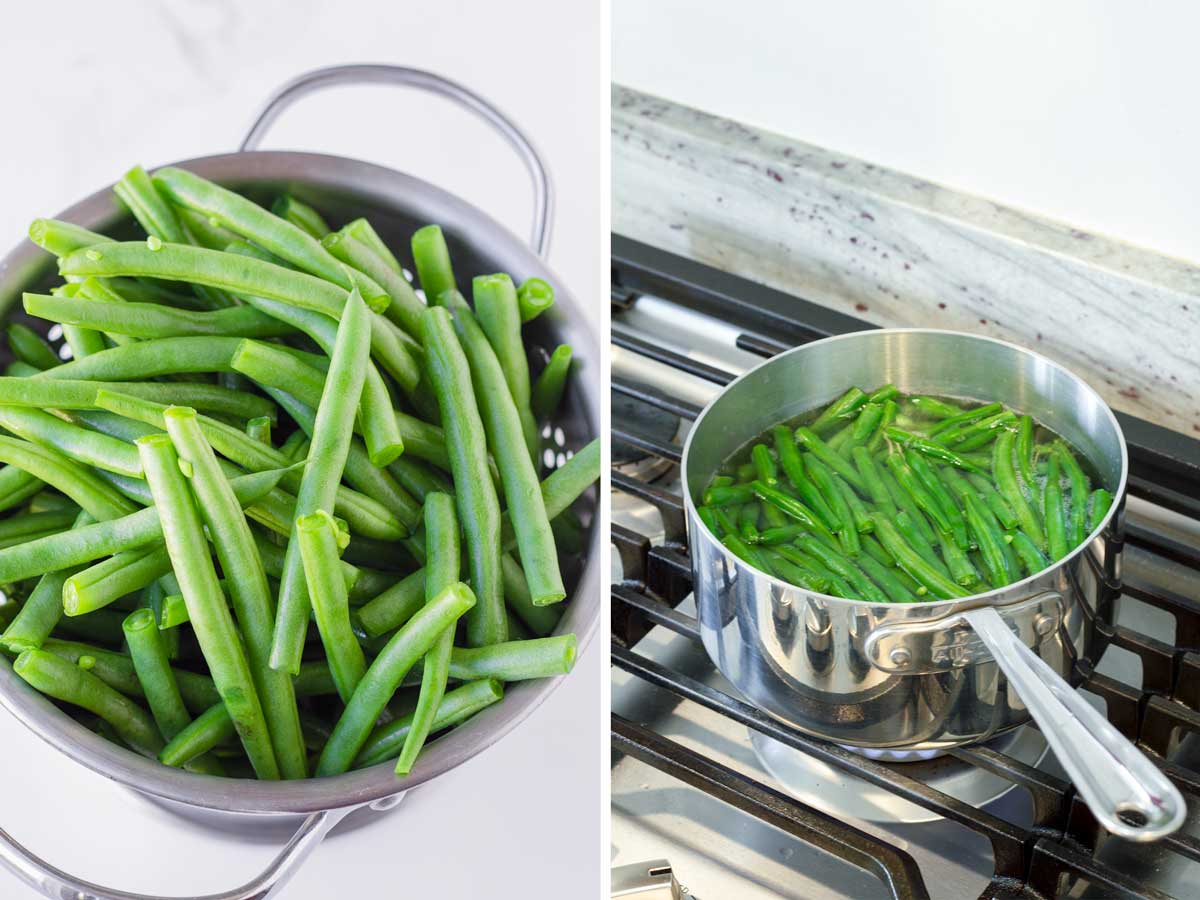
Step 1 | Blanch green beans
To begin, wash and trim the green beans. Bring a pot of salted water to a boil. While the water is boiling, prepare an ice bath by combining water and ice in a large bowl Cook the green beans in the boiling water for about 5 minutes until crisp and bright green.
Using a slotted spoon or tongs, quickly transfer the green beans (leave the boiling water behind) to the prepared ice bath. Once it’s completely ice cold, drain the water and transfer the beans to a plate and pat dry with paper towel.
Step 2 | Cook bacon
Meanwhile, cook bacon in a large skillet until crispy and chop into small pieces. Leave about 2 to 3 tablespoons of the bacon fat in the skillet.

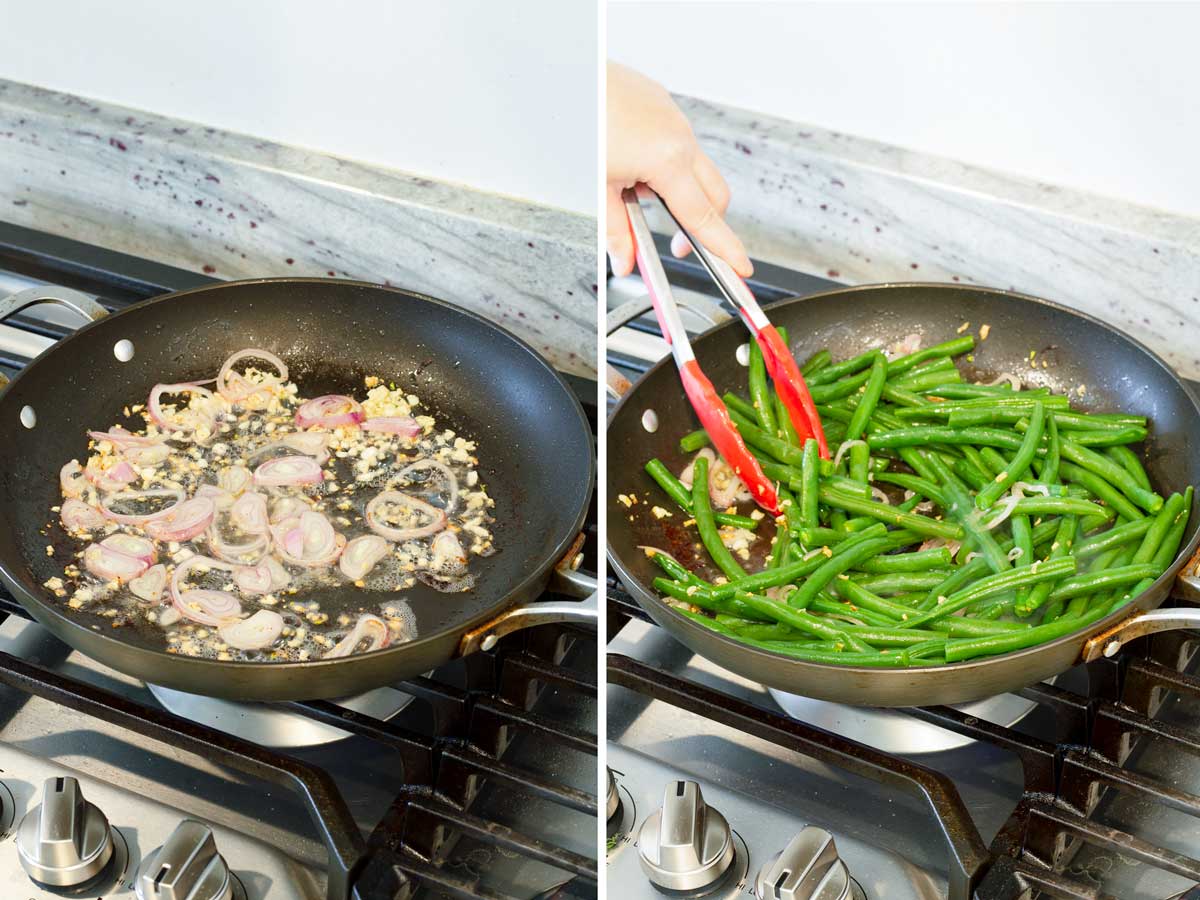
Step 3 | Sauté everything and serve
Sauté garlic and shallots, then add the beans, cooking them in the bacon fat to infuse flavor.
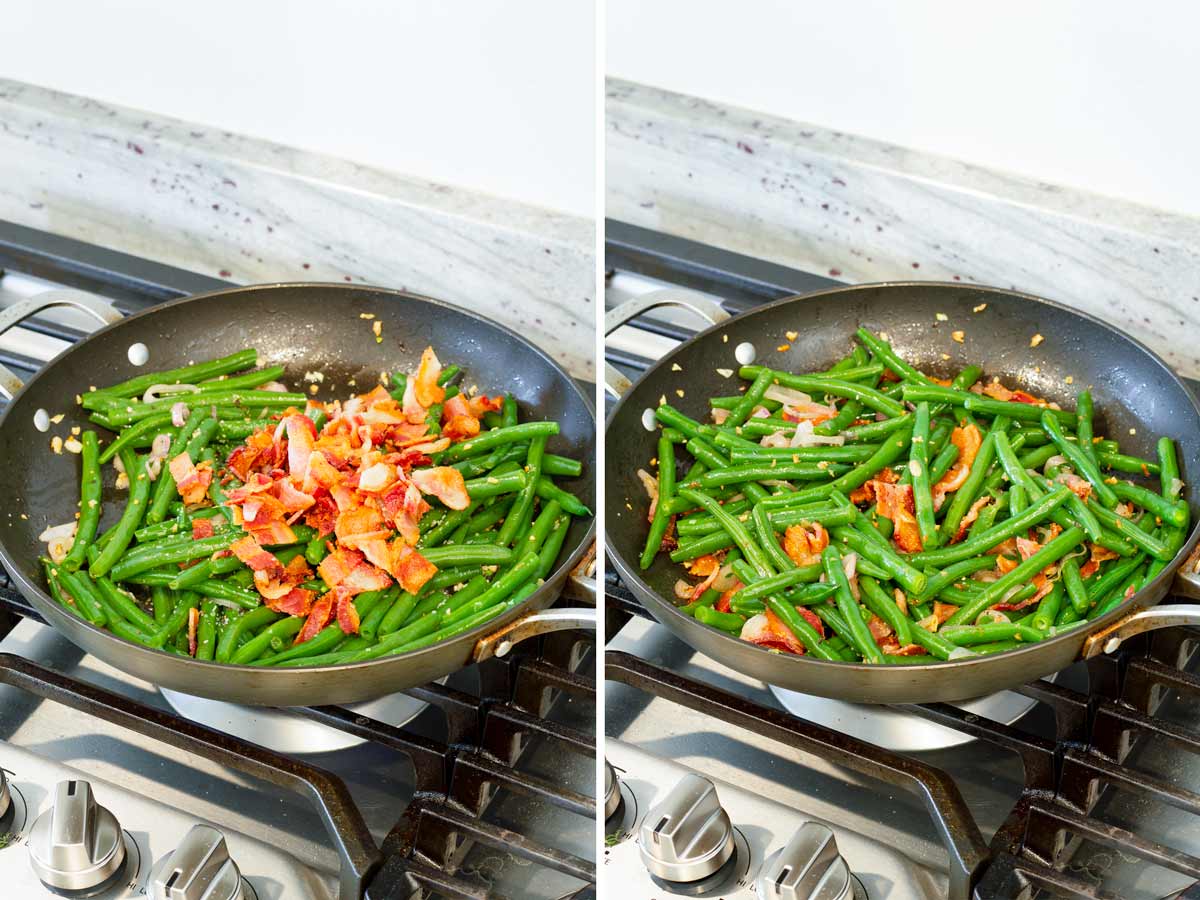
Stir in the chopped bacon..and done! Easy peasy. You’ll love how easy and delicious green beans with bacon dish is.
Tips for Success
- Pick green beans that have very fewer blemishes or brown spots. The fresher they are, the better.
- Don’t overcook the beans. Once the water boils, 4 to 6 minutes is all you need.
- Remember not to discard the bacon fat after you’re done cooking the bacon. You’ll need about 2 to 3 tablespoons to cook the beans.
- Don’t skip the ice bath; it’s key for the color and texture. If you don’t have access to ice, run it through cold water immediately after draining through a colander until cold.
- If you want even crunchier beans, undercook them by 1 minute or until desired level of doneness.
Recipe FAQs
It’s just water and ice in a large bowl, where you’ll add the cooked ingredients to “shock” them. This process immediately stops the cooking process and keeps vegetables crisp and bright in color.
If you don’t have ice handy, run the green beans through very cold water until completely cooled. You may also undercook by 1 minute to account for this.
Yes, you may also use turkey bacon instead.
You could but they may turn pale in color and not be crunchy. I’d recommend using fresh.
While I do not suggest preparing this dish in its entirety in advance, you can prepare several of the ingredients ahead of time.
Prep Ahead Tips
I’d recommend making bacon green beans the same day you’re serving. While it does store well in the fridge, the green beans can lose their texture and color. However, there are a few things you can do to prep ahead:
- Wash and trim the beans in advance. Pat dry and store in a resealable bag or container in the fridge for 2 to 3 days.
- Mince and slice garlic and shallots in advance.
- Precook the bacon and store the bacon fat.
Pairing and Serving Ideas
These are some of our other go-to holiday side dishes that pair really well with the green beans with bacon recipe!


Favorite Thanksgiving main dish pairings: Dry Brine Turkey, Slow Cooked Turkey Breast, Brined Turkey Breast, and Turkey Roulade!
You can also serve them year-round! They go well with Pork Chops with Apples or Spinach Stuffed Chicken.
I’d love to hear from you! If you loved my recipe, please consider leaving a 5-star rating and a comment down below. Sign up for my newsletter and follow along on Instagram, Facebook, or Pinterest
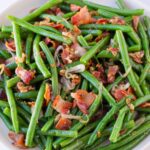
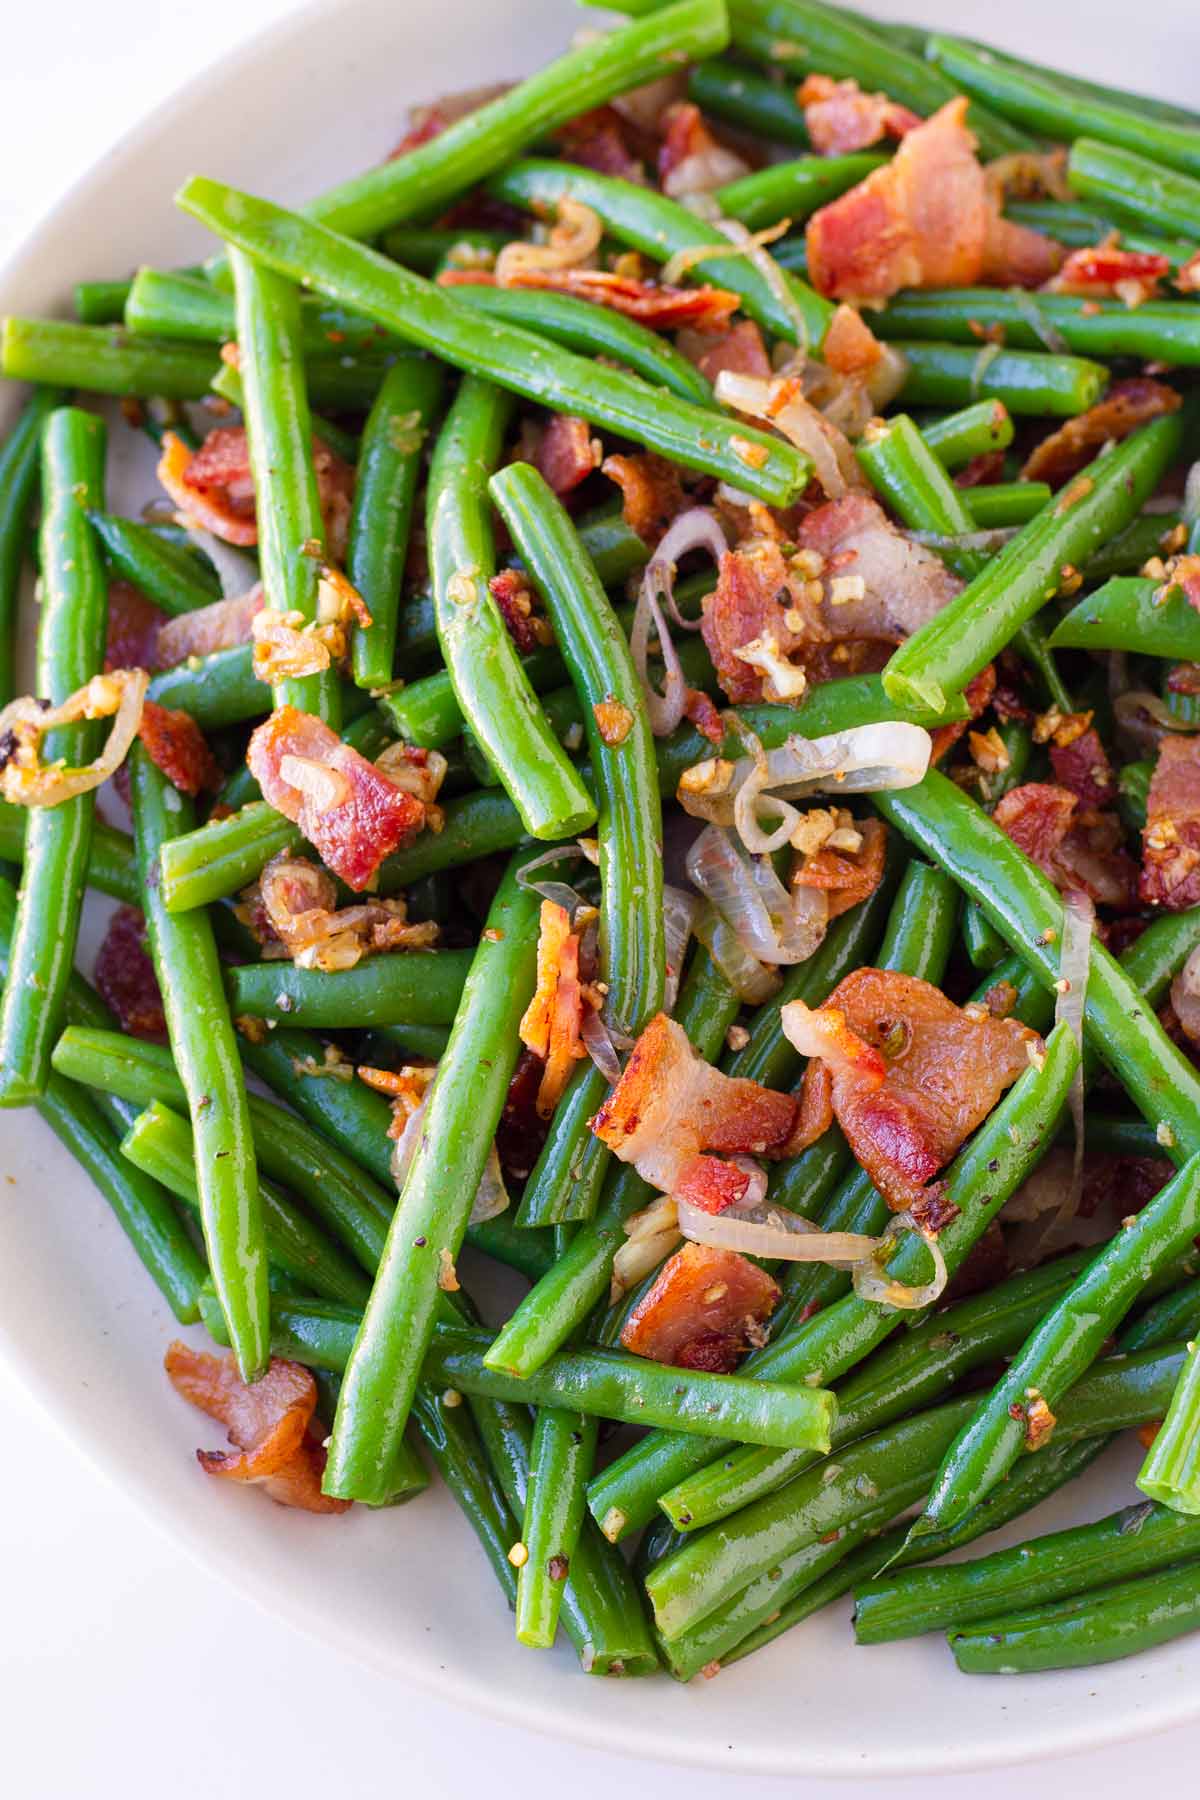
Green Beans with Bacon
Equipment
Ingredients
- 1 ½ pounds green beans - washed and ends trimmed
- 6 slices bacon
- 4 cloves minced garlic
- 1 small shallot - thinly sliced
- Salt and pepper - to taste
- Red pepper flakes - optional, to taste
- Ice cubes - for the ice bath
- Water - for the ice bath
Instructions
- In a medium pot, bring generously salted water to a boil.
- Meanwhile, set up the ice bath: In a large bowl, combine water and ice (enough water to fully submerge the green beans and enough ice to keep the water ice cold). Set aside.
- Cook green beans for 5-6 minutes in the boiling water or until they are crisp tender and bright green. Drain and transfer to the prepared ice bath. You could also transfer them straight from the pot using tongs. Let them get fully cold, about 5-8 minutes. Then, remove green beans from the ice bath and pat dry with paper towel.
- In a large skillet, cook the bacon until crispy. Then, transfer to a plate lined with paper towel and chop. Set aside. Leave about 2 to 3 tablespoons of the bacon fat in the skillet.
- Add garlic and shallots to the skillet with the bacon fat, and cook until fragrant and slightly golden brown for about 2 minutes over medium-high heat.
- Add the green beans and bacon to the skillet, and cook for another 2 to 3 minutes, tossing until coated and warm. Season with salt, pepper and red chili flakes to taste. Serve warm. Enjoy!
Notes
- Use fresh green beans. Don’t use canned or frozen green beans – they will turn out soft, mushy, and pale.
- Pick green beans that have very fewer blemishes or brown spots. The fresher they are, the better.
- If you don’t have access to ice, run it through cold water immediately after draining through a colander until cold. You may also undercook by 1 minute to account for this.
- For crisp and bright green results, cook green beans for about 4 to 6 minutes. But really, it’s a matter of preference. Taste test the green beans every 2 minutes until they are cook to your liking.
- Green beans: French green beans (aka haricort verts).
- Bacon fat: If you prefer not to cook with bacon fat, use olive oil, coconut oil, or vegetable oil.
- Shallots: Yellow onions.


Jessica says
Love this one! So delicious and easy to make!