
This chuck roast in the oven recipe is one of those that are big on flavor with minimal effort. The oven does all the work because there’s no need to sear first!
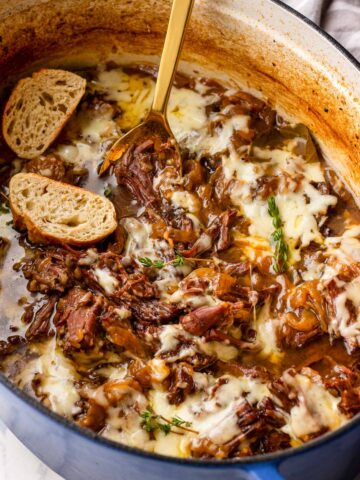
Instead, the caramelization comes at the very end, when we broil the shredded chuck roast with brown sugar on top to get incredible flavor and really nice crust.
Quick Look: Chuck Roast in the Oven
- Prep Time: 30 minutes, Cook Time: 3 hours 30 minutes
- Total Time: 4 hours
- Servings: 6 people
- Method: Oven braised
- Main Ingredients: Chuck roast, beef broth, brown sugar, butter, herbs
- Flavor Profile: Savory with a touch of sweetness
- Ideal for: Sunday dinner, comfort food

Jump to:
How Long to Cook Chuck Roast In Oven
Chuck roast is technically a tougher cut with lots of connective tissue, but when slowly braised in the oven, it gets melt-in-your-mouth tender.
Here’s what I found works every time: 3.5 hours at 325ºF (for a 3-3.5 pound roast), as long as it’s covered or sealed tightly (prevents heat loss). If you’d rather bake at 300ºF, closer to 4 hours.
To be precise, this cut reaches that perfect fall-apart tender texture at 195-205°F internal temperature. What I always do is check for tenderness with a fork, and if it’s not tender yet, put it back for another 15-30 mins.
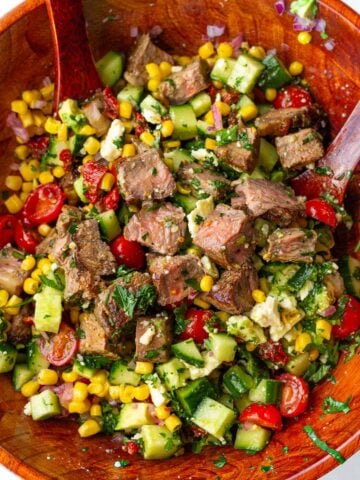
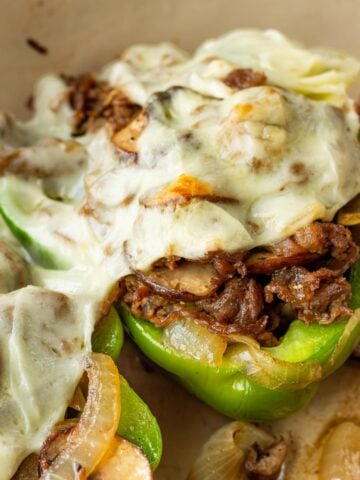
If you’re like me and love chuck roast, try my Dutch Oven Pot Roast and Slow Cooker Pot Roast. Or check out my versatile shredded beef recipe that I use for tacos!
Ingredient Notes
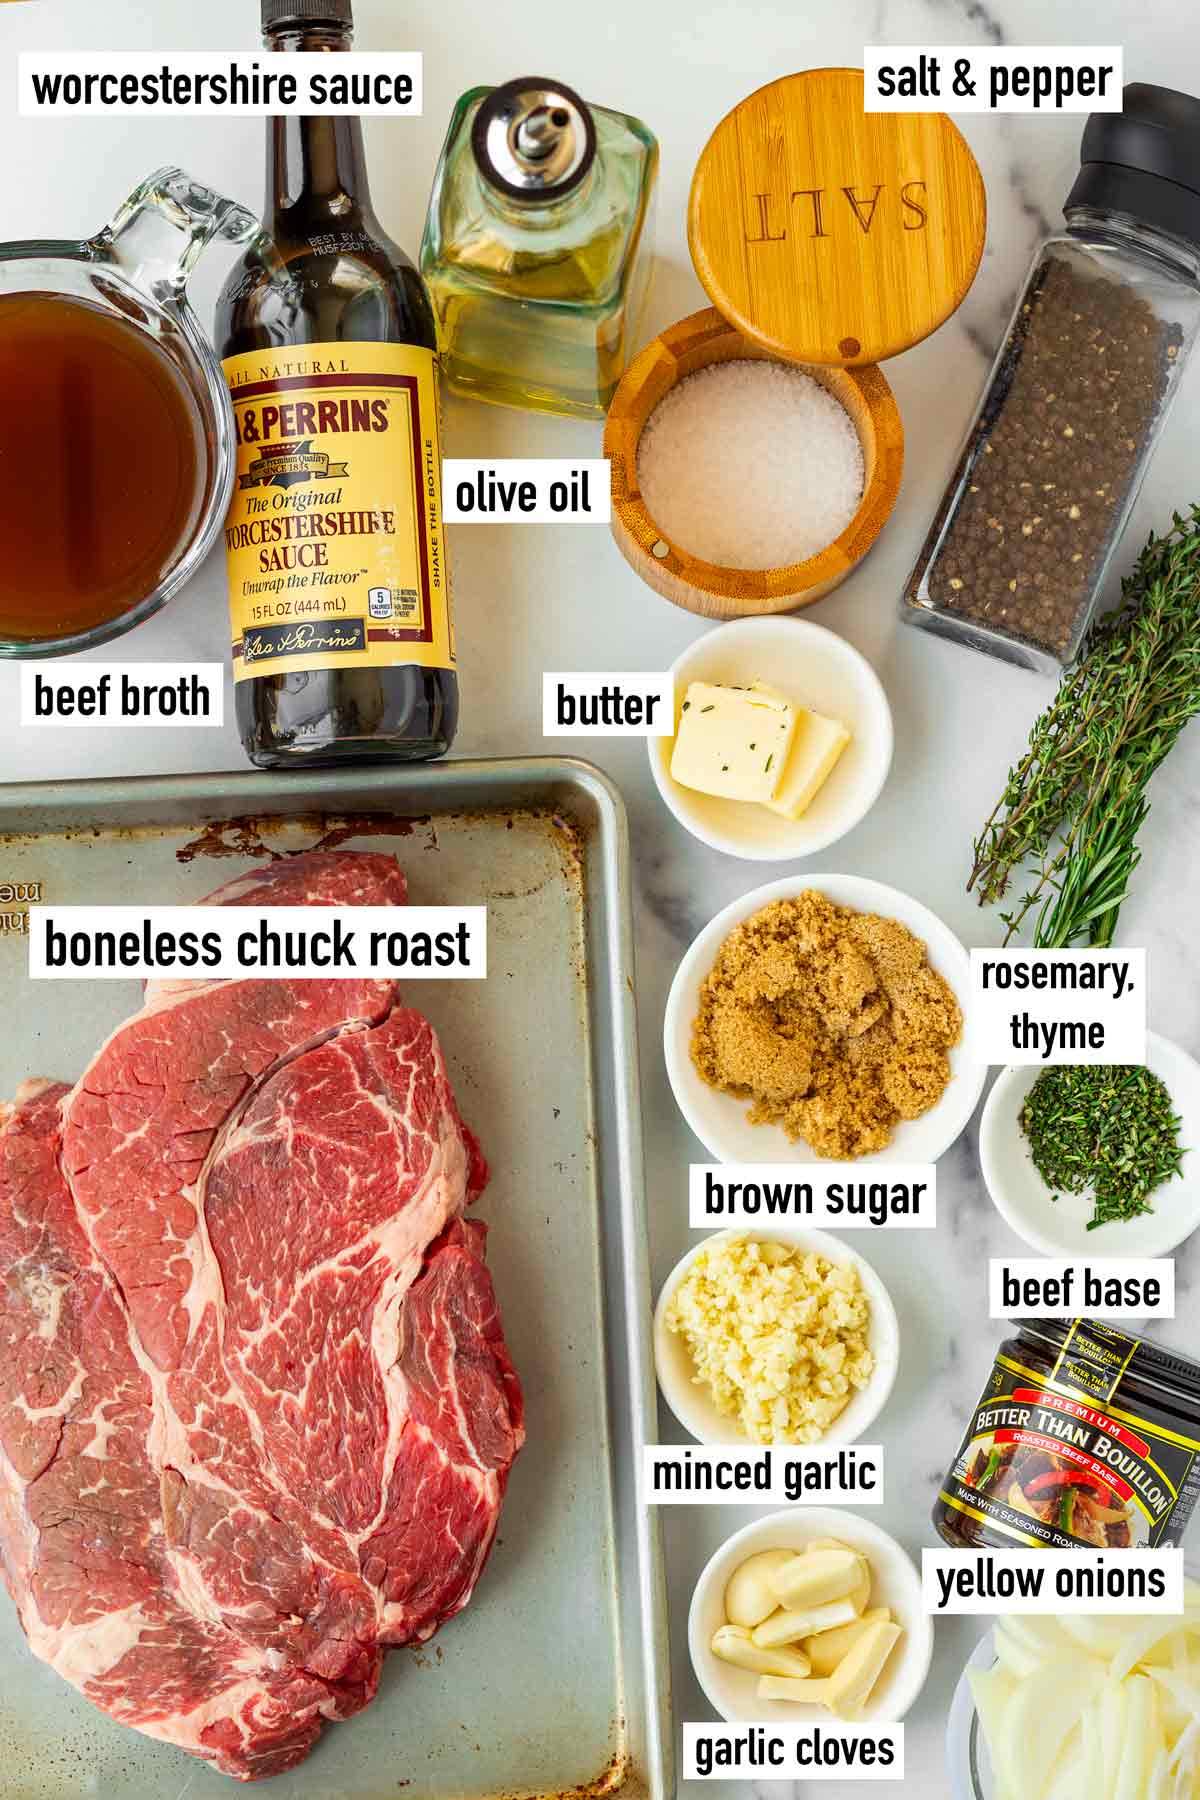
- Boneless chuck roast: A 3-pound chuck roast will fit well in a medium pan. Find a well-marbled piece and trim off excess fat.
- Warm beef broth: I always start with warm broth as this gives it a head start for more even, consistent cooking.
- Worcestershire sauce and beef bouillon: These are our main flavor boosters!
- Brown sugar: Sprinkle a generous coating at the end before broiling. Don’t use granulated sugar as it can harden too much.
- Garlic: Fresh, both minced (for the juices) and whole cloves (for encrusting).
- Yellow onions: The beef cooks nestled in a bed of onions for moisture. As a bonus, onions release sweetness as they cook, making everything even better.
- Fresh herbs: I use rosemary and thyme sprigs.
- Unsalted butter: It gets added before the roast goes into the oven, and as it cooks, the beef will cook in a rich, delicious braise. It also emulsifies the juices into a silky sauce.
- Other: Kosher salt, black pepper, and olive oil.
Substitutions and Variations
- Herbs: If you don’t have fresh, use dried Italian seasoning. Not much, as dried herbs tend to be stronger.
- Beef: I always go with chuck roast, but you can also use bottom round roast, although it may not turn out as tender. Avoid lean cuts like beef loin or brisket.
- If you don’t have Worcestershire sauce, substitute with a splash of apple cider vinegar and a touch of soy sauce.
- Maple syrup can be used instead of brown sugar (1:1 swap or to taste) for slightly warmer notes.
How to Cook Chuck Roast
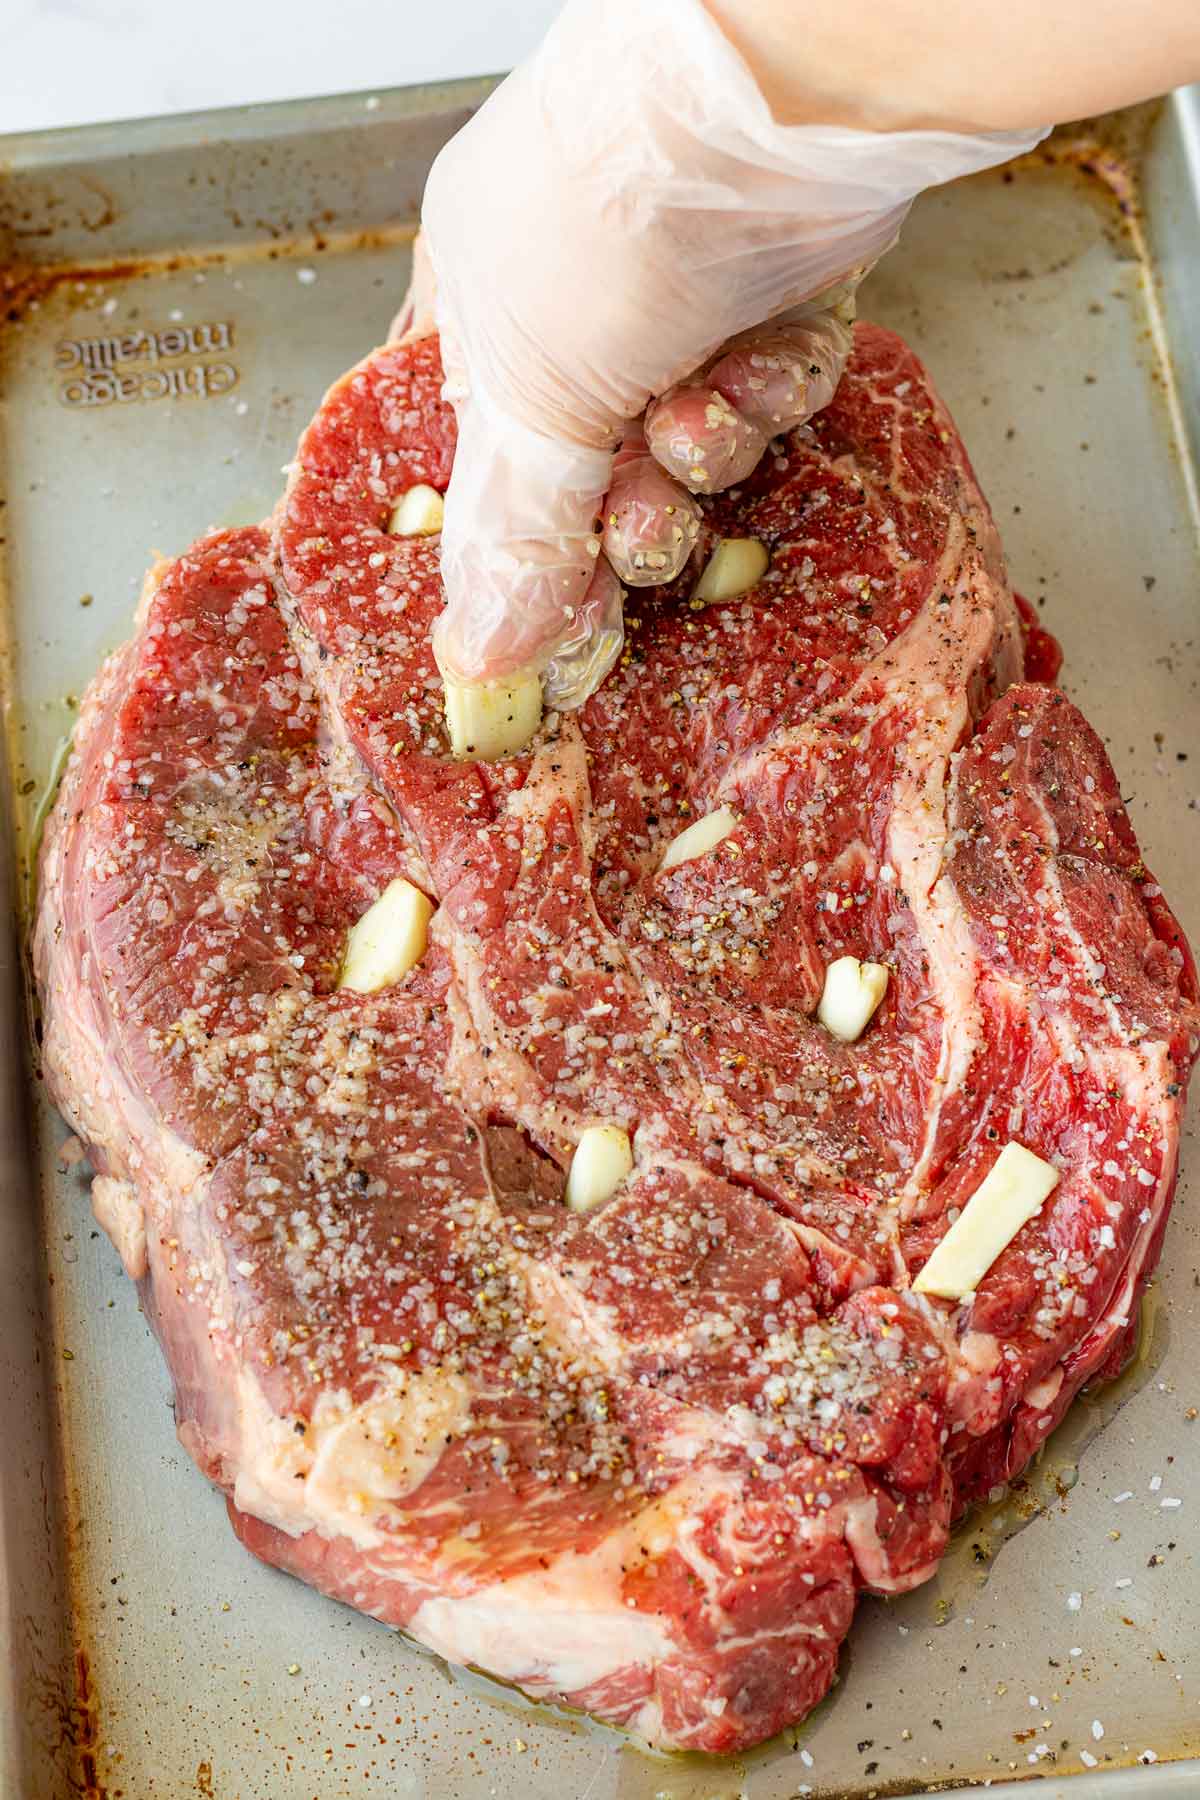
- Season chuck roast. Preheat oven to 325°F. Cut about 8 deep slits and insert small garlic cloves. Then, drizzle the outside with olive oil and season both sides generously with salt and pepper.
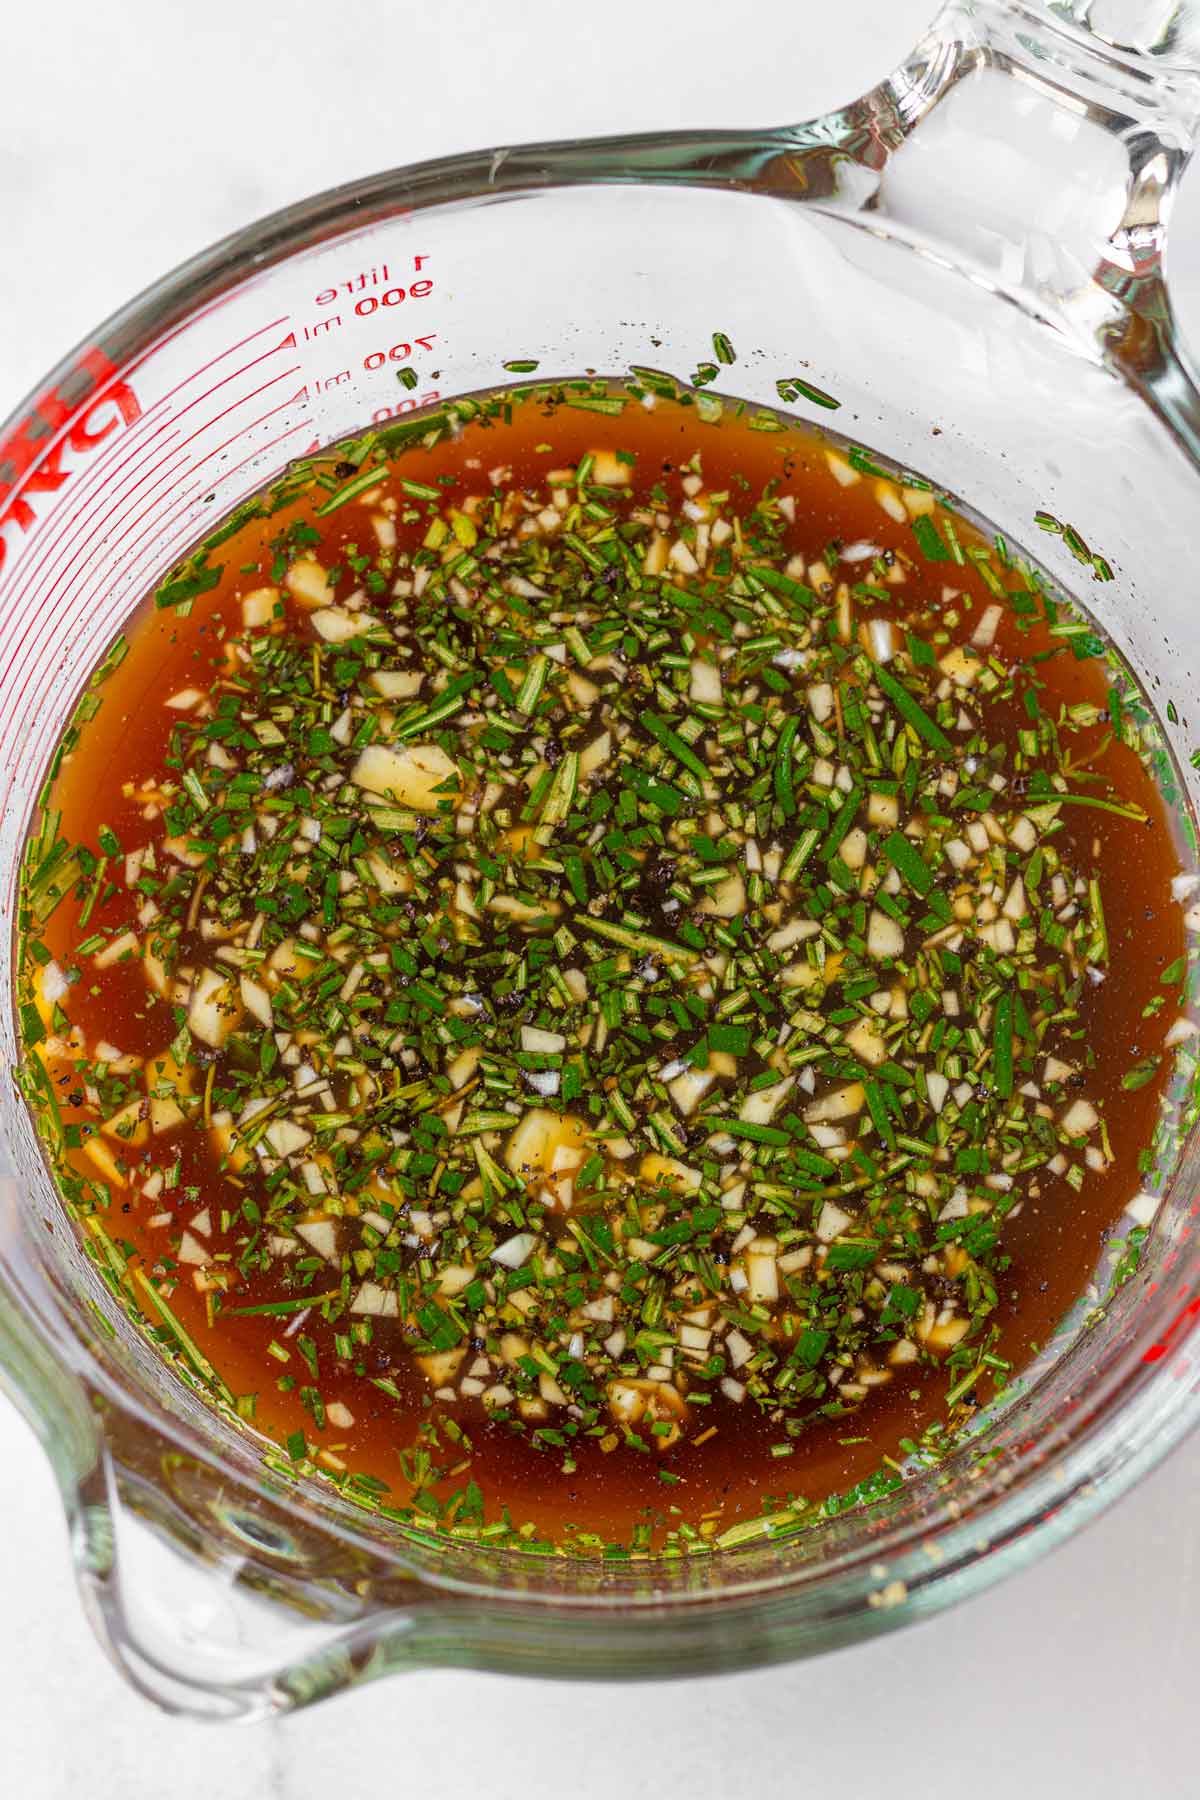
- Braising liquid. In a bowl, mix all the braise ingredients until well combined (see recipe card below). Quick tip: Start with warm beef broth to give it a head start. I usually microwave it for about 2 minutes.
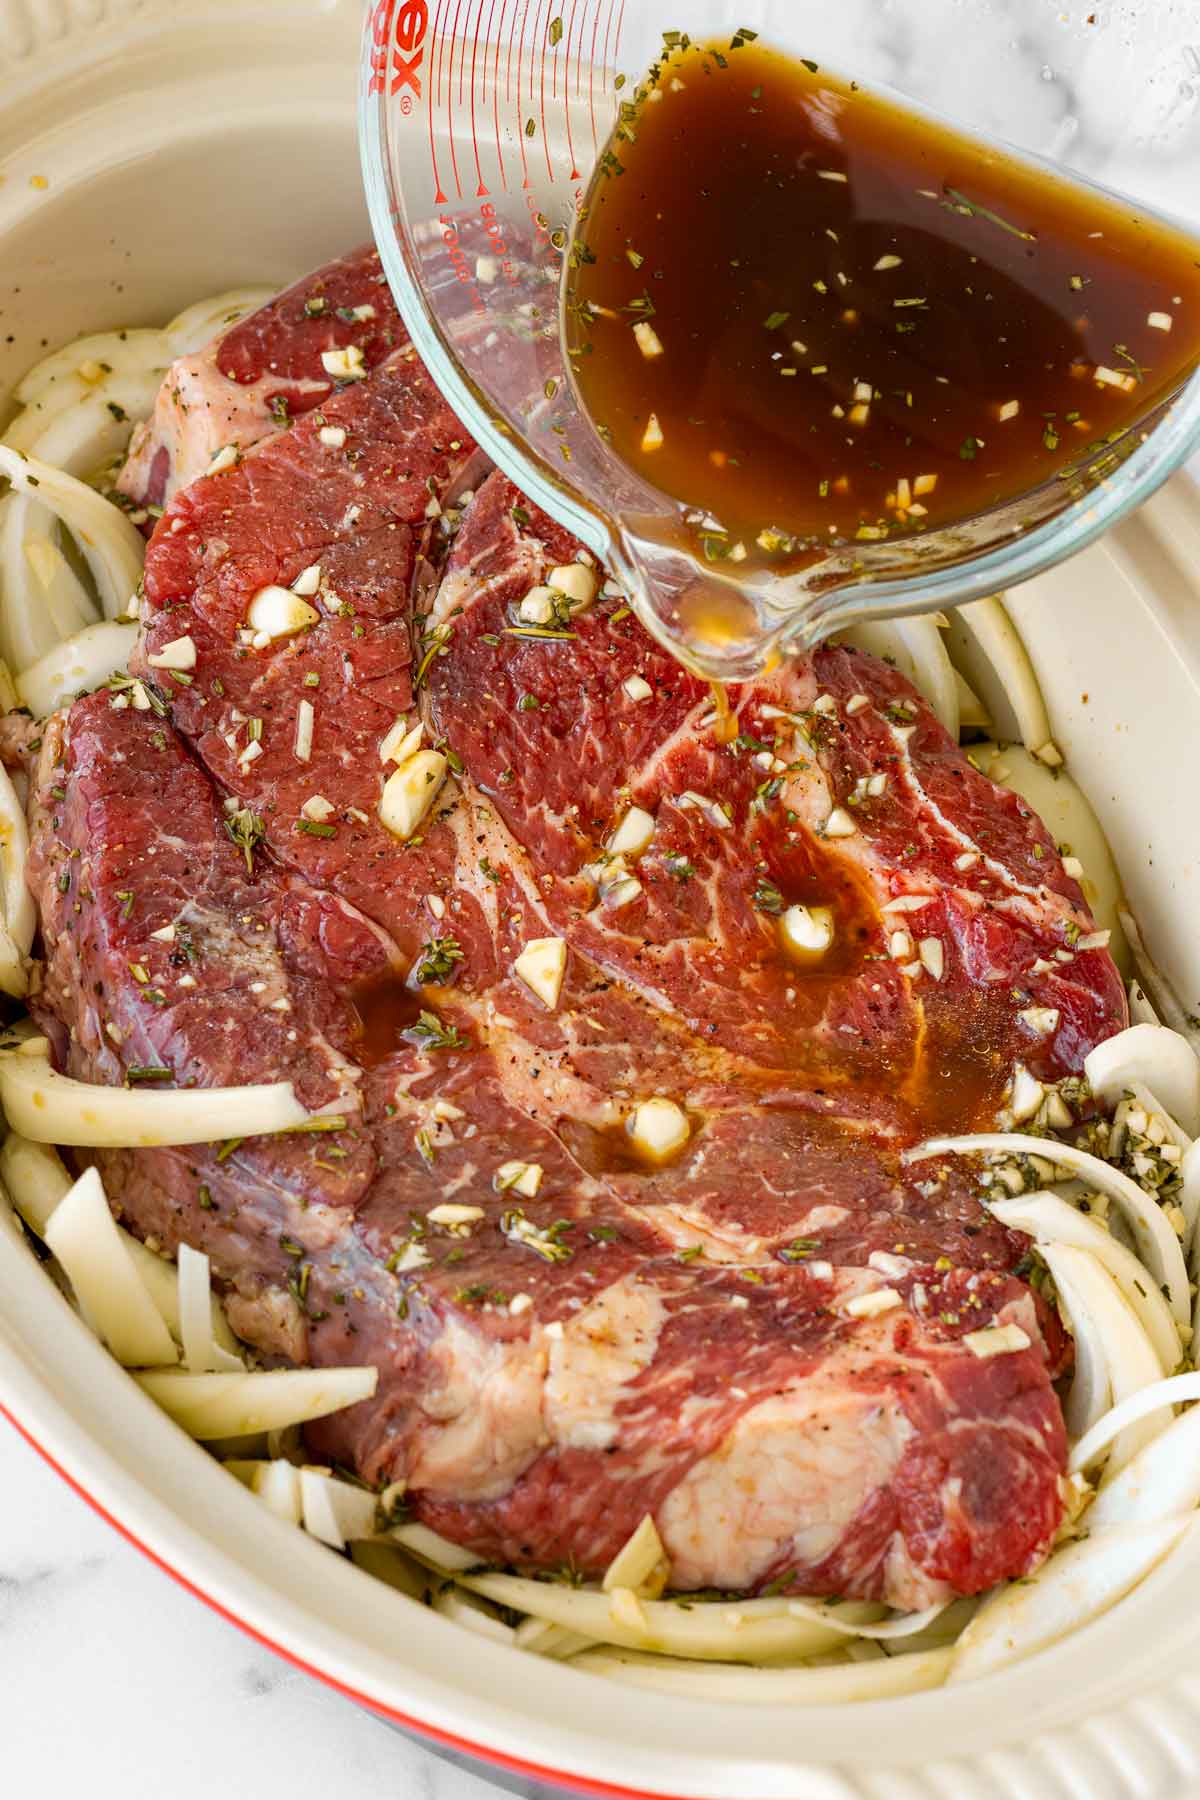
- Assemble. In a baking pan, preferably ceramic, arrange a bed of onions and nestle in the seasoned beef.
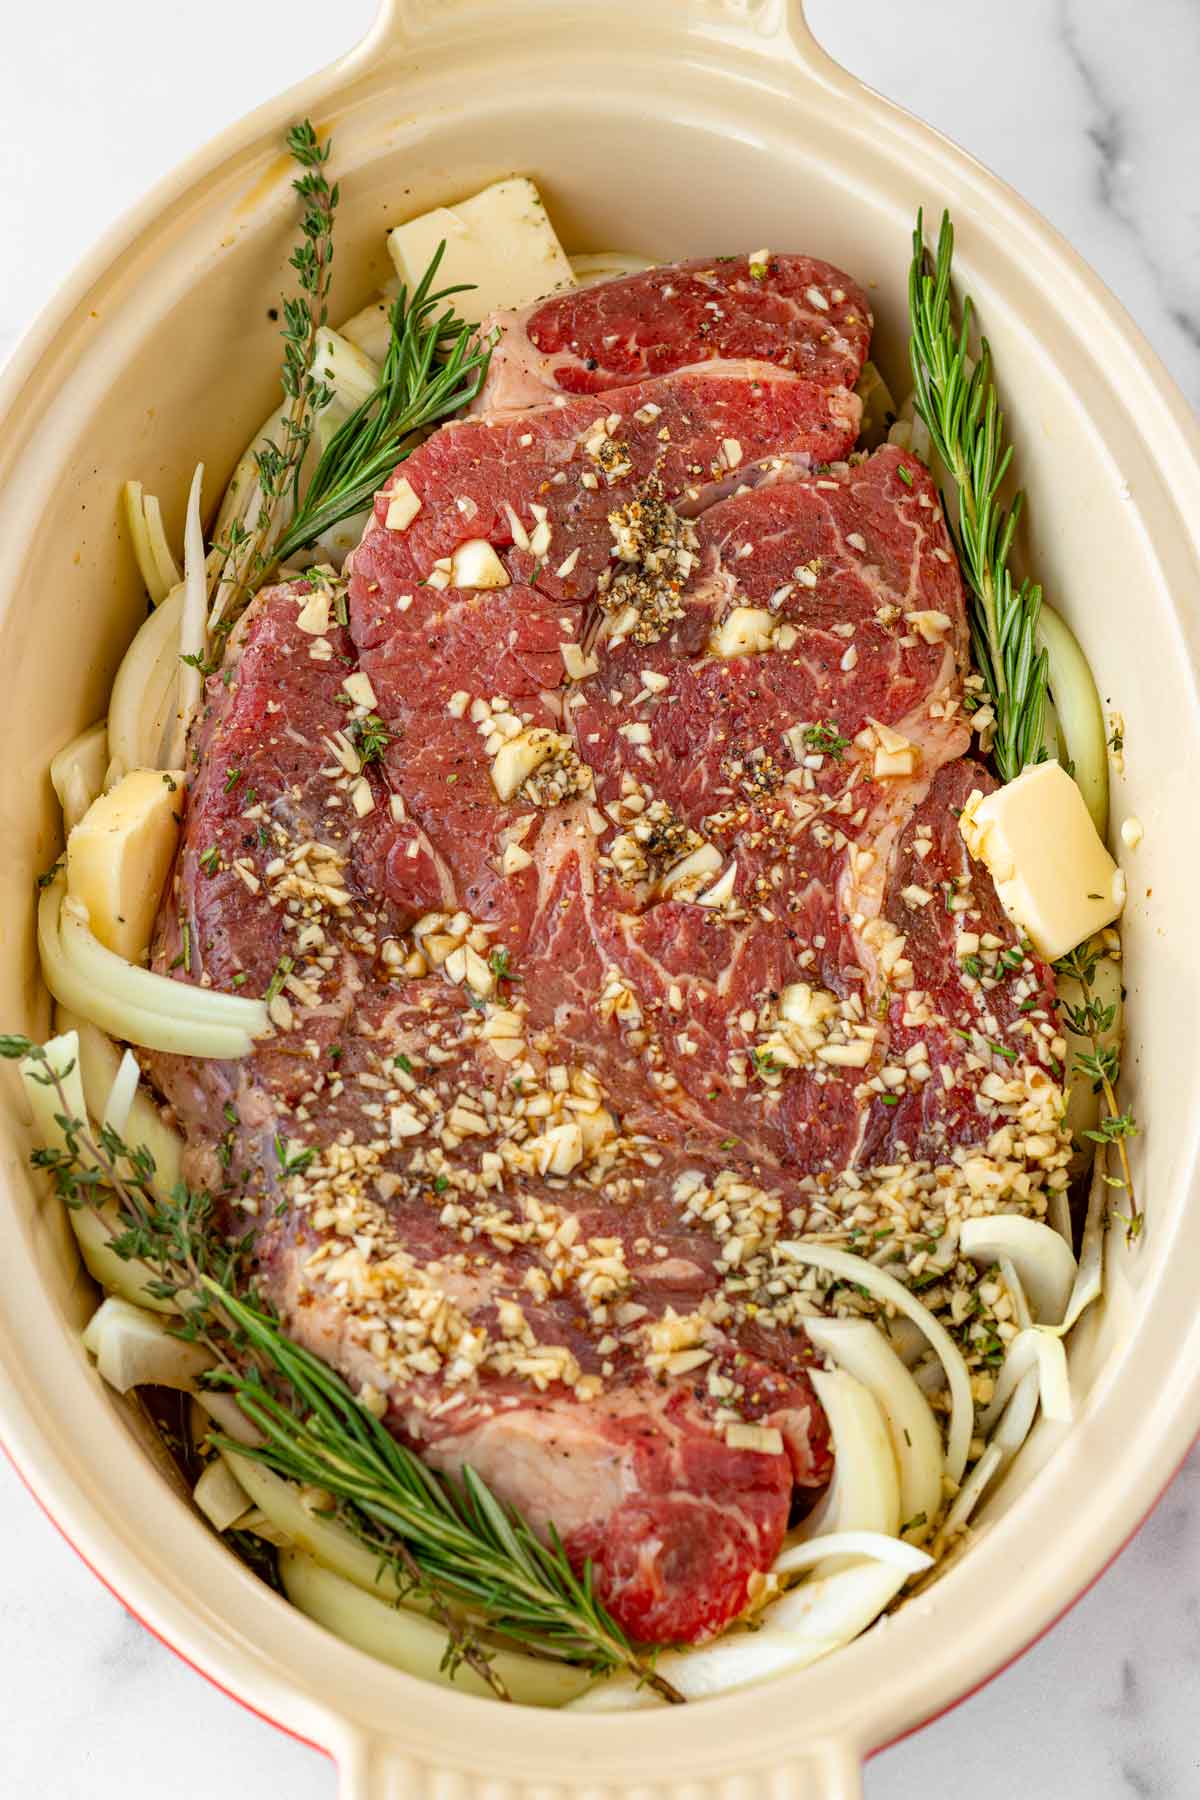
- Cook in oven. Place a few dollops of butter and herb sprigs around, then, pour in the braising liquid evenly. Cover tightly with a few layers of foil to trap in heat (this is important!). Cook the chuck roast in oven for 3.5 hours or until fall-apart tender.
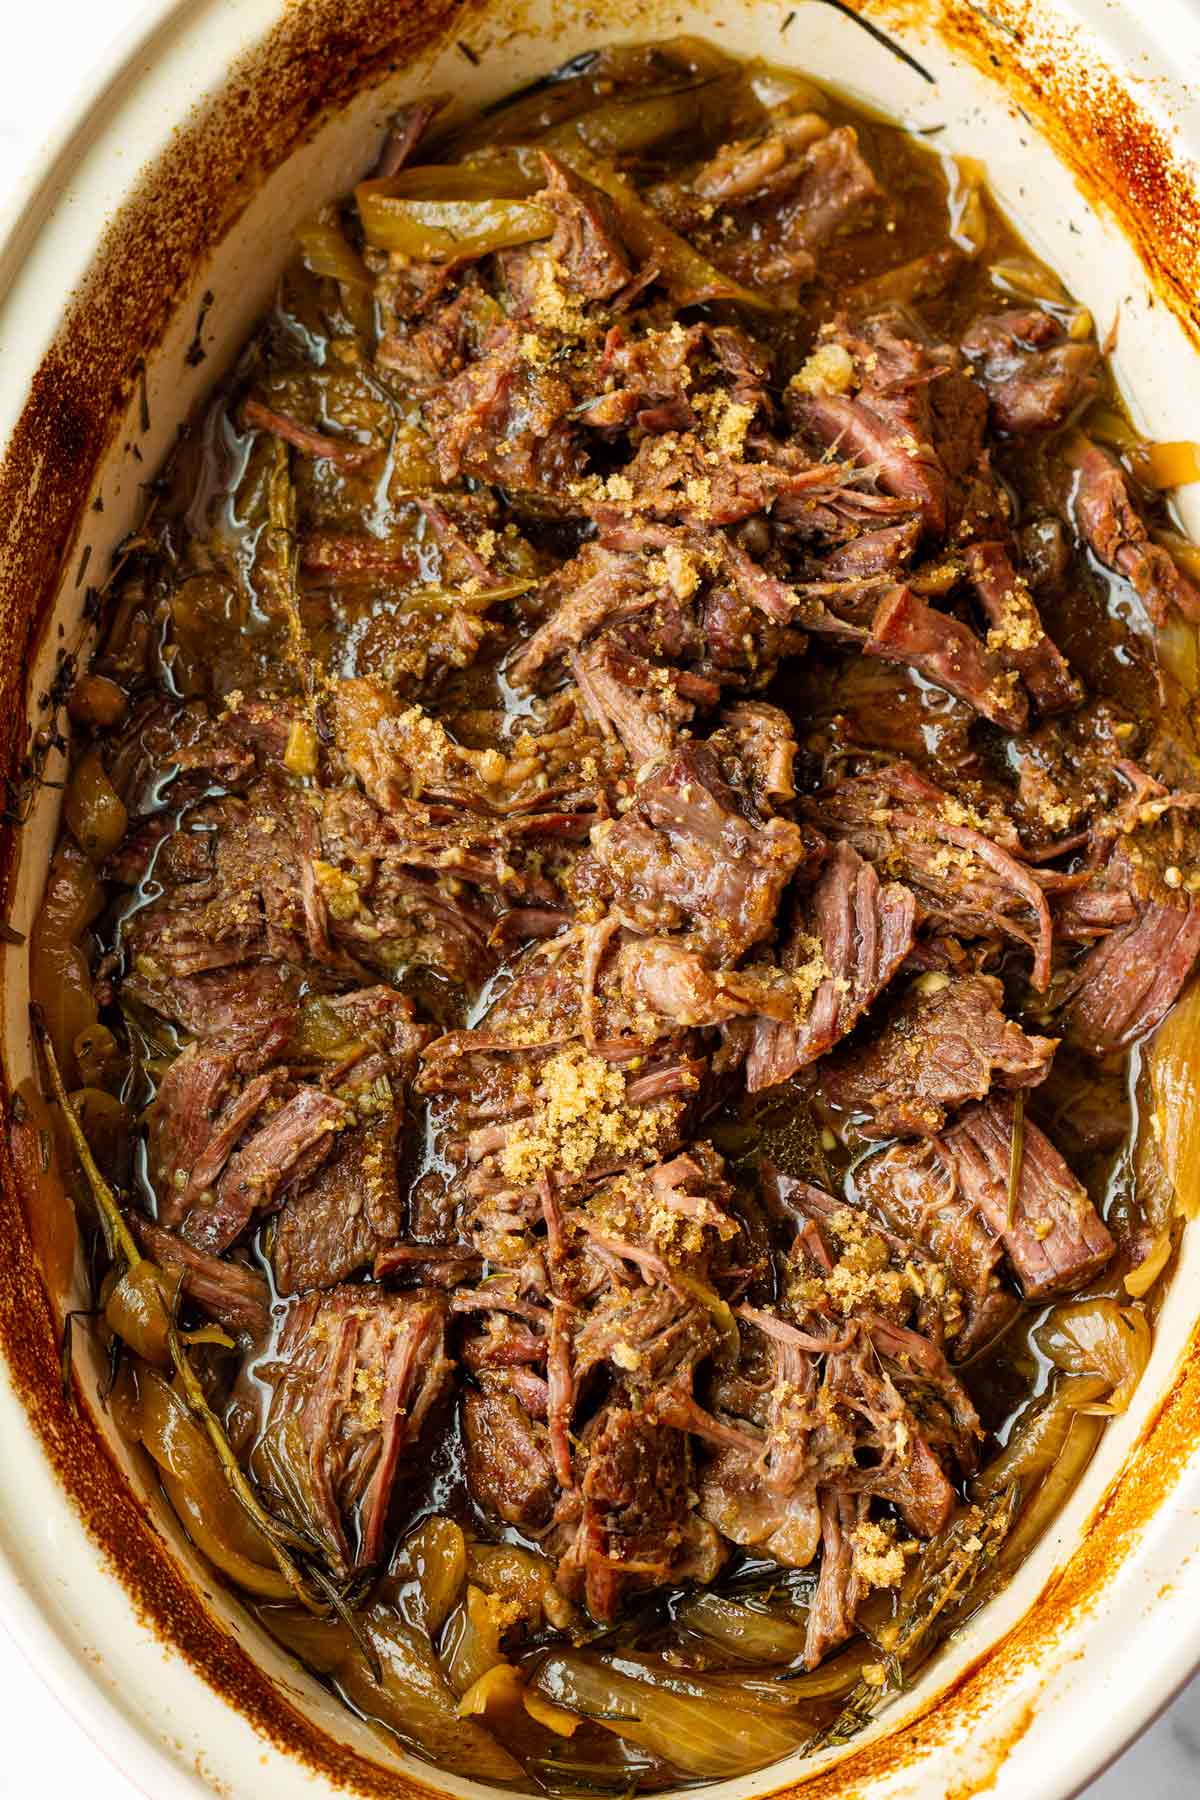
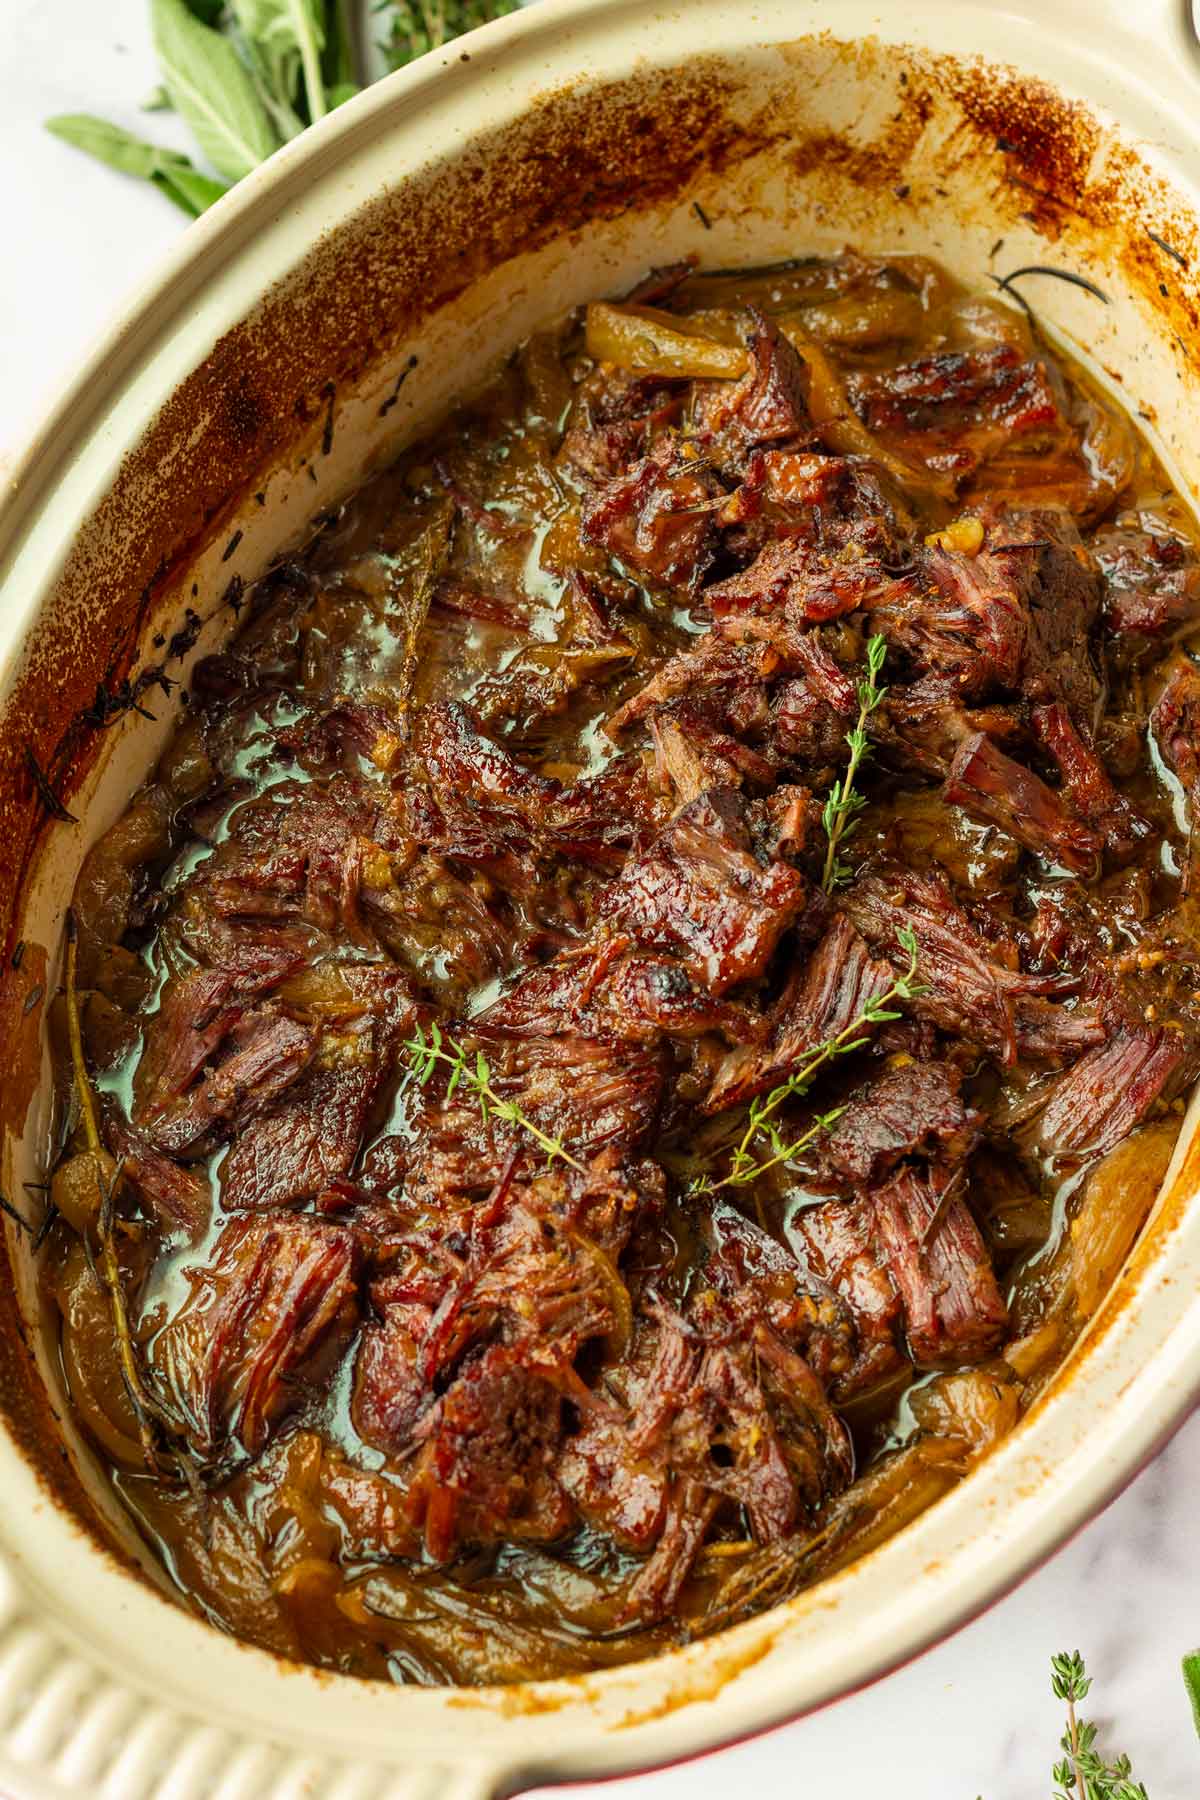
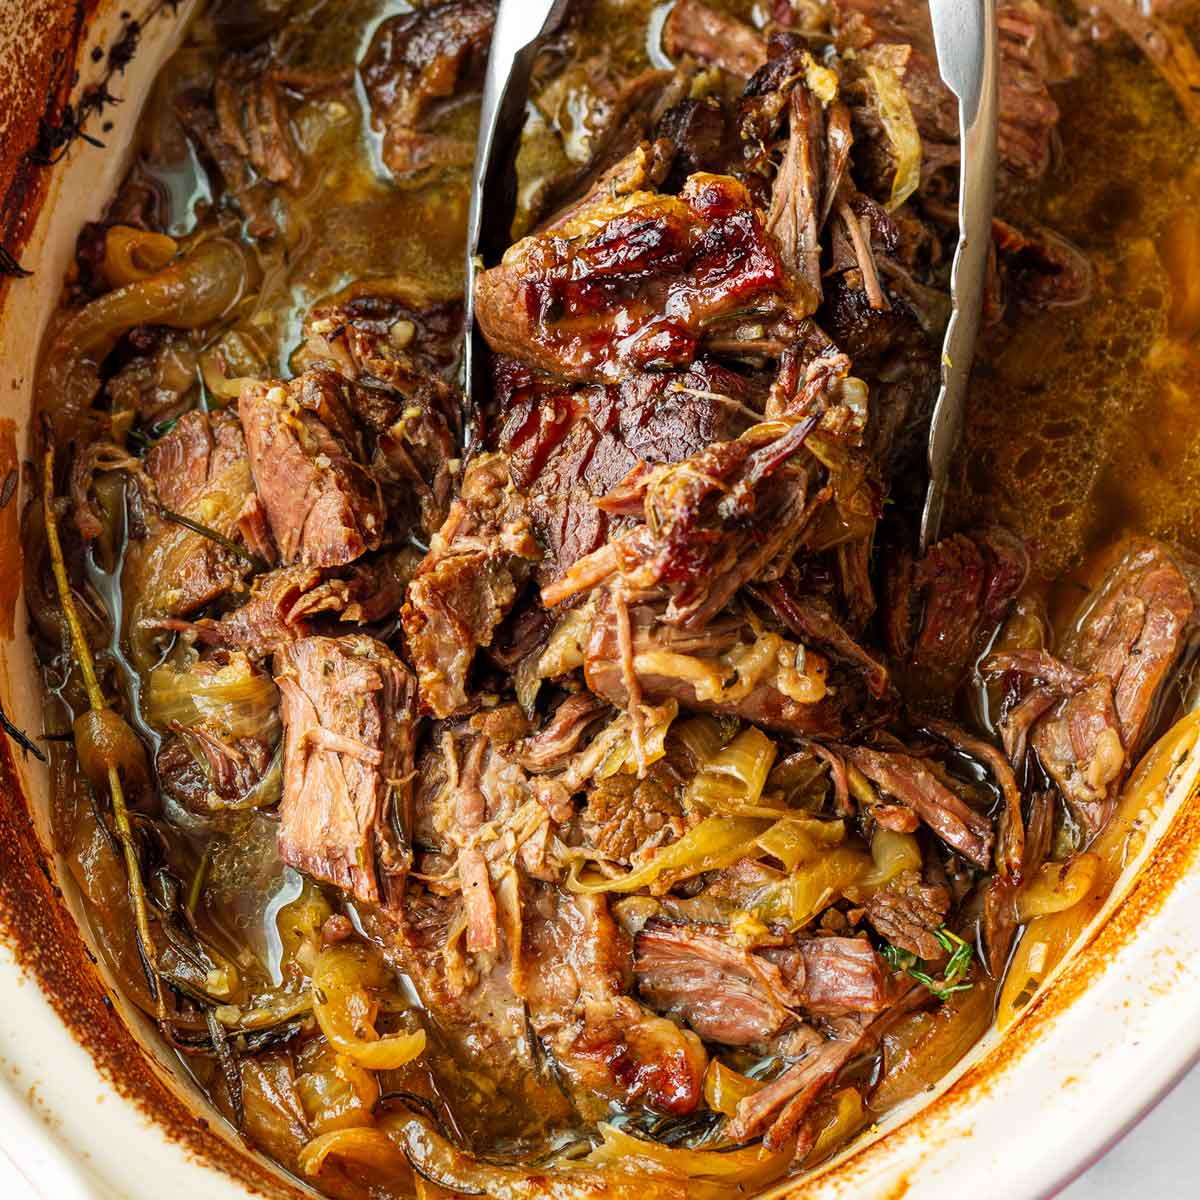
- Shred and top with sugar. Once tender, remove excess liquid if needed and save it for serving. Shred the beef with a fork, then sprinkle with a generous layer of brown sugar on top.
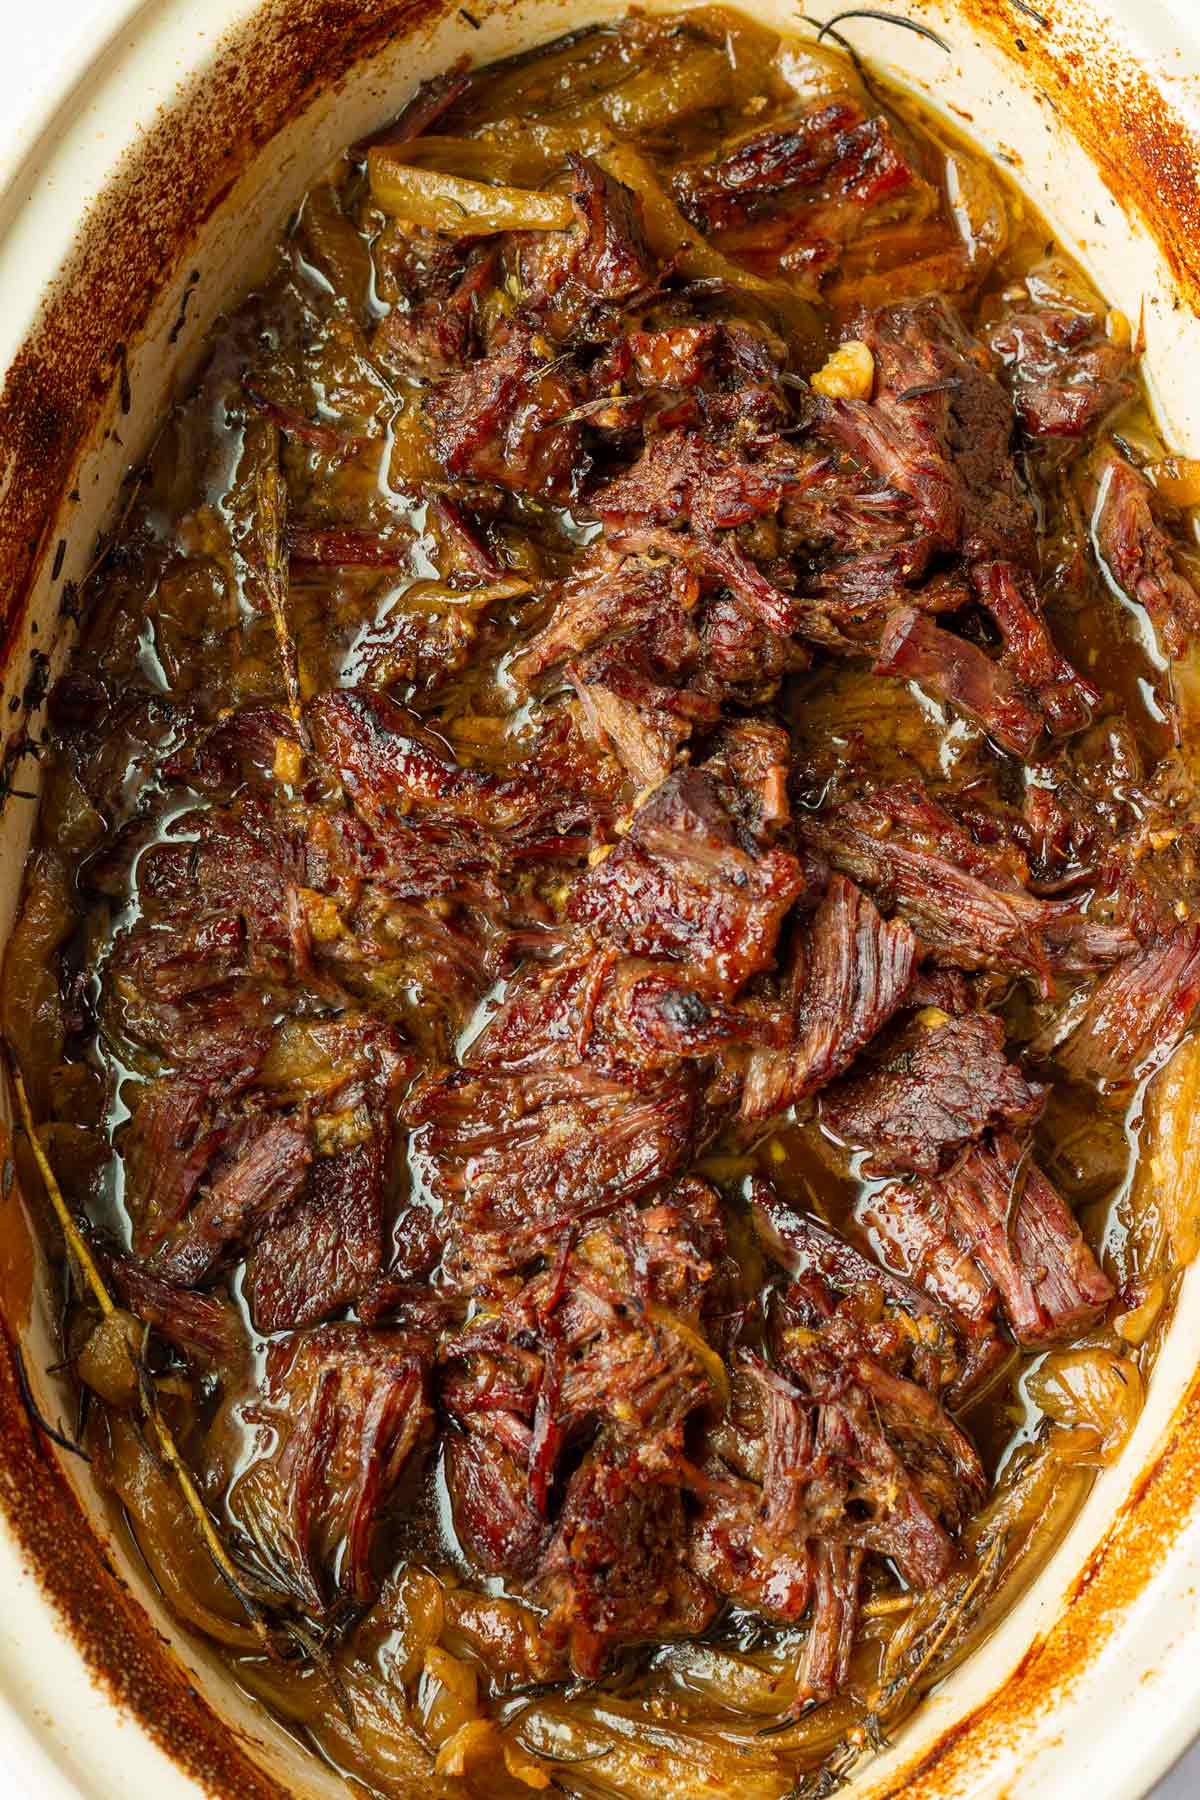
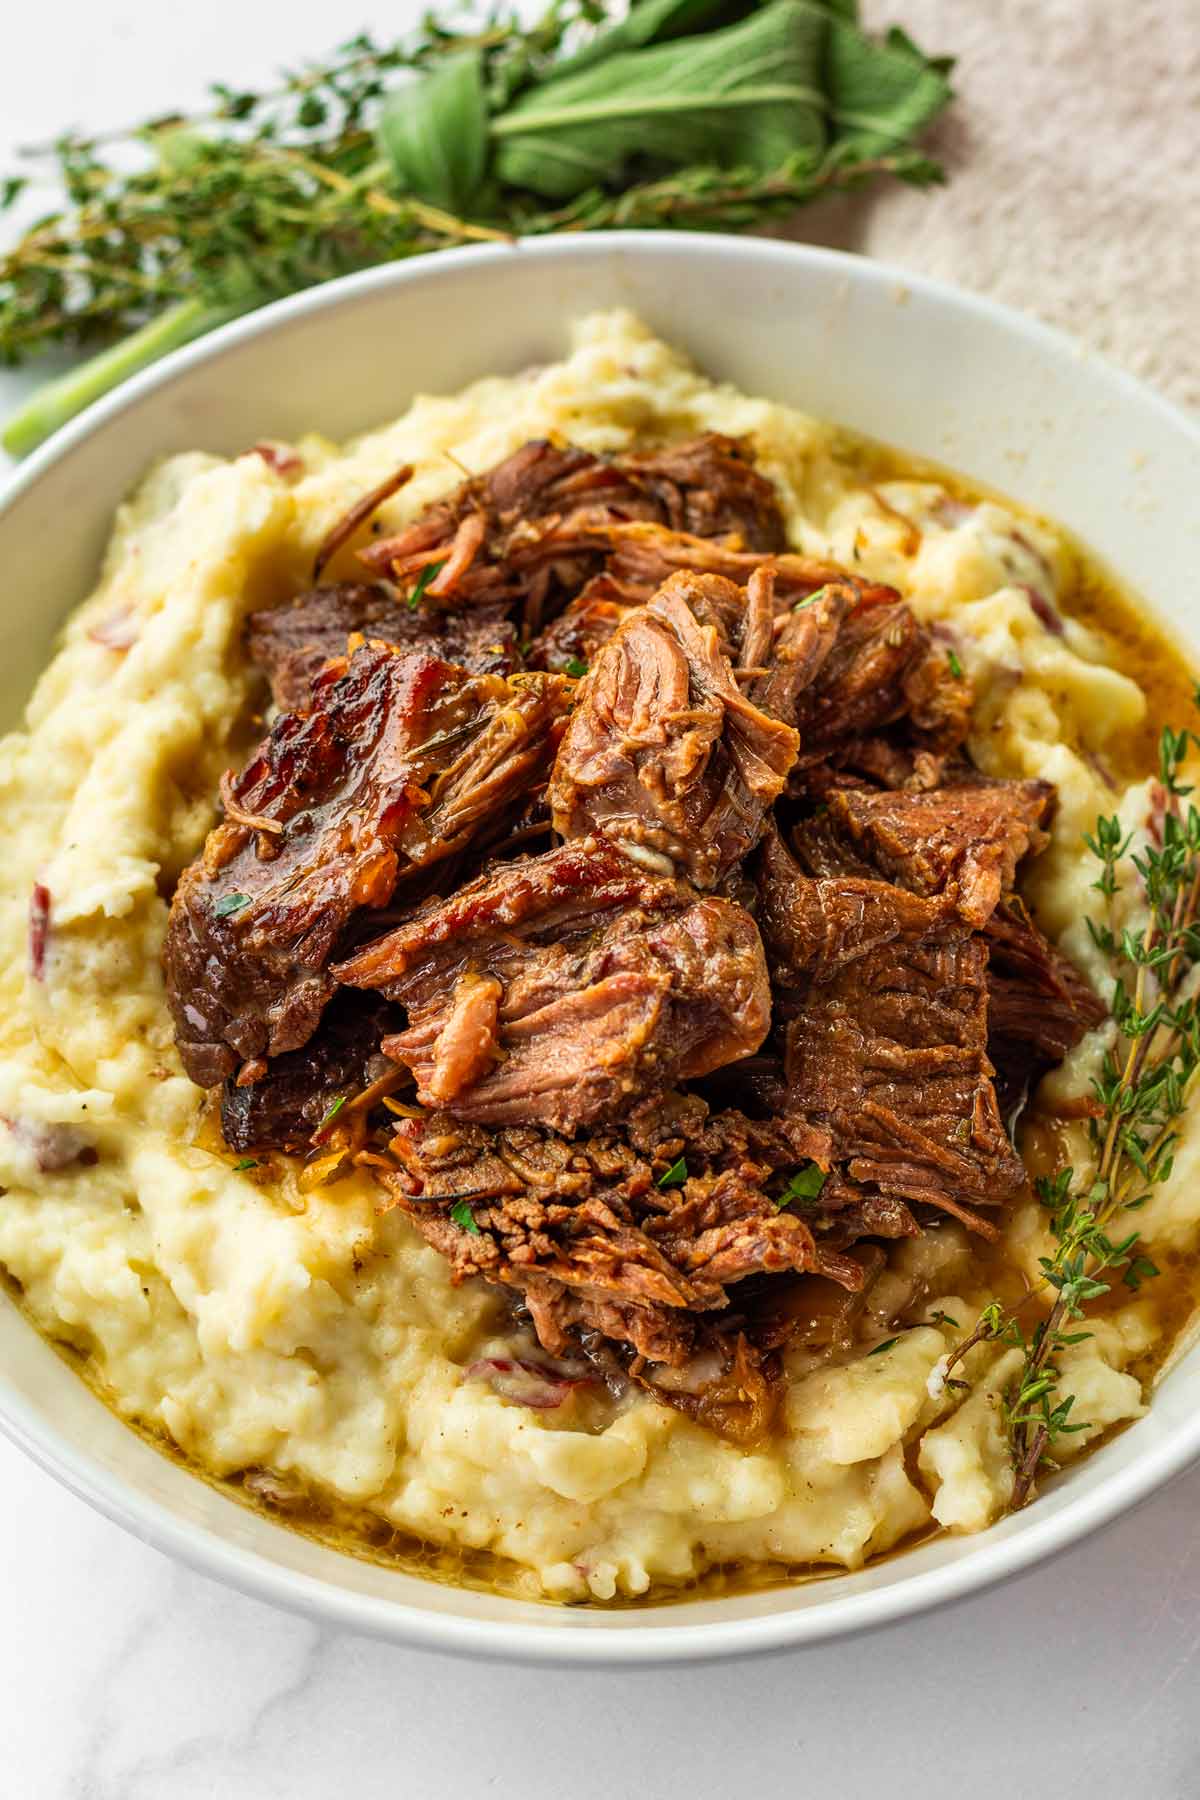
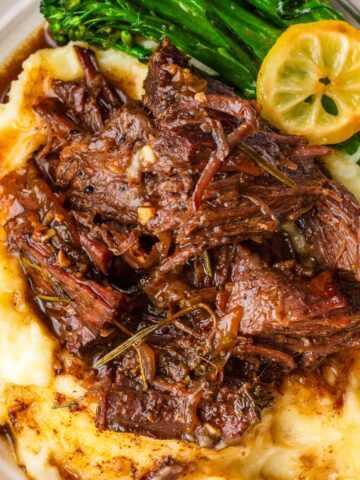
- Broil. Broil for about 3-4 minutes until the edges are nicely browned. Serve your oven baked chuck roast with the reserved juices and your favorite sides!
Tips for Success
- Final caramelization tips: Shred the beef before broiling to increase surface area for browning and get more of those crispy edges.
- Before broiling, discard the herb sprigs and any fatty parts. It will make it easier.
- Bed of onions: Not only does it add moisture and flavor, but also keeps the bottom from burning.
- Cover tightly: This is important! Seal well with a few layers of foil or a tight-fitting lid to trap in moisture and keep the internal temperature consistent. Don’t open or unseal it until it’s ready.
- Encrust with garlic: I really like this step because it adds flavor from the inside out, and it’s especially helpful since there’s no initial searing. But feel free to skip this step if you’re not a huge fan of garlic.
Recipe FAQs
For a smaller 2-pound chuck roast, closer to 3 hours at 325ºF is ideal.
The roast is not done yet since the connective tissue hasn’t fully broken down. Return to the oven and check every 15-30 minutes. To be precise, aim for 195-205°F internal temperature, which is when beef falls apart.
I don’t recommend using a frozen roast, as it will cook unevenly, can’t be seasoned properly, releases extra water that will dilute the braising liquid and significantly increases cook time.
Yes! Transfer the cooking liquid to a saucepan, bring it to a simmer, then whisk in a slurry of 1 tablespoon cornstarch mixed with 2 tablespoon cold water. Simmer until thickened.
Make Ahead, Reheating, Freezing
Make ahead: You can fully cook this chuck roast in the oven a day in advance and reheat it later. Honestly, it often tastes even better the next day!
How to reheat without drying out: Reheat gently in a covered baking dish at 325°F with a splash of the reserved cooking liquid until warm. You can also reheat on the stovetop over low heat.
Freezing: Freeze shredded chuck roast in its own braising liquid. The liquid acts as a protective barrier, helping prevent freezer burn and keeping the meat flavorful and tender when thawed. I always find Souper Cubes to be very convenient. Thaw in the fridge and reheat.
The Best Pairing and Sides
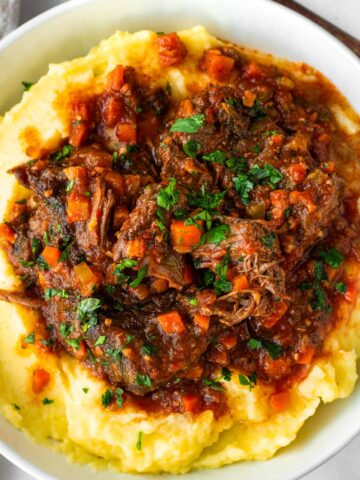
Mashed potatoes: Creamy Mashed Potatoes or Red Mashed Potatoes are perfect for soaking up all the savory juices.
Rice or noodles: Garlic Butter Rice is my go-to! It’s also amazing with buttered egg noodles.
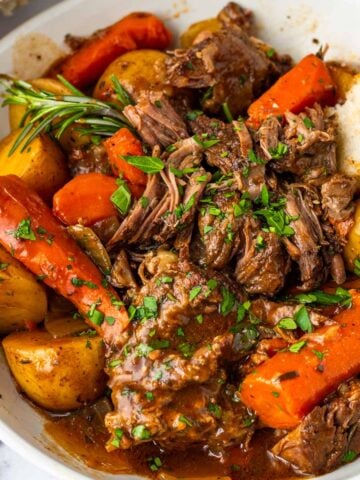
Vegetables: Parmesan Roasted Asparagus, Roasted Rainbow Carrots, or a simple side of roasted broccoli.
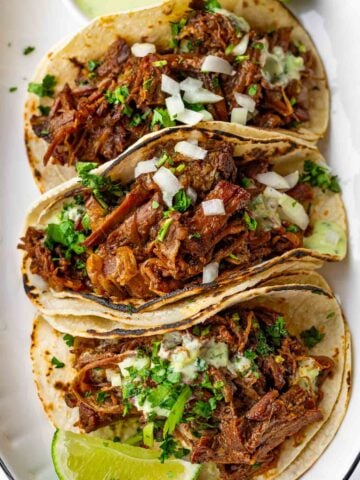
Repurposing leftovers: Use any leftovers or frozen chuck roast to make an easy skillet shepherd’s pie, tacos, or sandwiches.
I’d love to hear from you! If you loved my recipe, please consider leaving a 5-star rating and a comment down below. Sign up for my newsletter and follow along on Instagram, Facebook, or Pinterest
Chuck Roast in the Oven (No Searing!)
Equipment
- 9×13 baking pan or a medium pan that fits everything well
- Aluminum foil about 3 layers
Ingredients
- 3 pounds boneless chuck roast - excess fat trimmed
- 4 cloves garlic, - each cut in half – for encrusting, you should have 8 halves
- Olive oil
- 3 teaspoons Kosher salt
- 1 teaspoon ground black pepper
- 2 medium yellow onions - sliced
- 3 tablespoons unsalted butter - cut into pieces
- 4 sprigs fresh rosemary and thyme
- 2 tablespoons brown sugar - for sprinkling at the end
For the braising liquid:
- 2 cups warm beef broth - microwave it for about 2 minutes
- 2 tablespoons Worcestershire sauce
- 2 tablespoons brown sugar
- 1 teaspoons beef base - I use Better Than Bouillon
- 2 teaspoons fresh rosemary and thyme, minced
- 5 cloves minced garlic
- A pinch of salt and pepper
Instructions
- Preheat oven to 325ºF.
- Season chuck roast: Pat dry the beef well. Using a paring knife, cut 8 deep slits over the chuck roast, then encrust the halved garlic cloves. Season both sides with a few drizzles of olive oil, kosher salt (3 teaspoons) and ground black pepper (1 teaspoon).
- Whisk the braising liquid: In a bowl, mix all the braising liquid ingredients until well combined. Season with a sprinkle of salt and pepper. Set aside.
- Assemble: In a 9×13 baking pan or similar, arrange the sliced onions and nestle in the seasoned chuck roast. Arrange the pieces of butter and fresh sprigs of rosemary and thyme around, gently pressing them down.
- Pour the braising liquid over and around the sides evenly. Cover tightly with 3 layers of aluminum foil or with a tight-fitting lid. Note: This is to trap in all the heat and moisture for best results.
- Cook in the oven at 325ºF for about 3.5 hours or until it’s fall-apart tender. Tip: Avoid opening the lid or the oven door until it’s done, otherwise steam and heat will escape. Tip: If you want it more tender, give it another 15-30 minutes as needed.
- Shred beef: Once it’s done, remove any excess juices and reserve for serving. Then, shred the roast with a fork. The beef shouldn't be fully covered in liquid, only a layer. Season with additional salt and pepper to taste.
- Broil and caramelize: Sprinkle the shredded beef evenly with about 2 tablespoons of brown sugar, or more to taste. Broil in the oven for 2-4 minutes until nicely browned and caramelized on top. Tip: Make sure it doesn't burn, broiling happens fast! I always keep an eye on it.
- Serve over mashed potatoes or your favorites sides, along with the reserved juices.
Video
Notes
- Chuck roast: Look for a well-marbled cut, but trim excess fat to prevent the cooking juices from becoming too oily.
- Using warm beef broth ensures even cooking from the very beginning, which is important since we’re not searing or simmering.
- Onions: I’d recommend yellow onions, don’t use red. They are not only for flavor, they also provide moisture, prevent the bottom of the meat from scorching, and add natural sweetness.
- Cover the pan tightly with multiple layers of foil or a heavy lid. Do not open or unseal the pan until it’s ready to avoid losing moisture.
- Doneness: It’s ready when it’s fall-apart tender. If it’s not tender yet, give it another 15-30 minutes or as needed.
- Do NOT use granulated sugar – it will harden. Use only brown sugar here. Light or dark is fine.
- How long to broil: About 2-4 minutes at the end. Keep an eye on it, as broiling happens very fast!
- Make-ahead: This dish can be made a day in advance and often tastes better the next day. Reheat in the oven at 325ºF or on the stovetop.
- Store in an airtight container in the refrigerator for up to 3 days.
- Freezing: Freeze in the braising juices for up to 3 months. This protects the meat from freezer burn. Thaw in the fridge and reheat on the stovetop or oven.
- Use maple syrup (1:1 swap) instead of brown sugar for warmer flavor notes. Avoid granulated white sugar.
- If fresh rosemary or thyme aren’t available, use a light sprinkle of dried Italian seasoning.
- Thickening of the juices: To make a gravy, whisk a cornstarch slurry (1 tablespoon cornstarch with 2 tablespoons water) into the simmering juices on the stovetop until thickened.


Sari says
My whole family LOVED this recipe. So simple and delicious. I think I’ll try it with a lamb roast. Thanks!!
PATTY says
I really loved the little sweet contrast with the broiling step. I felt it made all the flavors stand out as a whole! Great recipe, thank you very much.
Just make sure to not walk away while it’s in the broiler because the sugar can burn if left unattended, but I imagine it depends on how far from the broiler you place the pan.
marjorie says
Could you make in a dutch oven?
Tania says
Yes you can!