
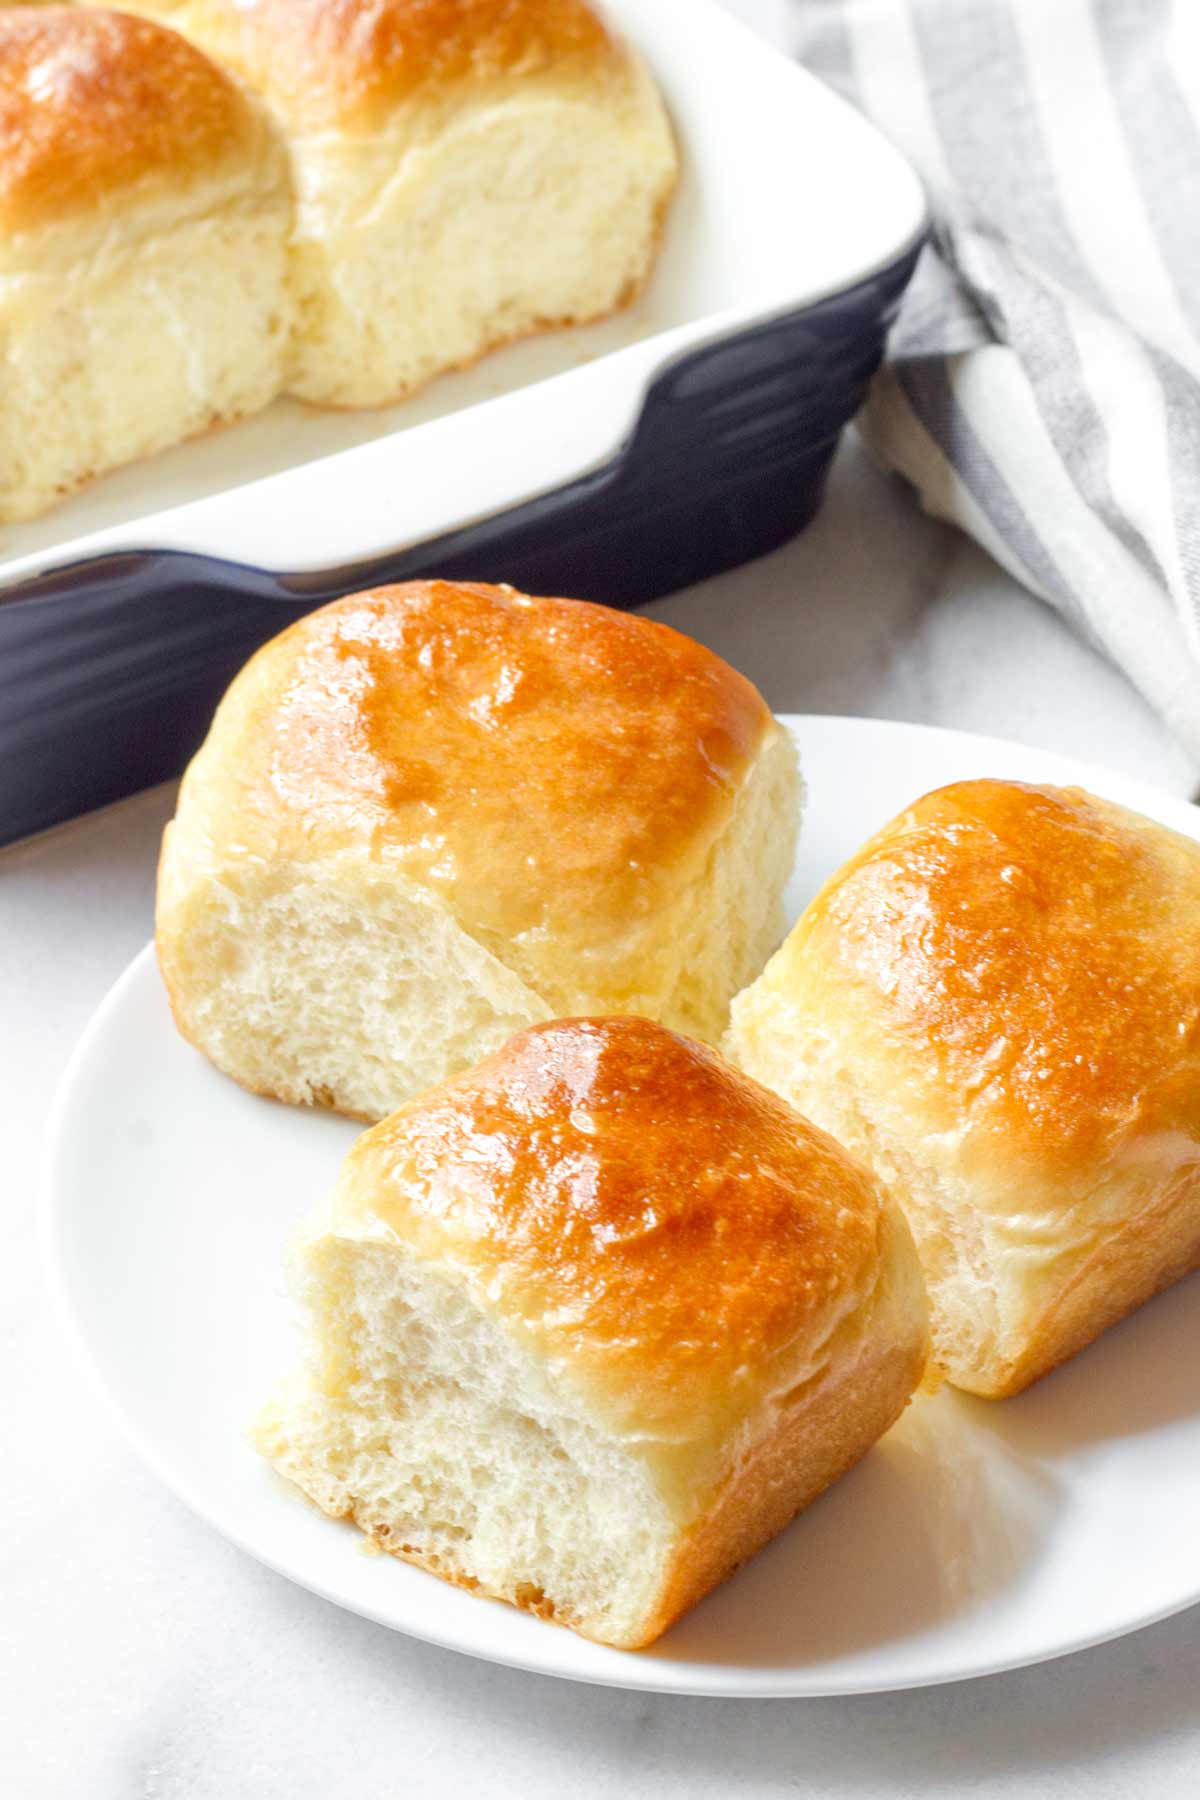
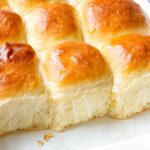
These soft Honey Butter Rolls are the ultimate dinner rolls! Pillowy soft, fluffy, and incredibly delicious.
To make them even better, we brush them with whipped honey butter for that amazing finishing touch. These honey butter rolls are also make-ahead and freezer-friendly.
Below I share all the tips and tricks to ensure you bake the perfect rolls at home, even if you’ve never baked bread before!

These honey butter rolls are seriously my weakness. We can finish the entire thing in one sitting, no kidding. They are especially good with whipped honey butter (recipe included below!).
These are my favorite dinner rolls of all time, hands down! We love making honey butter rolls for the holidays, but they also make an appearance on my dinner table on weekends, especially when I’m making my Red Wine Braised Beef, Beef Stew or Dutch Oven Pot Roast. OrThe perfect pairing!
Baking bread at home may seem a bit intimidating, but fear not. All you need is time for the dough to rise, and lots of tips and tricks. Today, I’m sharing EVERYTHING you need to know to make the best honey butter rolls at home!
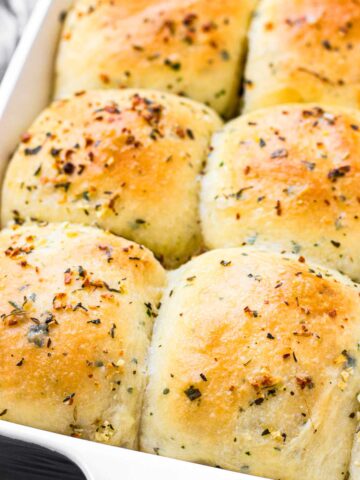
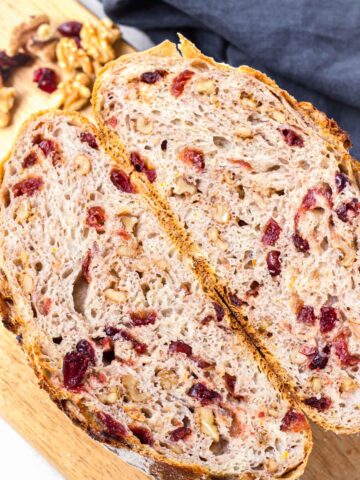
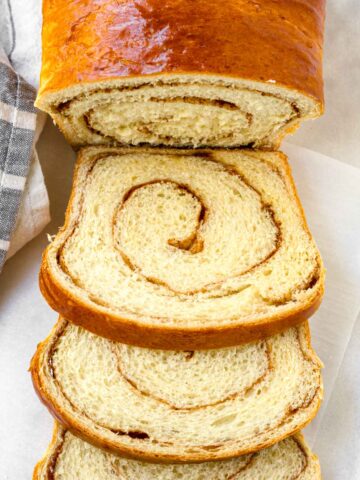
If you’re looking for a beginner bread recipe, make this super easy No-Knead Cranberry Walnut Bread (seriously zero kneading required!). Other soft breads we like: Garlic Herb Dinner Rolls, Apple Cinnamon Rolls, and Cinnamon Swirl Bread.
Why we love these dinner rolls so much:
- Super soft, fluffy, and tall: The trick is using the right amounts of bread flour (not all-purpose), whole milk, butter, and eggs. Making a rich dough is essential.
- The perfect balance between sweet and savory.
- Brushed and served with homemade whipped honey butter. It’s the perfect finishing touch!
- Make-ahead and freezer friendly!
Jump to:
Secrets to Making Soft, Tall and Fluffy Rolls
There are 4 key things to remember in order to make the softest, fluffiest, and tallest honey butter rolls ever:
- Use bread flour rather than all-purpose, as it has a higher protein content, which produces more gluten. This is what gives bread that beautiful texture and height. Bread flour is readily accessible at grocery stores.
- Use whole milk, not skim or 2 percent. Whole milk, plus melted butter and eggs will make a rich dough, which is essential for flavor and texture.
- Give it enough time to rise. During the 2-3 hours it needs to rise, amazing flavors develop and the yeast does its magic to ensure the bread turns out soft and airy.
- Do not over-knead the dough. Over-kneading develops too much gluten, which will make your bread chewy and tough.
Ingredient Notes
Here are helpful notes about each ingredient I used, for reference. As always, the specific ingredient quantities can be found in the recipe card down below.
- Whole milk, warmed to 110 to 115 degrees F (use a thermometer). Do not use non-fat or low-fat milk.
- Active dry yeast: You’ll need a standard 0.25 ounce package, equivalent to 2 ¼ teaspoons.
- Granulated sugar: Adds a touch of sweetness to the dough, and is also used to activate the yeast.
- Eggs: Add richness to the dough. You’ll need 2 large eggs.
- Unsalted butter, melted and cooled. Just like the eggs, butter adds richness and flavor.
- Salt: Helps to balance out the sweetness and bring out all the flavors.
- Honey: You’ll need about ⅓ cup to make these honey rolls.
- Bread flour: With bread flour, the bread will turn out exceptionally better than if you use all-purpose flour.
- For the honey butter, you need softened unsalted butter and honey to brush over the rolls and to serve.
Step-by-Step Instructions
Making these honey butter rolls at home is quite simple actually. This recipe is also make-ahead and freezer friendly. I promise, your house will smell like the coziest bakery in town!
Step 1 | Activate the yeast
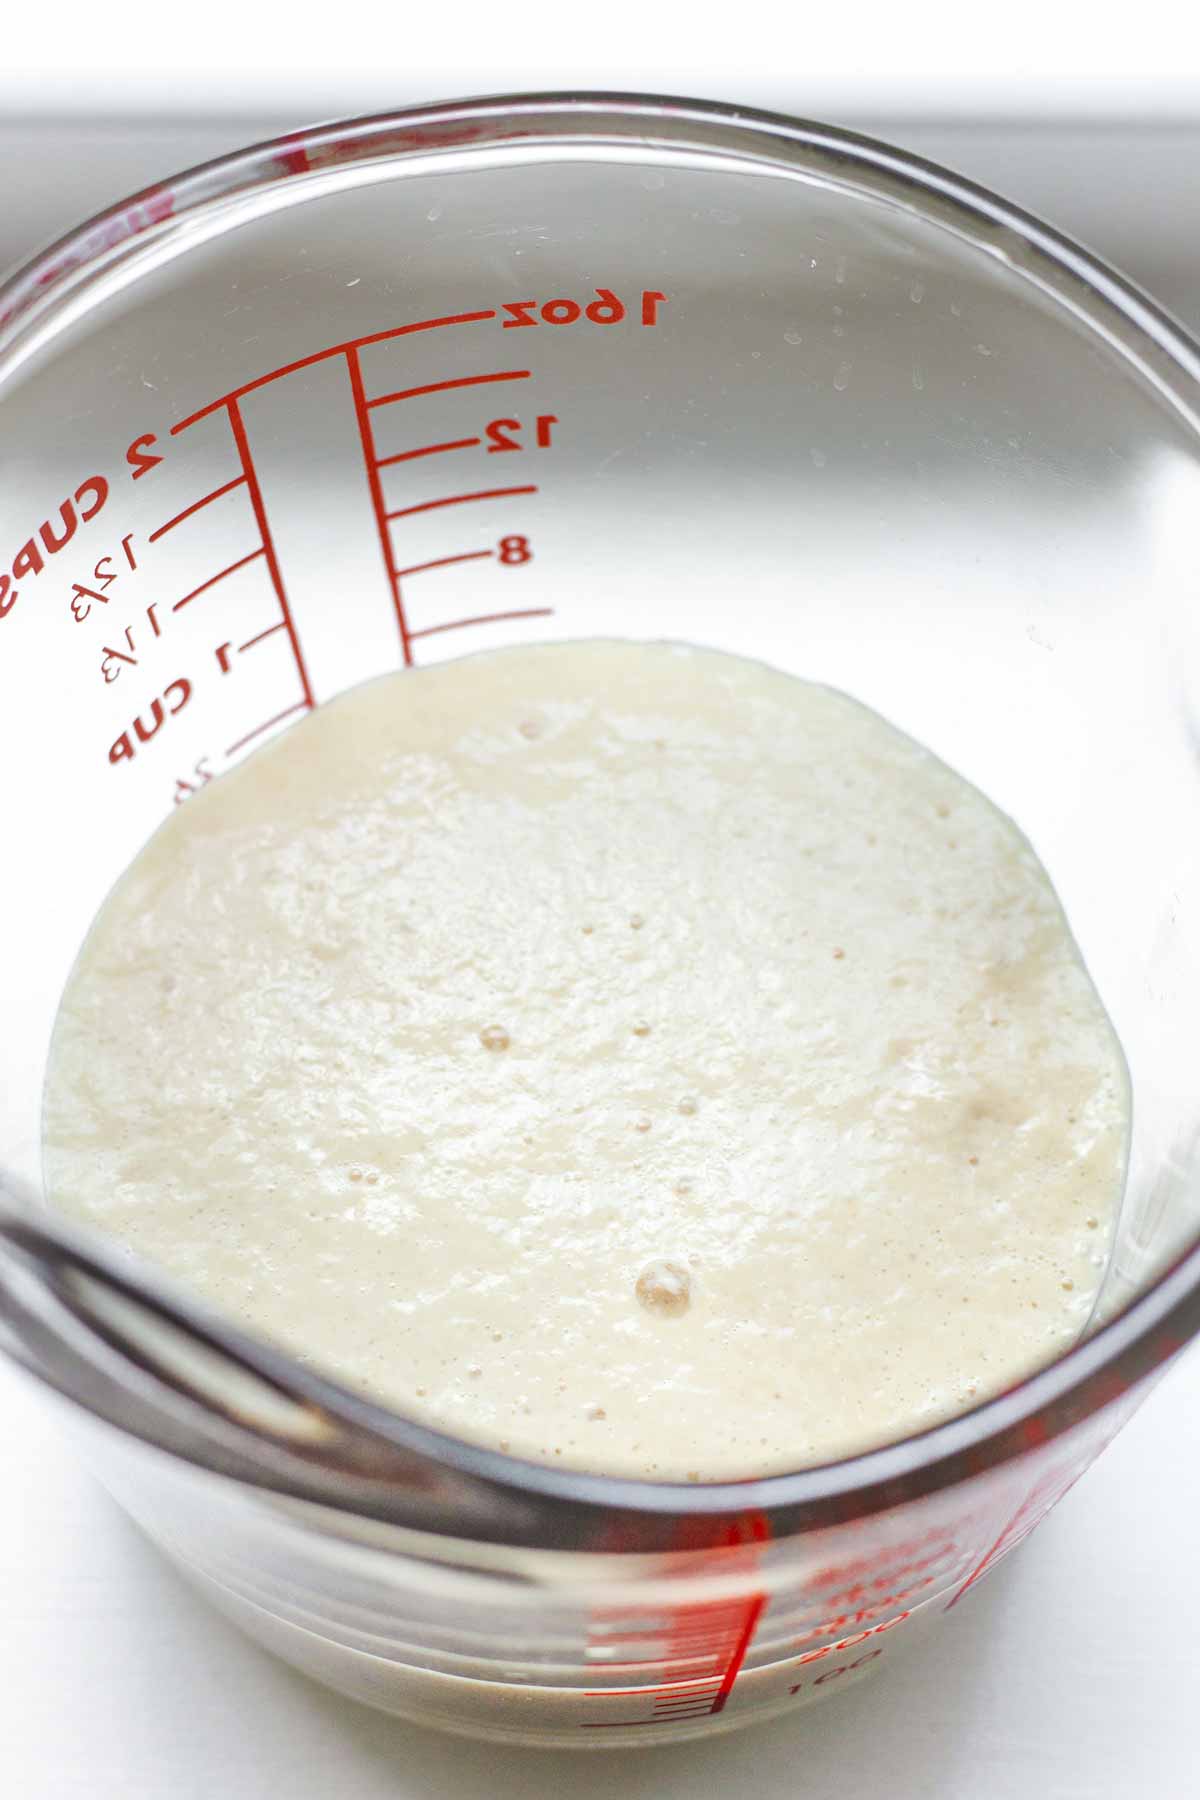
In the bowl of a stand mixer or in a separate bowl, dissolve the yeast and sugar with the warm milk (110 to 115 degrees F). I usually microwave the milk and measure the temperature with a kitchen thermometer. Let it sit for 10 minutes until it foams up at the top. If it doesn’t, discard and start over. This often means the yeast is expired.
Step 2 | Make the dough and let it rise
I use a stand mixer to knead the dough. Set up the dough hook attachment. To the yeast mixture, add the eggs, ¼ cup melted butter, honey, and salt and mix over medium-low speed. Increase to medium speed, and add flour 3 cups flour, 1 cup at a time. Add the remaining flour in ¼ cup increments as needed, until a dough forms. Mix over medium-high speed until the dough comes together and pulls away from the bowl, about 2 minutes. I ended up using a little over 3 ½ cups. The dough should be slightly sticky, moist, and manageable.
Then, transfer to a floured surface and knead by hand about 3 to 4 minutes, sprinkling more flour as necessary. The dough is ready when it’s moist and springs back slowly when poked. Do not over-knead.
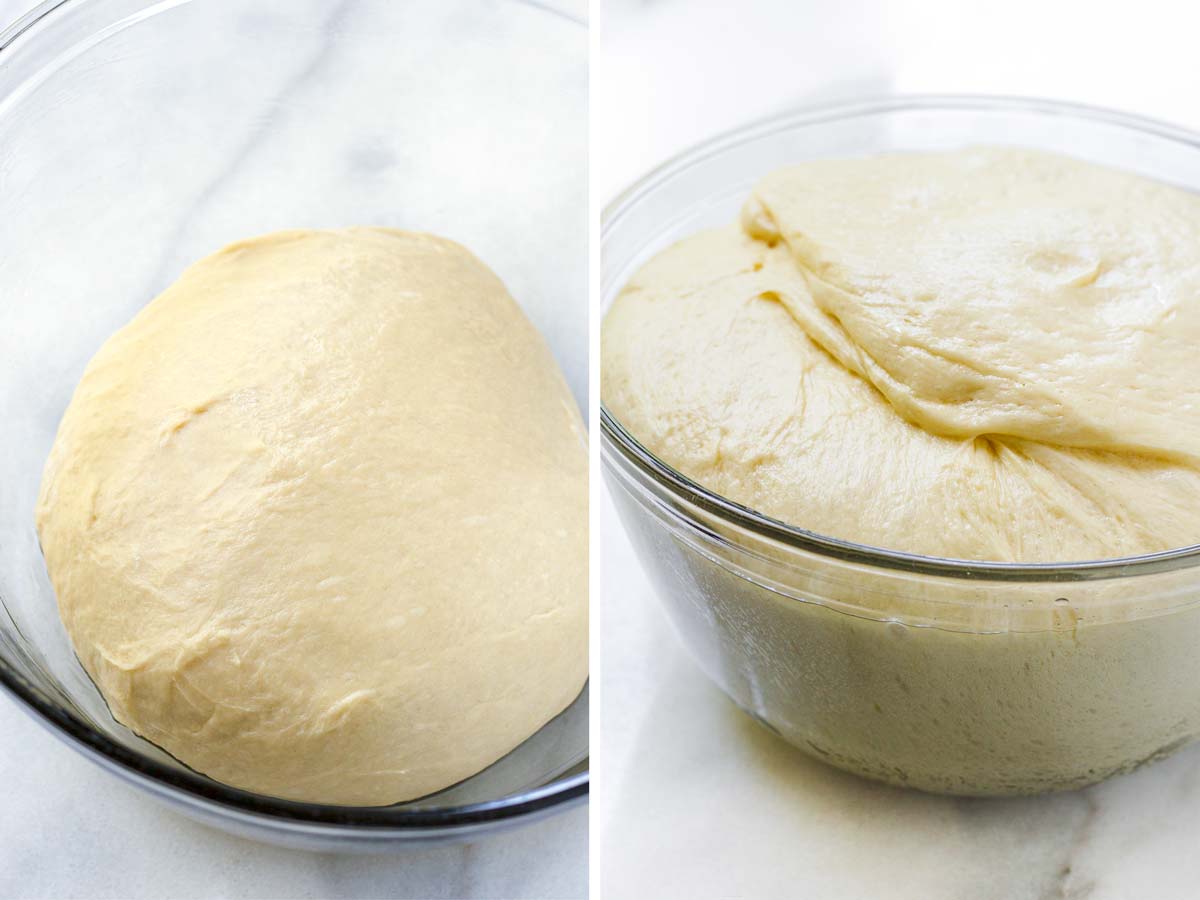
Form into a ball and place on a lightly oiled bowl (olive or vegetable oil), making sure the dough is coated in oil too. Cover bowl with plastic wrap and let it rise in a warm environment for about 1-2 hours or until doubled in size.
Step 3 | Shape into balls and let them rise again
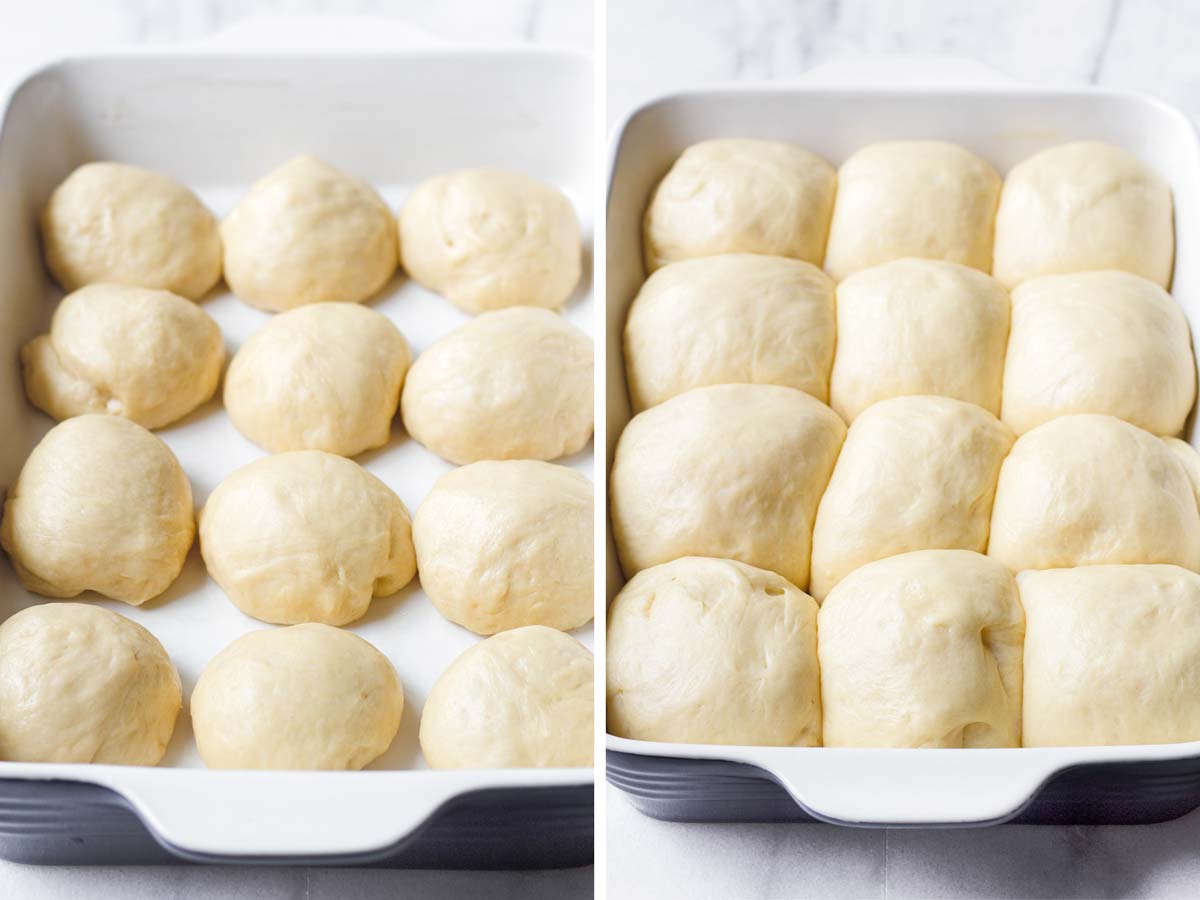
Punch the dough to remove excess air. Using a bench scraper, cut the dough into 12 equal parts. Shape each roll by pulling and stretching the outer edges into the center to form a ball, pinching at the bottom to seal the seams (more details under “How to Shape Dinner Rolls” section below).
Arrange in a lightly greased 9×13 inch baking pan, pinched side down. Cover and let them rise in a warm environment again for 1 hour or until puffed up. Meanwhile, preheat the oven to 350 degrees F.
Step 4 | Bake
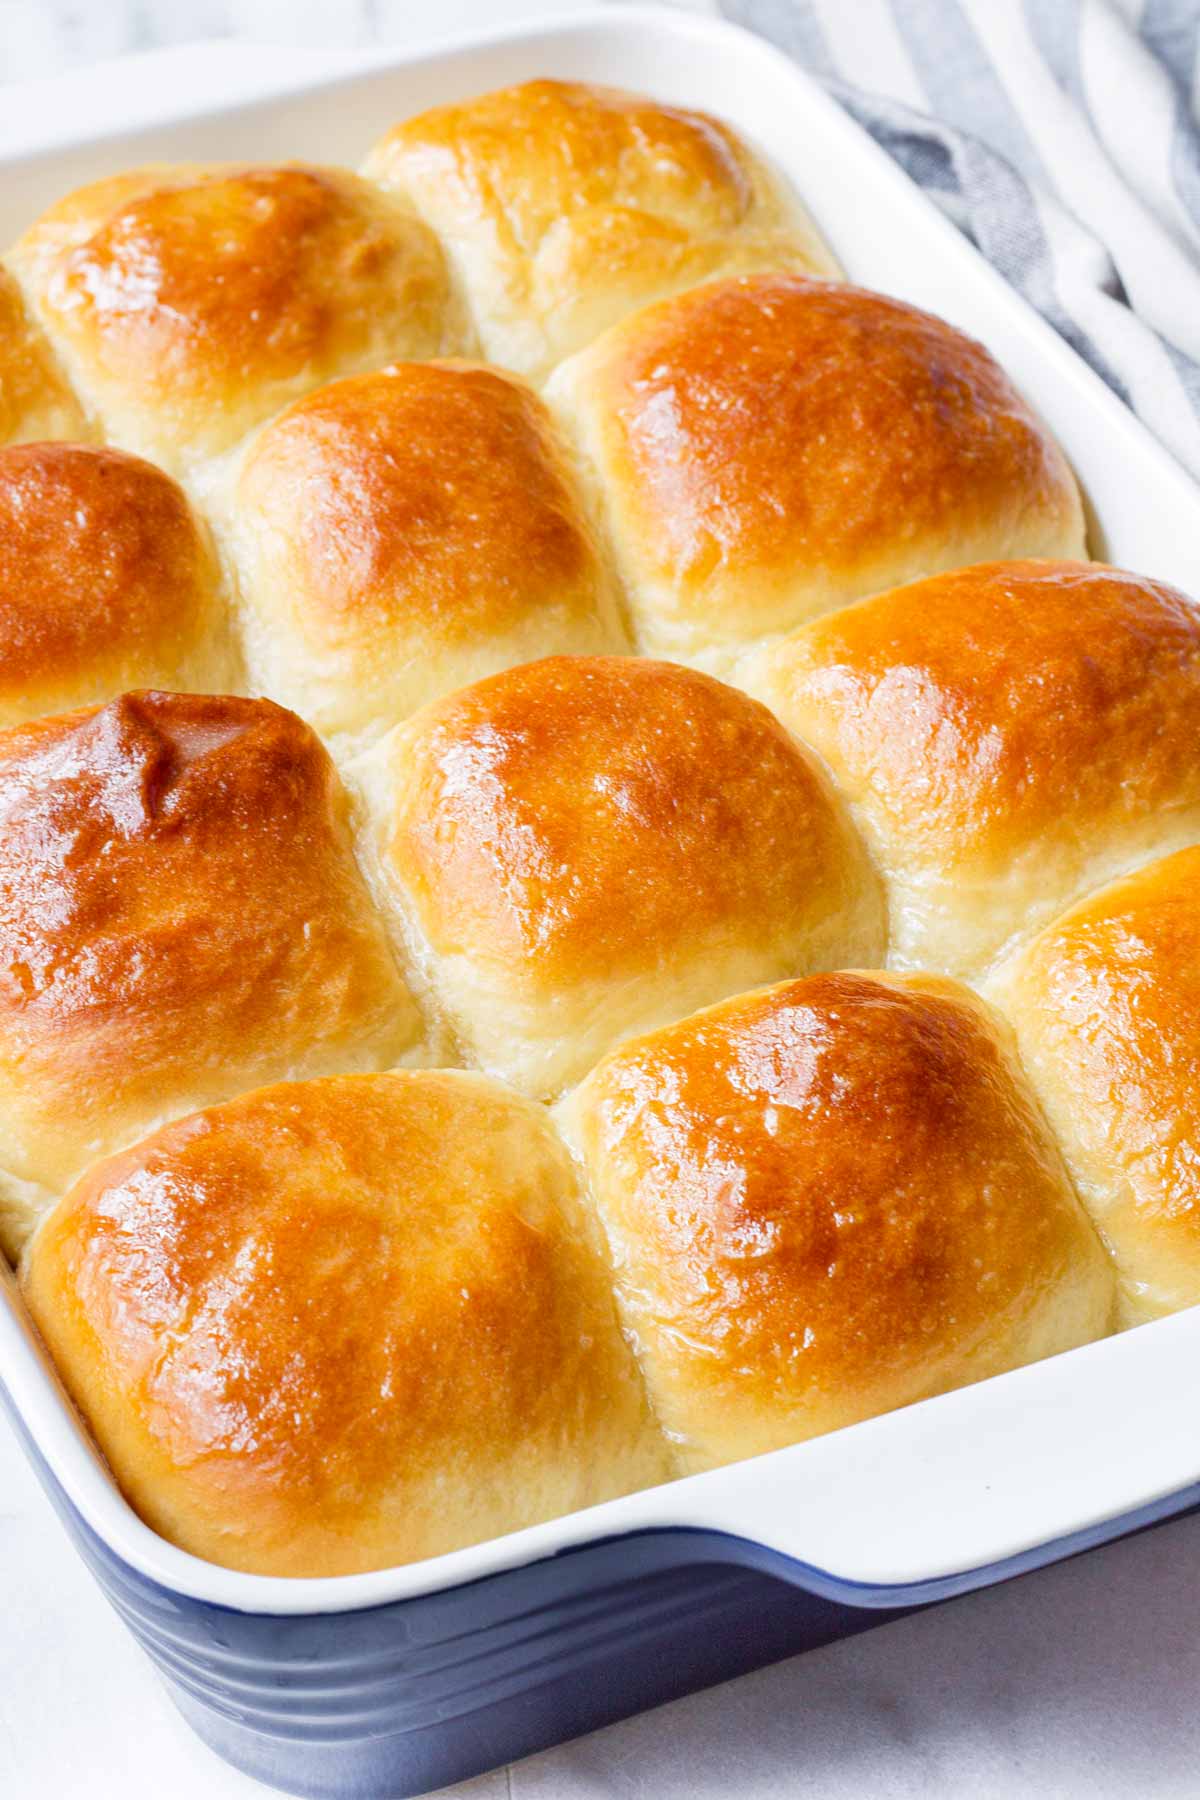
Once they are puffed up, brush with melted butter all over the top. Bake the honey rolls for 15 to 20 minutes until golden brown on top.
Step 5 | Brush with whipped honey butter
While the bread is baking, make the honey butter by whipping softened butter with honey over medium-high speed until light and fluffy. Once the buns come out of the oven, brush them with some of the prepared honey butter. Let cool slightly and serve with more of that delicious honey butter on the side.

How to Shape Dinner Rolls
To ensure the dinner rolls turn out extra fluffy and airy, follow this method when shaping them:
- Divide the dough into 12 equal parts. I usually divide it into half first, and then each half into 6 pieces. It’s just easier, I think.
- Take each piece, and pull and stretch the outer edges into the center to form a ball, pinching at the bottom to seal the seams. The top should be smooth. This step adds some air inside, resulting in light and fluffy rolls.
- Place the pinched side down on the baking pan.
Make Ahead Instructions
As with most bread recipes, these honey butter rolls take some to prepare because they need to rise for about 3 hours total. We’re all busy and sometimes it’s hard to find the time. Luckily, you can make these honey rolls in advance!
Here’s how: Once the rolls are shaped and arranged on the baking pan (before the second rise), cover and refrigerate for up to 24 hours. When ready to bake, remove from the fridge and let it sit at room temperature until puffed up. Then, gently brush the tops with melted butter and bake as directed.
As a bonus, while the honey butter rolls refrigerate, flavors develop even more, resulting in extra delicious bread. it’s a win-win!
How to Freeze
Shape the dough into balls and place them in the baking pan. Cover tightly with foil and freeze for up to 2 months.
When ready to make, let thaw and rise at room temperature until puffed up. This should take a few hours. Once risen, brush with melted butter and bake as directed.
Quick tip: Once they are frozen, you can also remove them from the pan and freeze each roll individually in a resealable bag. This is great if you only want to bake a few rolls at a time.
The Finishing Touch: Whipped Honey Butter
Whip softened butter with some honey to taste over medium-high speed until evenly combined and fluffy. Spread the prepared butter over the rolls once they come out of the oven, and use more of it for serving later. Hey, these are honey butter rolls after all!
If you forgot to take the butter to soften at room temperature, pop it in the microwave oven 10 seconds at a time until softened. Make sure it doesn’t melt though.
More Bread Recipes
If you love baking easy bread recipes at home, give these a try! These recipes are great ways to use up any leftover bread flour.
Recipe FAQs
I’d highly recommend using bread flour instead of all-purpose so you get extra soft, fluffy, airy, and tall honey butter rolls. If you can’t find bread flour, all-purpose will work too, but may turn out a bit denser than desired.
When it comes to baking bread, the exact amount of flour can vary. For this recipe, start with 3 cups of flour, and then add more in ¼ cup increments, mixing and kneading until a slightly sticky, moist, and manageable dough forms. I usually end up using just a little over 3 ½ cups of flour.
Dissolve the yeast in warm milk and sugar. Let it sit for 10 minutes. If it foams up, the yeast is good. If not, discard and start over with fresh yeast.
It should be doubled in size. Alternatively, to be completely sure, try the “poke” test: poke the risen dough with your finger (about 1 inch) and if the indentation stays, it’s ready. If it springs back, it needs more time.
This recipe was originally published in 2018 and updated in November 2024.
Tips for Success
- Make sure the milk is between 110 to 115 degrees F warm. Use a thermometer. If it’s too cold, the yeast will not activate. If it’s too hot, the yeast will die.
- Activating yeast: If the yeast doesn’t foam up in step 1, it means it’s no longer good. Discard and start over with fresh yeast.
- The amount of flour can vary, but should be between 3.5 to 4 cups. You’re looking for a dough that is slightly sticky and moist, yet manageable. Always measure the flour by spooning into a measuring cup and leveling it.
- Allow the dough to rise in a warm environment. I use the “microwave method.” See notes in recipe card below for instructions on how to do this.
- How to shape rolls: Pull and stretch the outer edges into the center to form a ball, pinching at the bottom to seal the seams. The top should be smooth. This step adds some air inside, resulting in light and fluffy rolls.
- Be sure to brush buns with melted butter before baking so they turn out golden brown. Also, brush with whipped honey butter (recipe below) as soon as they come out of the oven so they get that shiny top.
I’d love to hear from you! If you loved my recipe, please consider leaving a 5-star rating and a comment down below. Sign up for my newsletter and follow along on Instagram, Facebook, or Pinterest
Honey Butter Rolls (Super Soft)
Ingredients
- 1 cup warm whole milk - warmed to 110 to 115 degrees F
- 1 teaspoon granulated sugar
- 1 0.25 ounce package active dry yeast - equivalent to 2 ¼ teaspoons
- 2 large eggs - at room temperature
- ¼ cup unsalted butter, melted and cooled
- ⅓ cup honey
- 1 teaspoon Kosher salt
- 3 ½ to 4 cups bread flour, spooned and leveled
- Olive oil or vegetable oil - for greasing the bowl
- Melted butter for brushing - plus more for greasing the pan
Whipped Honey Butter
- 1 cup unsalted butter, softened
- ½ cup honey
Instructions
- Activate the yeast: Pour warm milk (110-115 degrees F) into the bowl of stand mixer or in a separate bowl. Add sugar and yeast. Stir, and let it stand for about 10 minutes until it foams up. If it doesn't, discard and start over with fresh yeast.
- Set up the dough hook attachment in the stand mixer. To the yeast mixture, add the eggs, ¼ cup melted butter, honey, and salt. Mix over medium speed until evenly combined.
- With the mixer on medium speed, gradually add flour 3 cups flour, 1 cup at a time. Add the remaining flour in ¼ cup increments as needed, mixing over medium-high speed until the dough comes together and pulls away from the bowl, about 2 minutes or so. I ended up using a little over 3 ½ cups of flour. At this point, the dough should be slightly sticky, moist, and manageable.
- Transfer dough to a floured surface and knead by hand (use the lower palm of your hands) for about 3 to 4 minutes, sprinkling more flour as necessary. The dough is ready when it’s moist, slightly sticky, and manageable, and should spring back slowly when poked. Do not over-flour or over-knead.
- Form into a ball and place on a lightly oiled large bowl (olive or vegetable oil are fine), making sure to coat the dough with oil as well so it doesn’t dry out. Cover bowl with plastic wrap and let it rise in a warm environment for about 1 to 2 hours, or until doubled in size. Tip: How to create a warm environment – microwave a cup of water until the microwave oven is warm, about 1-2 minutes. Turn it off. Immediately place the dough, close the door, and let it rise. You can leave the cup of water inside.
- After it’s doubled in size, punch down the dough and transfer to a clean non-floured surface. Cut into 12 equal parts. Tip: I like to cut the dough in half, and then each half into 6 equal pieces.
- Shape rolls: pull and stretch the outer edges of the dough into the center to form a ball, pinching at the bottom to seal the seams. Arrange on a lightly greased 9×13 in baking pan, pinched side down.
- Cover the pan with plastic wrap and let it rise for another 1 hour in a warm environment, until puffed up. While the dough is rising, preheat oven to 350 degrees F.
- Once the dough has puffed up, gently brush the top with some melted butter. Bake for about 15-20 minutes, or until golden brown on top.
- Meanwhile, make the whipped honey butter: In a mixer, whip the softened butter with honey over medium-high speed until fluffy and combined.
- Once the buns come out of the oven, brush them with some of the prepared honey butter. Let them cool slightly and serve with more of that delicious honey butter on the side. Enjoy!
Notes
- How to create a warm environment for the dough to rise: Microwave a cup of water until the microwave oven is warm inside, about 2 minutes. Turn it off. Immediately place the covered bowl with the dough and close the door. You can leave the cup of water inside.
- How to tell if the dough is done rising (first rise): It should be doubled in size. Or use the “poke” test: poke dough with your finger (about 1 inch deep). If the indentation remains, it’s ready. If not, give it more time.
- Kneading by hand: If not using a stand mixer, you can totally knead it by hand on a floured surface (be careful not to overuse the amount of flour though). Knead with the bottom of the palm of your hands until it’s smooth and elastic, but still slightly sticky and moist.
- How to shape rolls: Pull and stretch the outer edges into the center to form a ball, pinching at the bottom to seal the seams. The top should be smooth. This process adds some air inside, resulting in light and fluffy rolls.
- Make ahead: Shape the rolls up until Step 6 in the baking pan. Cover with plastic wrap and refrigerate overnight. The next day, let them sit on the counter at room temperature for about 2 hours, or until doubled in size. Then, bake as directed.
- Freezing: Shape the dough into balls and arrange on a baking pan. Cover tightly with foil and freeze for up to 2 months. Thaw and let rise at room temperature until doubled in size. Bake as directed.
- Bread flour: All-purpose flour can be used, but I’d highly highly recommend bread flour for best results.


Carolyn says
I’m not really a bread lover, but these rolls are awesome! I don’t think my husband and I will have any issues finishing these rolls! I can’t stop eating them! Thanks for an awesome recipe… it was really easy to follow!!!
Marilyn Bay Area says
There is not a thing I would change about this recipe, except perhaps to just make more of them!
Tania says
Thank you!
Arzeena says
Can I use maple syrup instead of honey in the dough?
Tania says
Hi! I don’t see why not!
Jcook says
Can you double the recipe or best to make 2 batches?
First time bread maker…
Jude says
How do you measure your honey? Do you use a liquid or dry measuring cup? It’ll make a difference in the final product, so I want to make sure I measure the way you do!
Tania says
Hi there! I always use a dry measuring cup for honey.
MamaBearHolderman says
Can you do anything to prep them the day before? Like make up the dough and cook them the next day?
Kate says
These are the best rolls I e ever made. I made them a few days ahead for Thanksgiving. Going to freeze them then after thawing add the honey butter on top to warm in oven. Great recipe!
Damilola says
Very yummy recipe. I’m addicted😂😂. Love from Nigeria 😘
Larisa says
These are amazing! I made them for Thanksgiving and am doing them again today for Easter. So soft, fluffy, and the density is PERFECT!
LaKisha says
Hello, have you made this recipe without honey? If so, what is the adjusted recipe?
Tania says
Hi LaKisha! I haven’t made this recipe without honey, so I can’t say for sure.
Stephanie says
Can I use 2% milk?
Tania says
Hi Stephanie! For best results, use whole milk. The fat in the milk helps with flavor, and creates a softer and richer texture.
Betty Pippin says
I have tried these twice. Both times they fall after the second time of rising. What am I doing wrong.
Tania says
Hi Betty! Sometimes that can happen when it’s “punched.” Are you using plastic wrap to cover the buns during the second rise? If so, is the wrap pulling on the buns? This can cause them to deflate.
Christine O'Brien says
Very good rolls .. dough is sticky but that’s what makes them so fluffy. These are large rolls! Thank you for the recipe.
Tania says
Thank you, Christine!
Karen says
Can you do this on the dough setting on a bread machine?
Tania says
Hi Karen – Unfortunately I haven’t tested this recipe on a bread machine, so I’m not sure if you can. If you decide to make it with a bread machine, let me know how it goes! 🙂
Dawn Dubé says
These sound yummy! I’m assuming they would be better freshly cooked- but have you ever served a day old?
Tania says
Day old buns are, like you said, not as great as freshly baked. But, I’ve kept leftovers for the next day or 2, and they are still yummy! Just be sure to let the buns cool COMPLETELY and then cover the pan with plastic wrap. Store it in a dry and cool environment – your countertop should be fine. When ready to eat/serve, I like to microwave them for a few seconds to warm them up.
Jo says
These turned out great, so tall and fluffy. Will be my go to recipe.
Tania says
Thank you, Jo! I’m so glad you liked these buns!
Stacia says
If I don’t have bread flour can I just add cornstarch to make it? Has anyone done that did it turn out okay?
Natalie says
These rolls look so fluffy and delicious!
Tania says
thank you Natalie!