
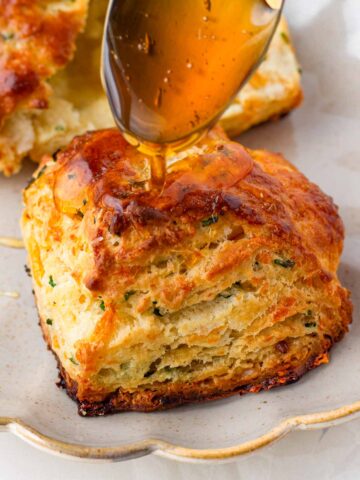
Learn how to make the best buttermilk biscuits at home! These tender and flaky buttermilk biscuits are very easy to make, and will make your house smell like a bakery.
I like serving them for breakfast or as a side with dinner. I also love using it as a topping for chicken pot pie. It’s so, so good!
Here I share all the tips and tricks to make the best biscuits from scratch!
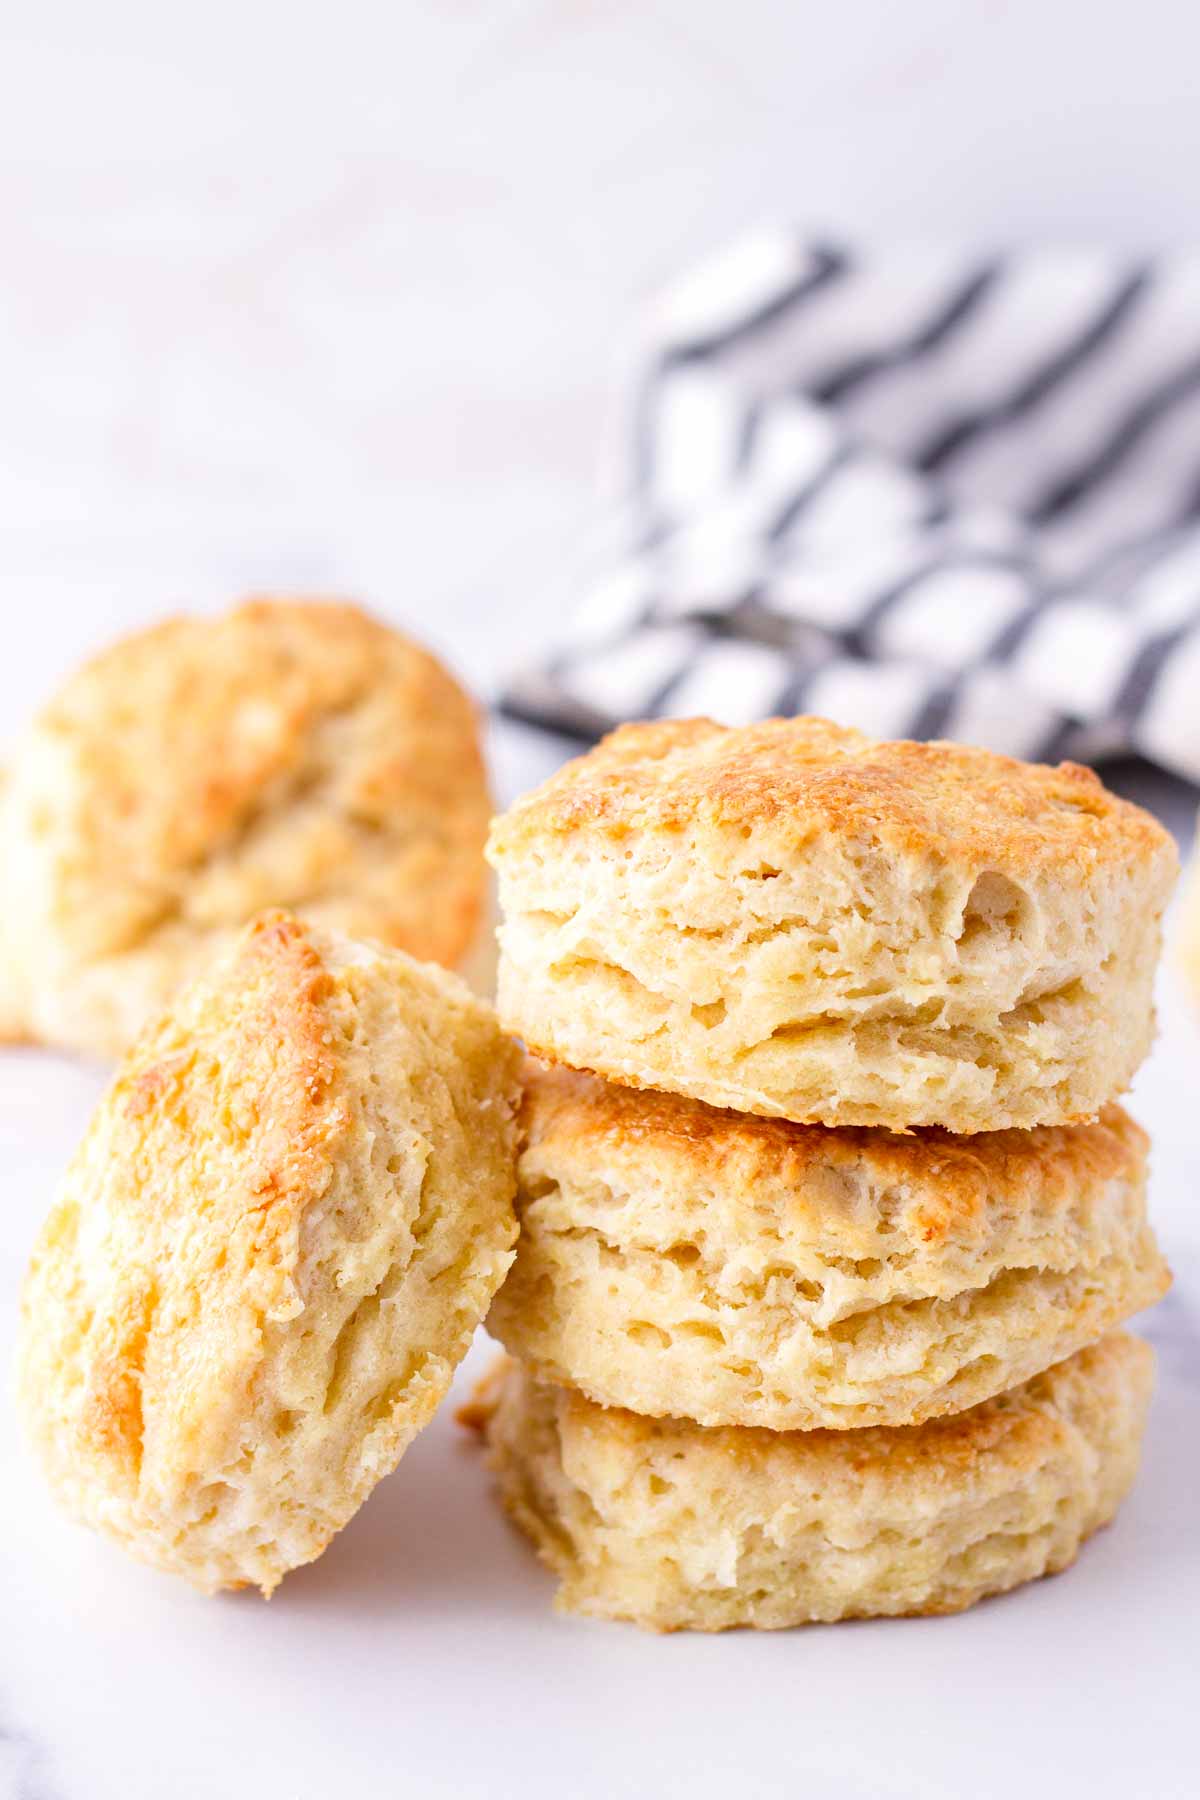
Everyone loves a buttery, flaky, and tender buttermilk biscuit. It’s comforting and goes well with almost everything: jam, butter, honey, gravy. You can also use them to make sandwiches, top chicken pot pie filling, serve with fried chicken…the list goes on.
The great news is that they are very easy to make. They come together very quickly, and only need like 15-16 minutes in the oven. They are make-ahead friendly and freezer-friendly as well.
Forget store-bought buttermilk biscuits, make these right at home instead! Not only are these flaky biscuits easy to make, they are also make-ahead and freezer friendly.

Jump to:
The Basics
Making the perfect buttermilk biscuits at home is possible. Before you start, here are a few things you should know.
I hope these tips and tricks will help you make the best biscuits from scratch!
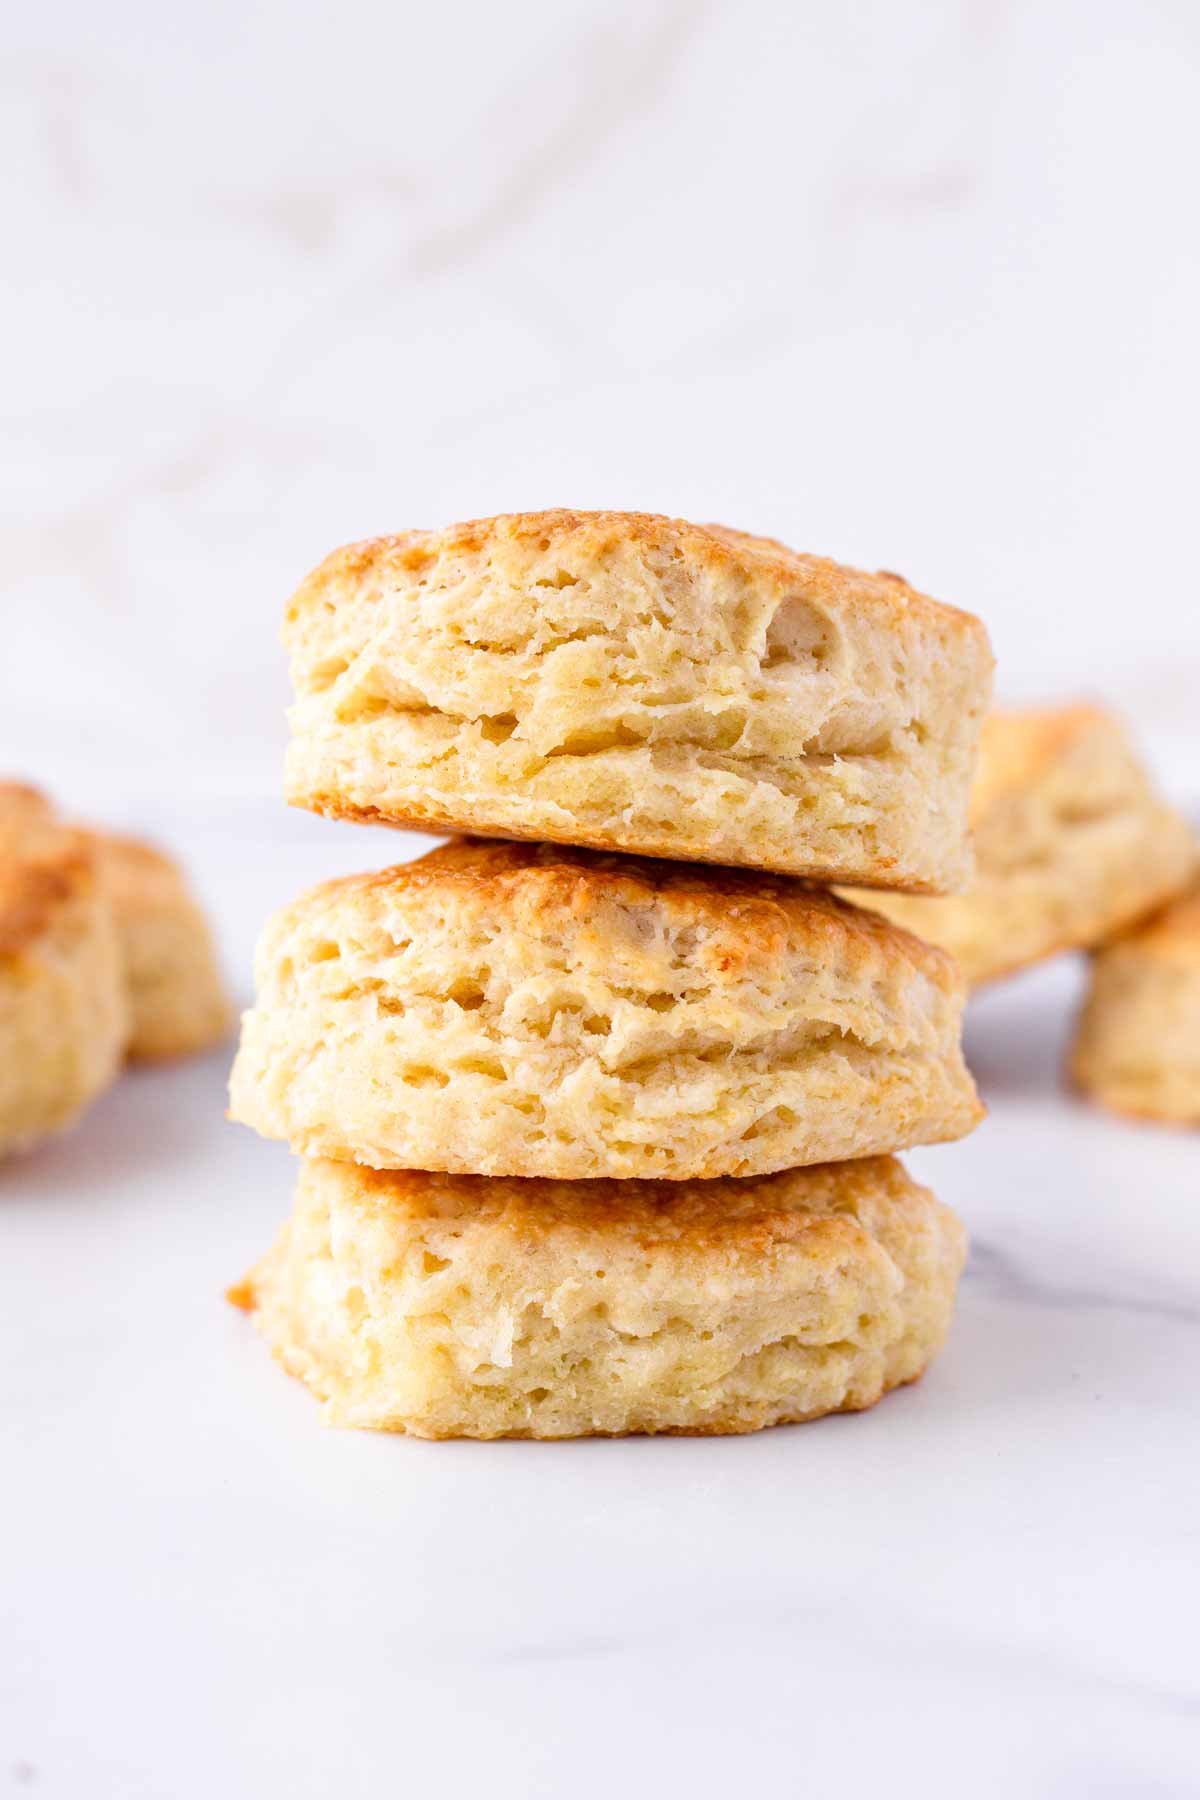
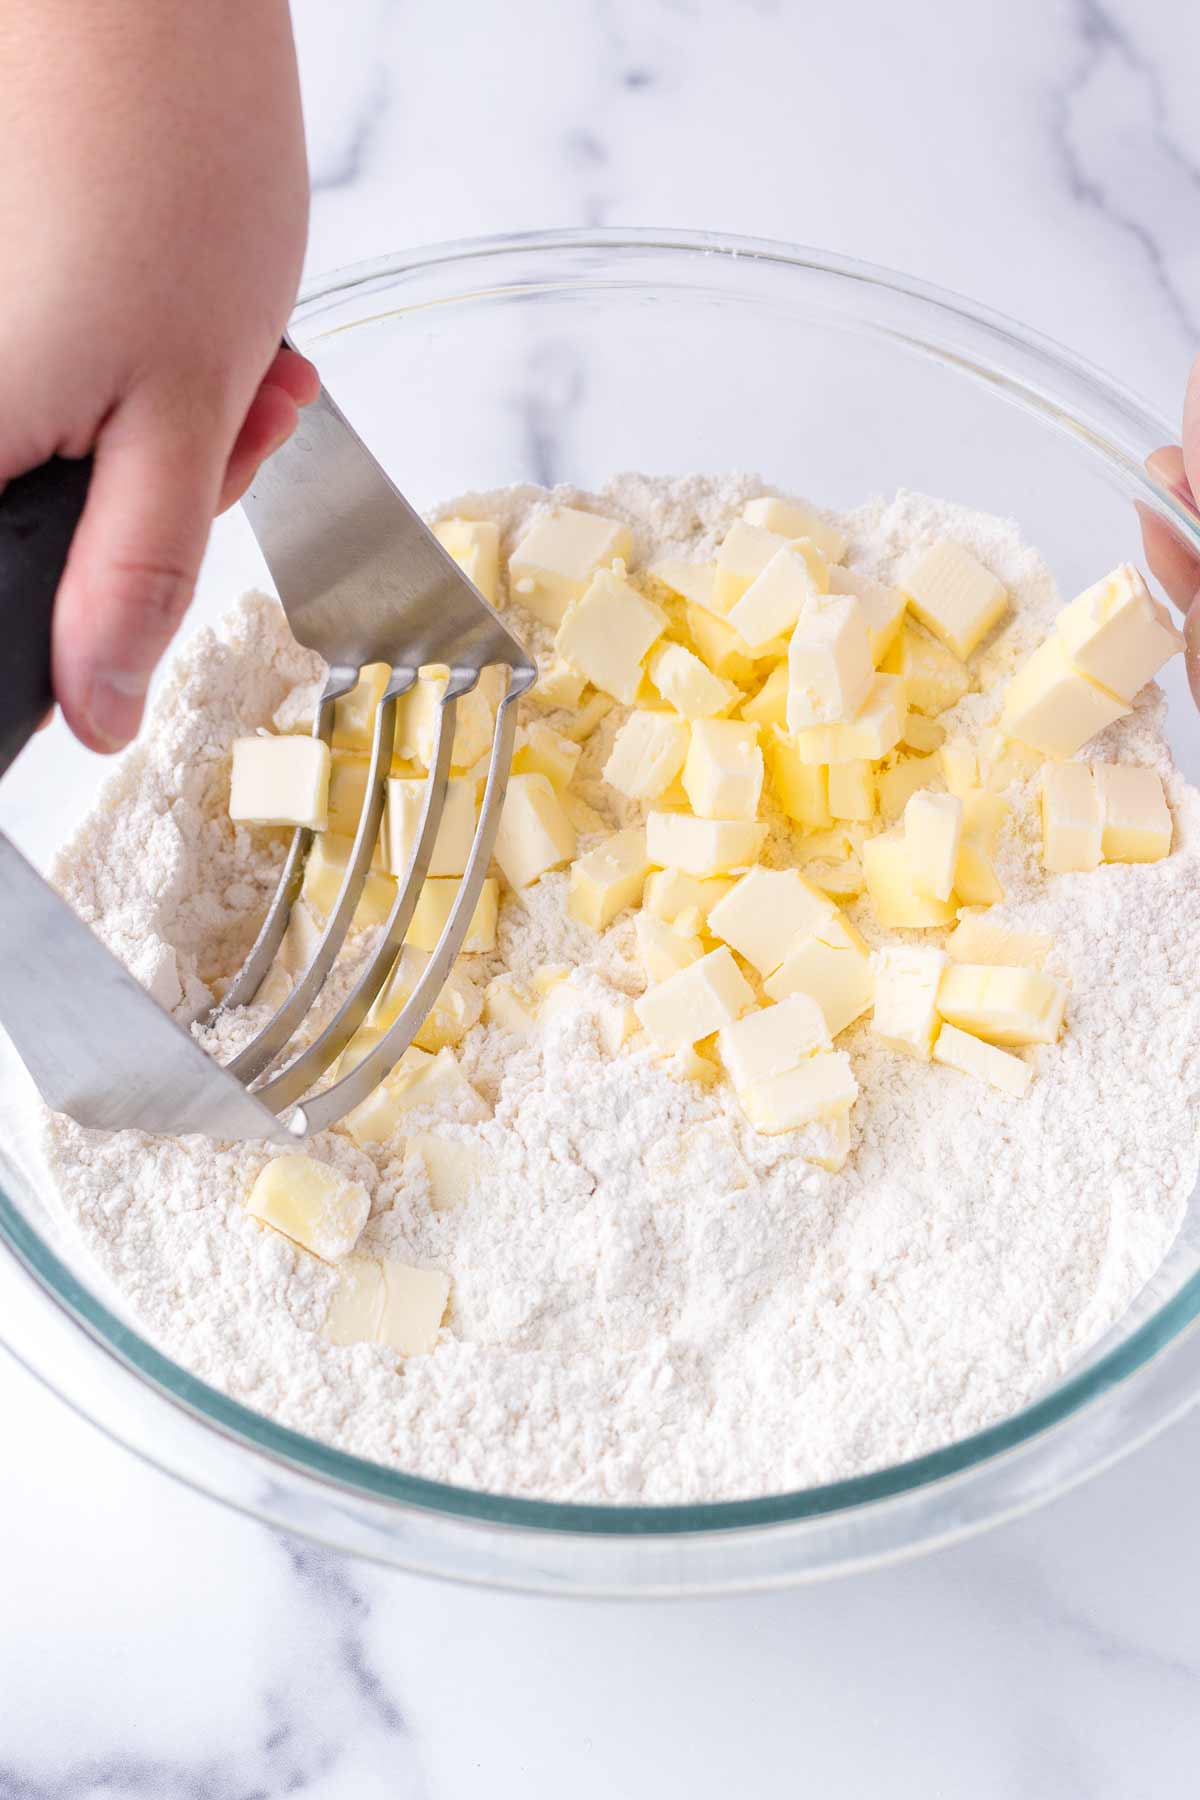
- Use COLD, FROZEN butter: Pieces of cold butter in the dough create pockets of steam when they bake in the hot oven, resulting in those wonderful layers.
- Use COLD full-fat buttermilk: No need to freeze it, but make sure it’s cold and refrigerated.
- Work fast: To prevent the ingredients from getting too warm.
- Don’t overwork the dough: Overworked dough will result in dense biscuits. In fact, the dough should look a bit shaggy and crumbly. You should never knead biscuit dough.
- Don’t twist the biscuit cutter: Doing so will actually seal the borders, preventing flaky layers from forming.
- Fresh baking powder and baking soda: Baking powder and baking soda are the only leavening agents. Make sure they are not expired.
Why You Need Super Cold Butter
Cold butter is essential to getting those flaky layers.
When you work cold butter pieces into the flour to form the dough, you’re pretty much forming “pockets” of air. In the hot oven, the cold butter produces steam, forming pockets of air that create those wonderful, flaky layers.
Here’s what I do: I cut the butter into small cubes and freeze them for at least 30 minutes or overnight. As simple as that.
Some people like to grate frozen butter. I don’t really like doing this. It’s much easier to work with little cubes of butter.
The other thing to keep in mind is that you need to work the dough quickly so that the butter doesn’t warm up. If you think the dough is a bit too warm, you can pop it in the freezer for a few minutes
Pastry Cutter vs. Food Processor
You can use either a pastry cutter or a food processor.
Personally, I prefer to use a pastry cutter because I can control how big the pieces of butter are. The bigger they are, the bigger the pockets of air. Also, working the dough by hand will ensure it’s not overmixed. Handmade buttermilk biscuits tend to come out more tender and flakier.
On the flip side, a food processor is great for working FAST and keeping the dough cold. It’s also a time-saver since everything goes into the food processor. With just a few pulses, the dough will be ready.
Ingredient Notes
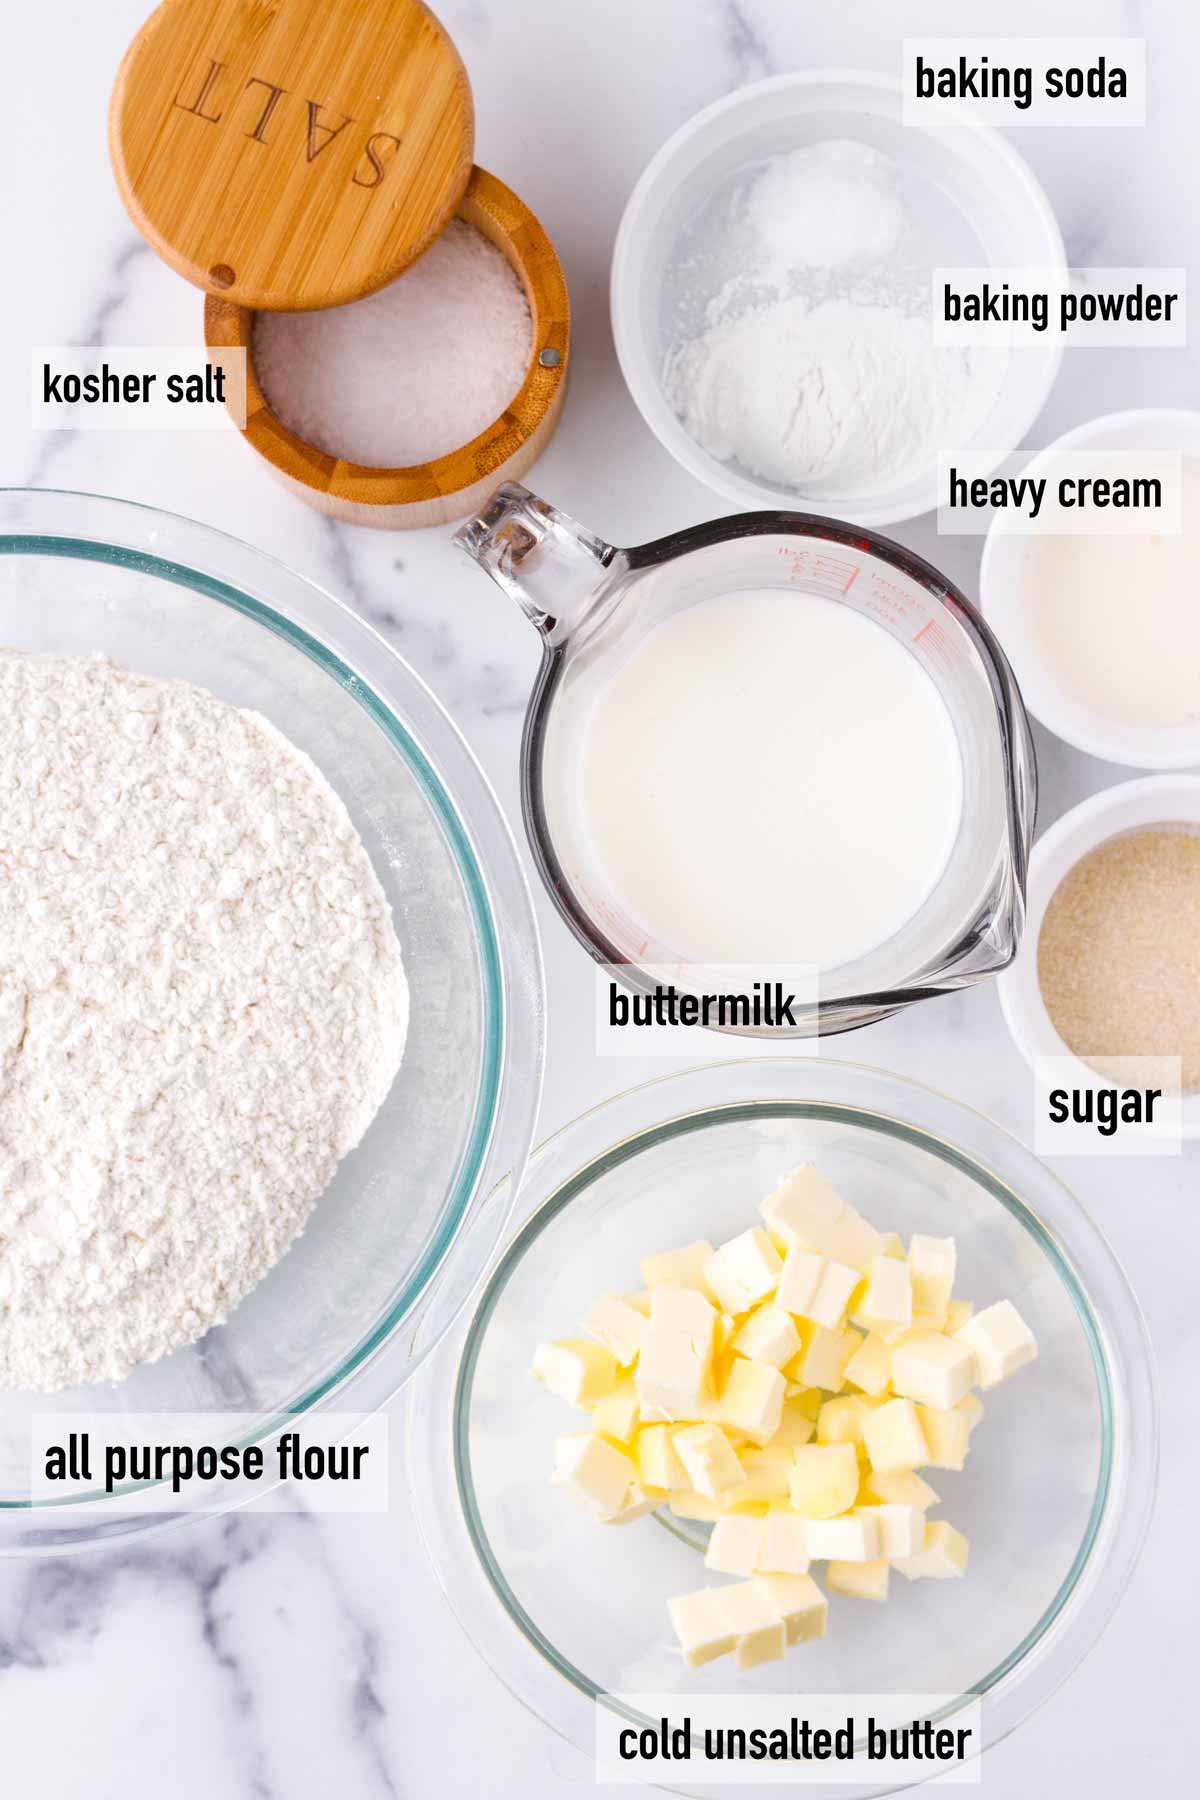
You don’t need many ingredients to make biscuits. The only important thing to remember is that the butter and buttermilk HAVE to be very cold.
The butter should be frozen before you start working. The buttermilk should be cold, straight out from the refrigerator (no need to freeze the buttermilk).
- Flour: All-purpose flour.
- Granulated sugar: For a little bit of sweetness
- Kosher salt: To add a bit of saltiness.
- Baking powder and baking soda: You need both for best results. They will rise beautifully.
- Frozen unsalted butter: Cut into small cubes.
- Cold buttermilk: Full-fat, straight out from the fridge. No need to freeze it.
- Heavy cream: To brush the tops prior to baking. This will help you get a richer golden brown color.
Step-by-Step Instructions
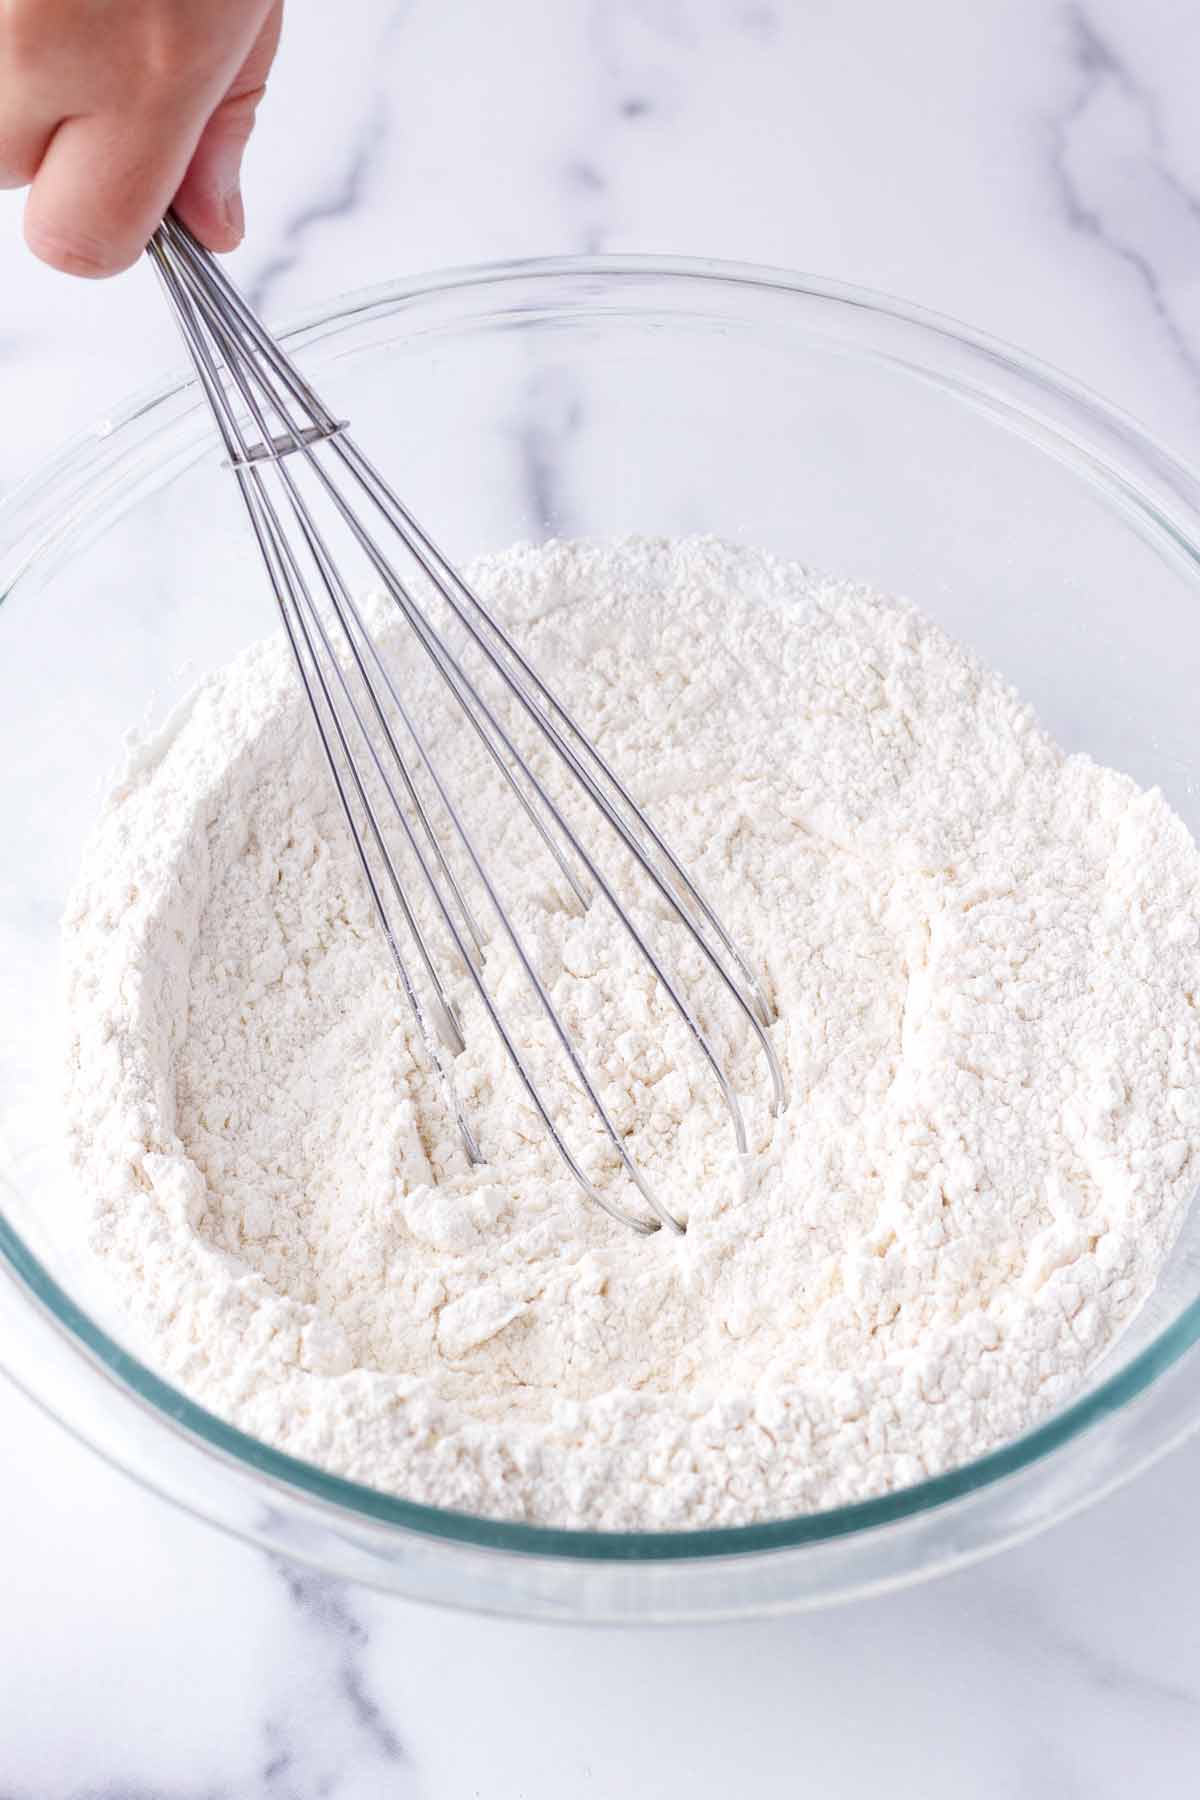
1. Whisk the dry ingredients
By hand: Whisk the flour, sugar, salt, baking powder, and baking soda until evenly combined. Use a large bowl because you’ll need to add butter and buttermilk to it later.
Food processor: Pulse until evenly combined.
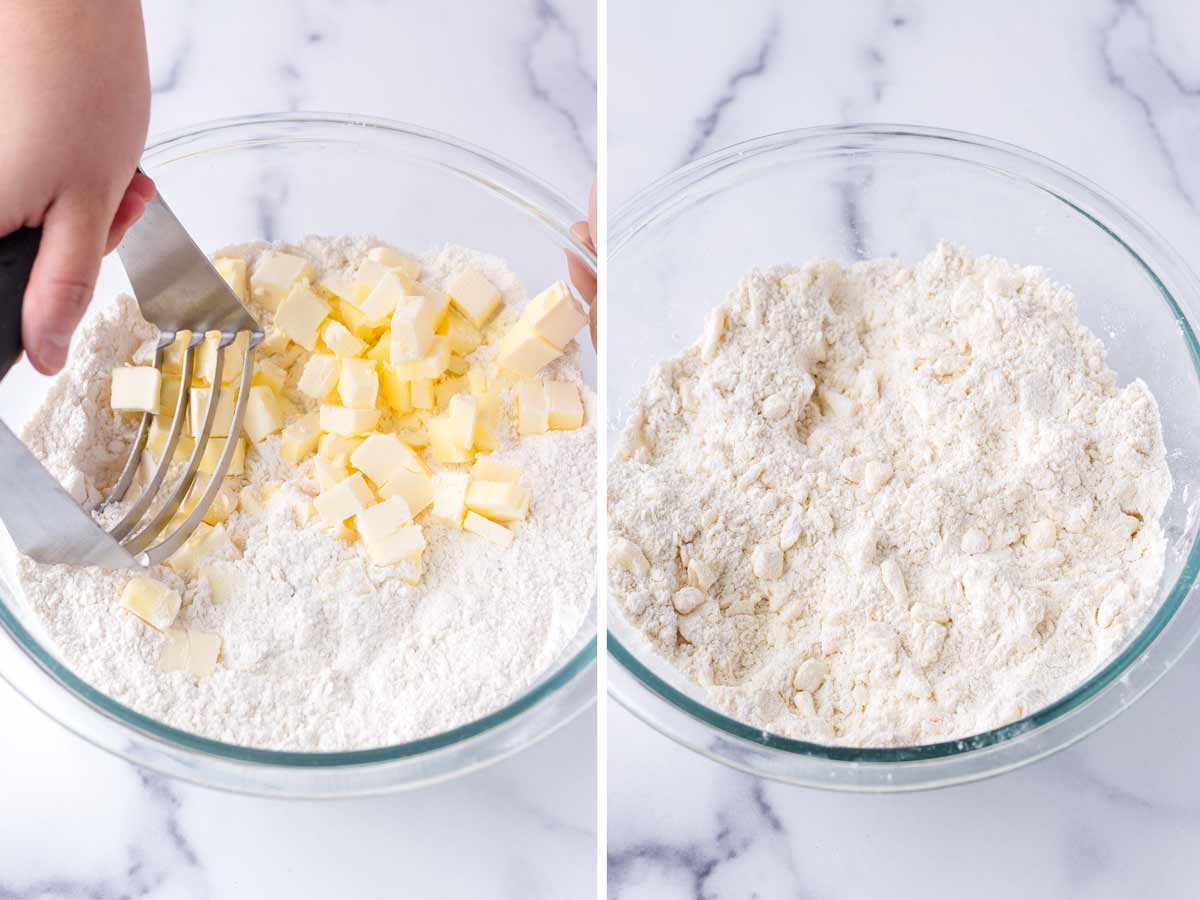
2. Incorporate the butter
By hand: Use a pastry cutter to work the COLD butter into the flour, and then use your hand to break up the butter coated in flour into pea-sized pieces. This should be done quickly to prevent the butter from getting too soft. Should take 2 minutes or so. It doesn’t need to be perfect.
Food processor: Add the COLD butter to the flour mixture in the food processor. Pulse just a few times until you get pea-size pieces of butter coated with flour.
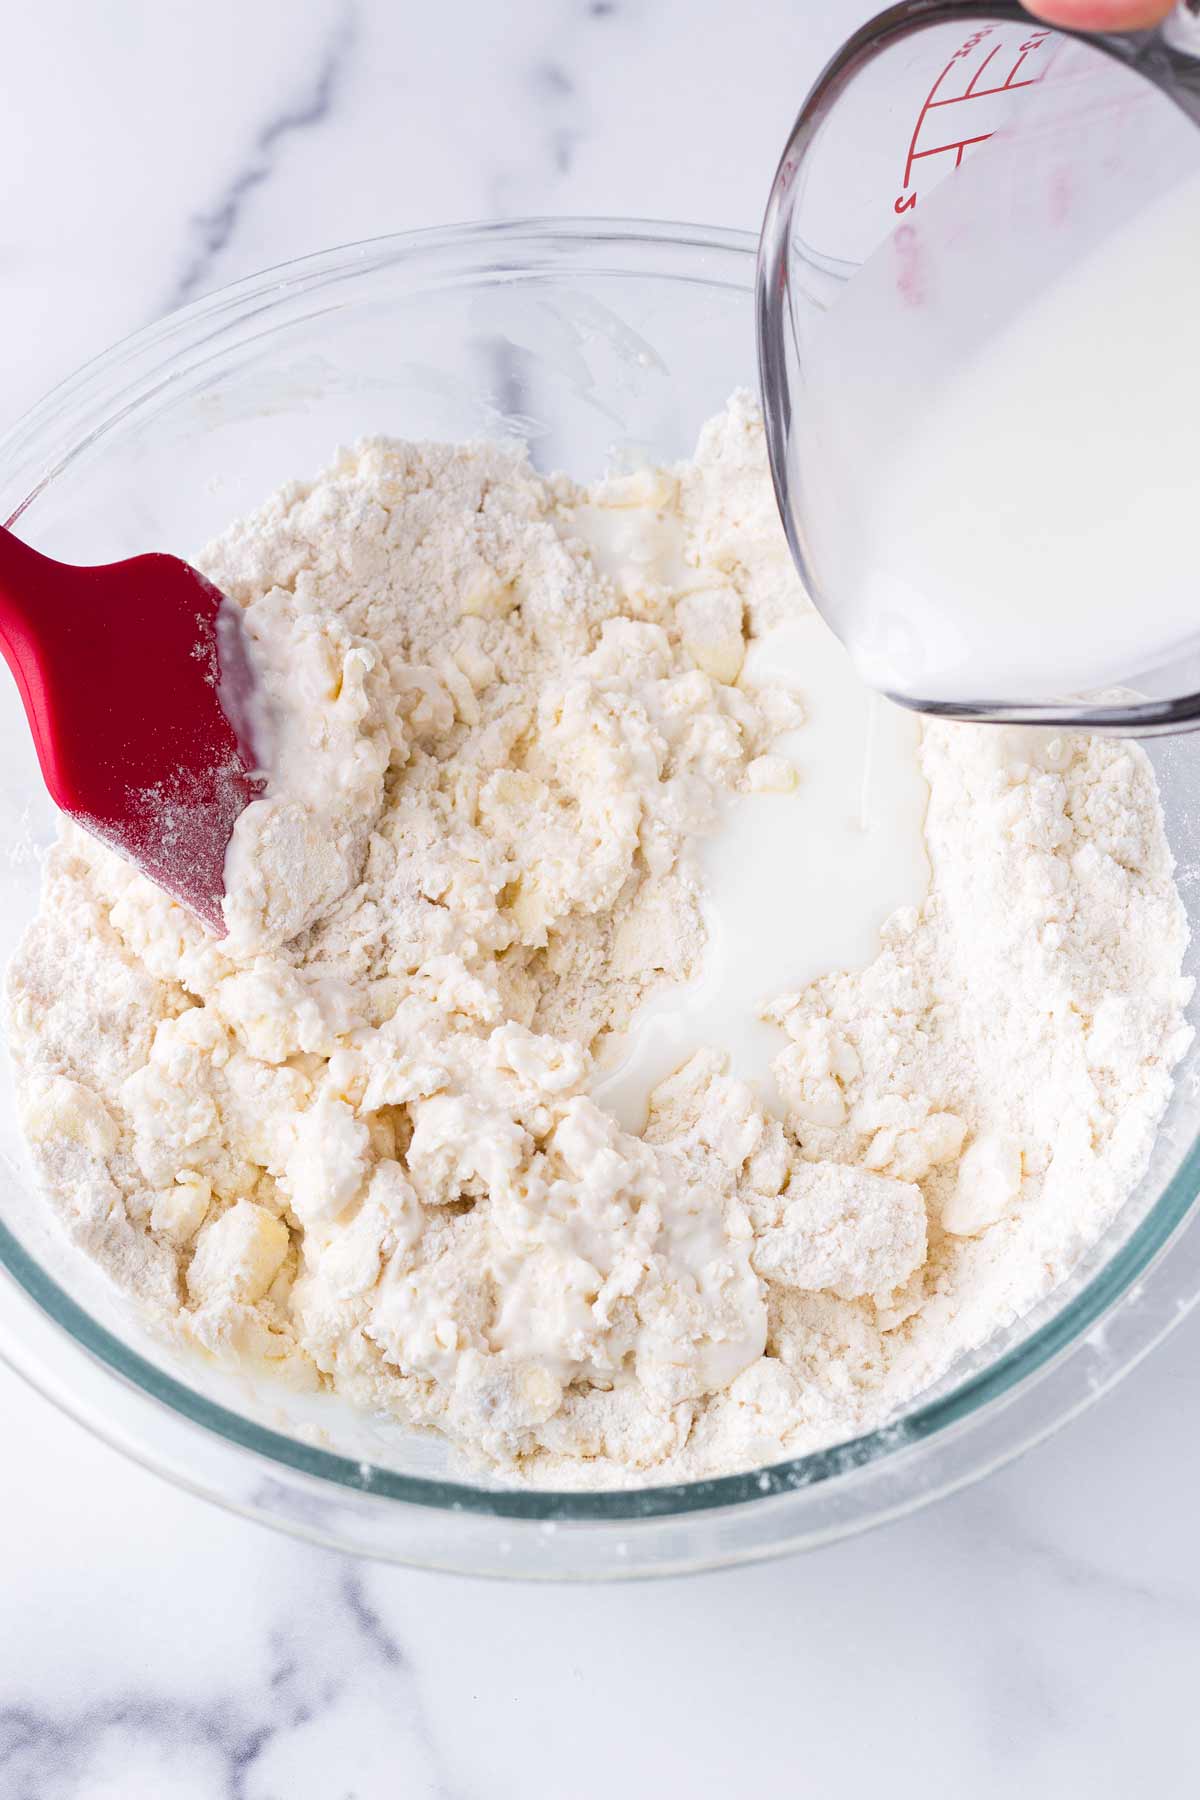
3. Add the buttermilk
By hand: Gradually add the COLD buttermilk into flour and butter mixture, and fold to combine using a rubber spatula. The dough will look shaggy and a bit crumbly.
Food processor: Gradually add the COLD buttermilk into flour and butter mixture, and pulse just a few times until you get a shaggy and crumbly dough.
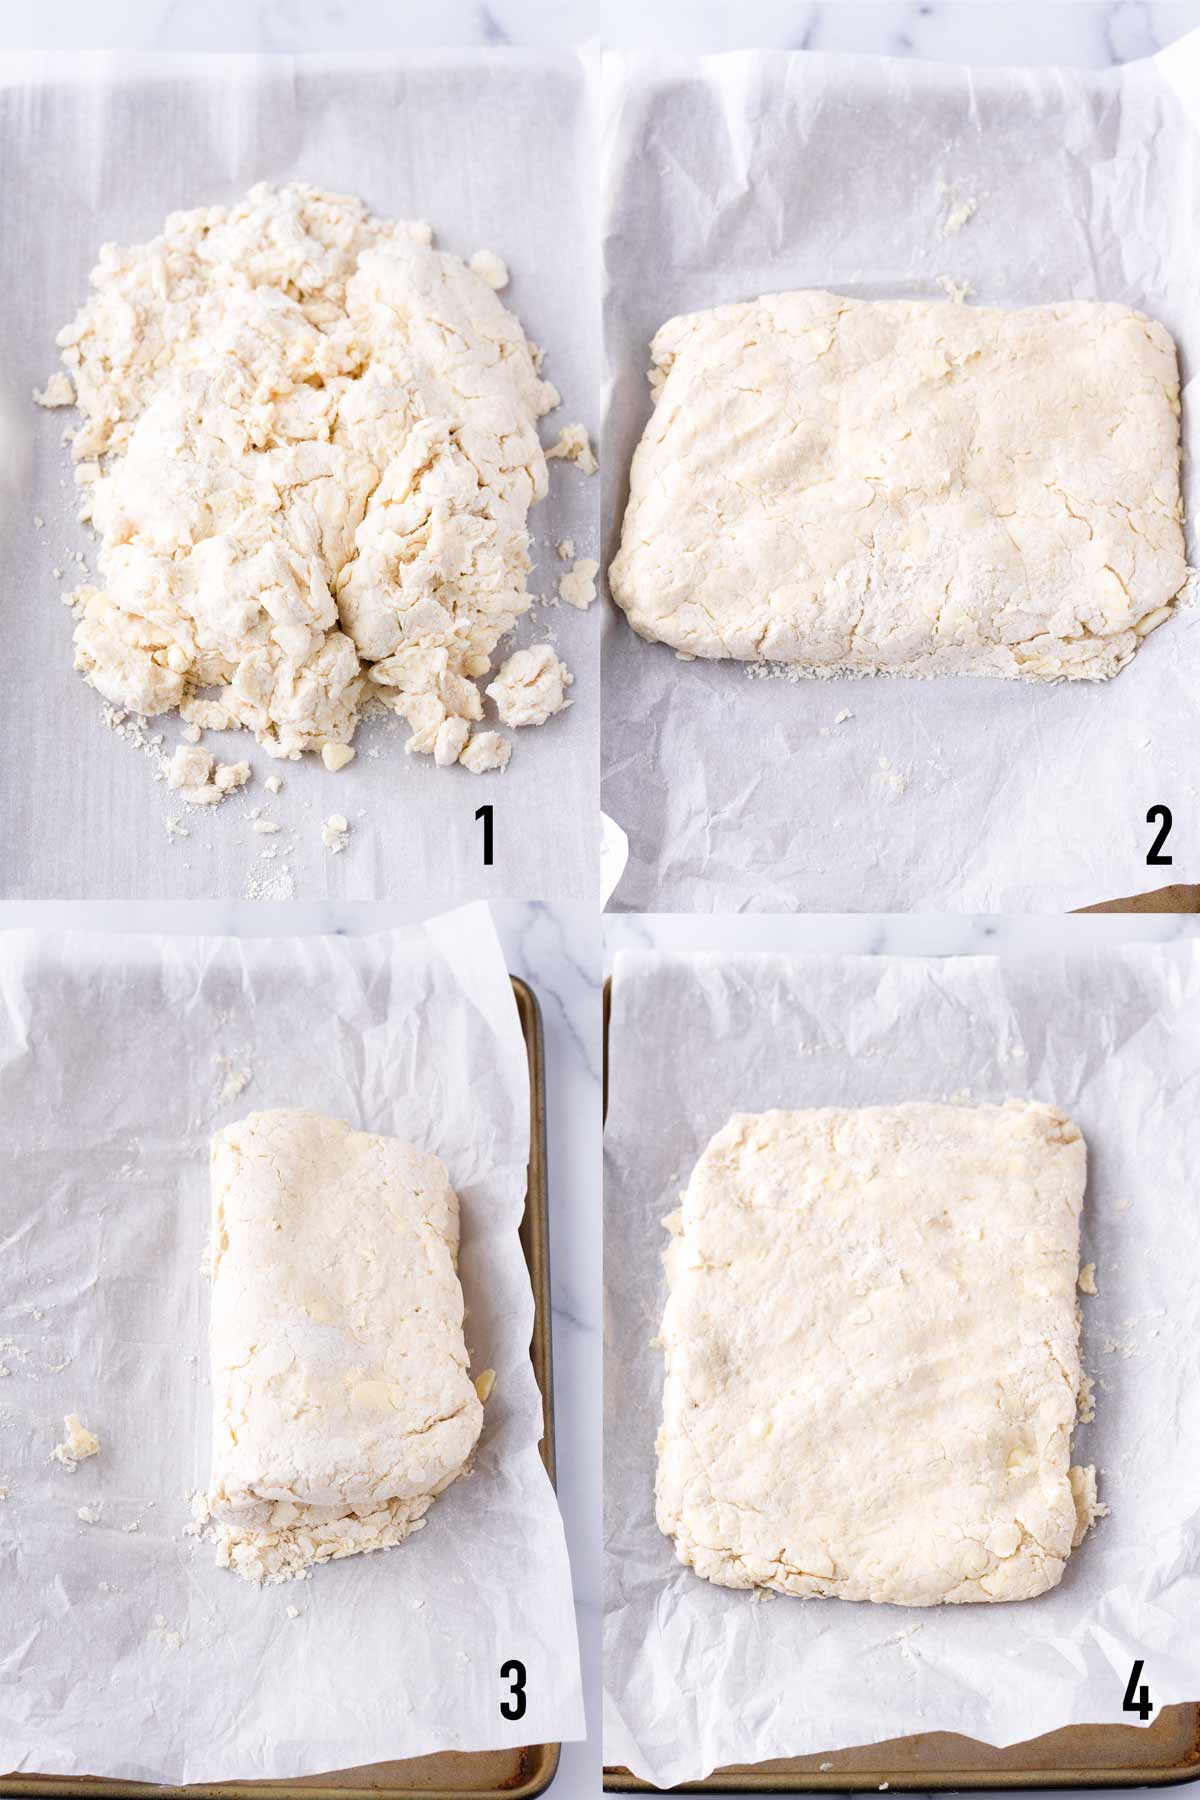
4. Prepare the dough
Dump the shaggy dough onto a working surface. With your hands, press the dough to form a 1-inch thick rectangle. Then, fold it over from the shorter end to the other, and press it down again to form a 1-inch thick rectangle.
This process of folding the dough helps to laminate the dough and create more layers. You should see small pieces of butter encrusted in the dough.
Tip: I like to use the parchment paper as a barrier between my hands and the dough to work the dough. This prevents the dough from getting warm.
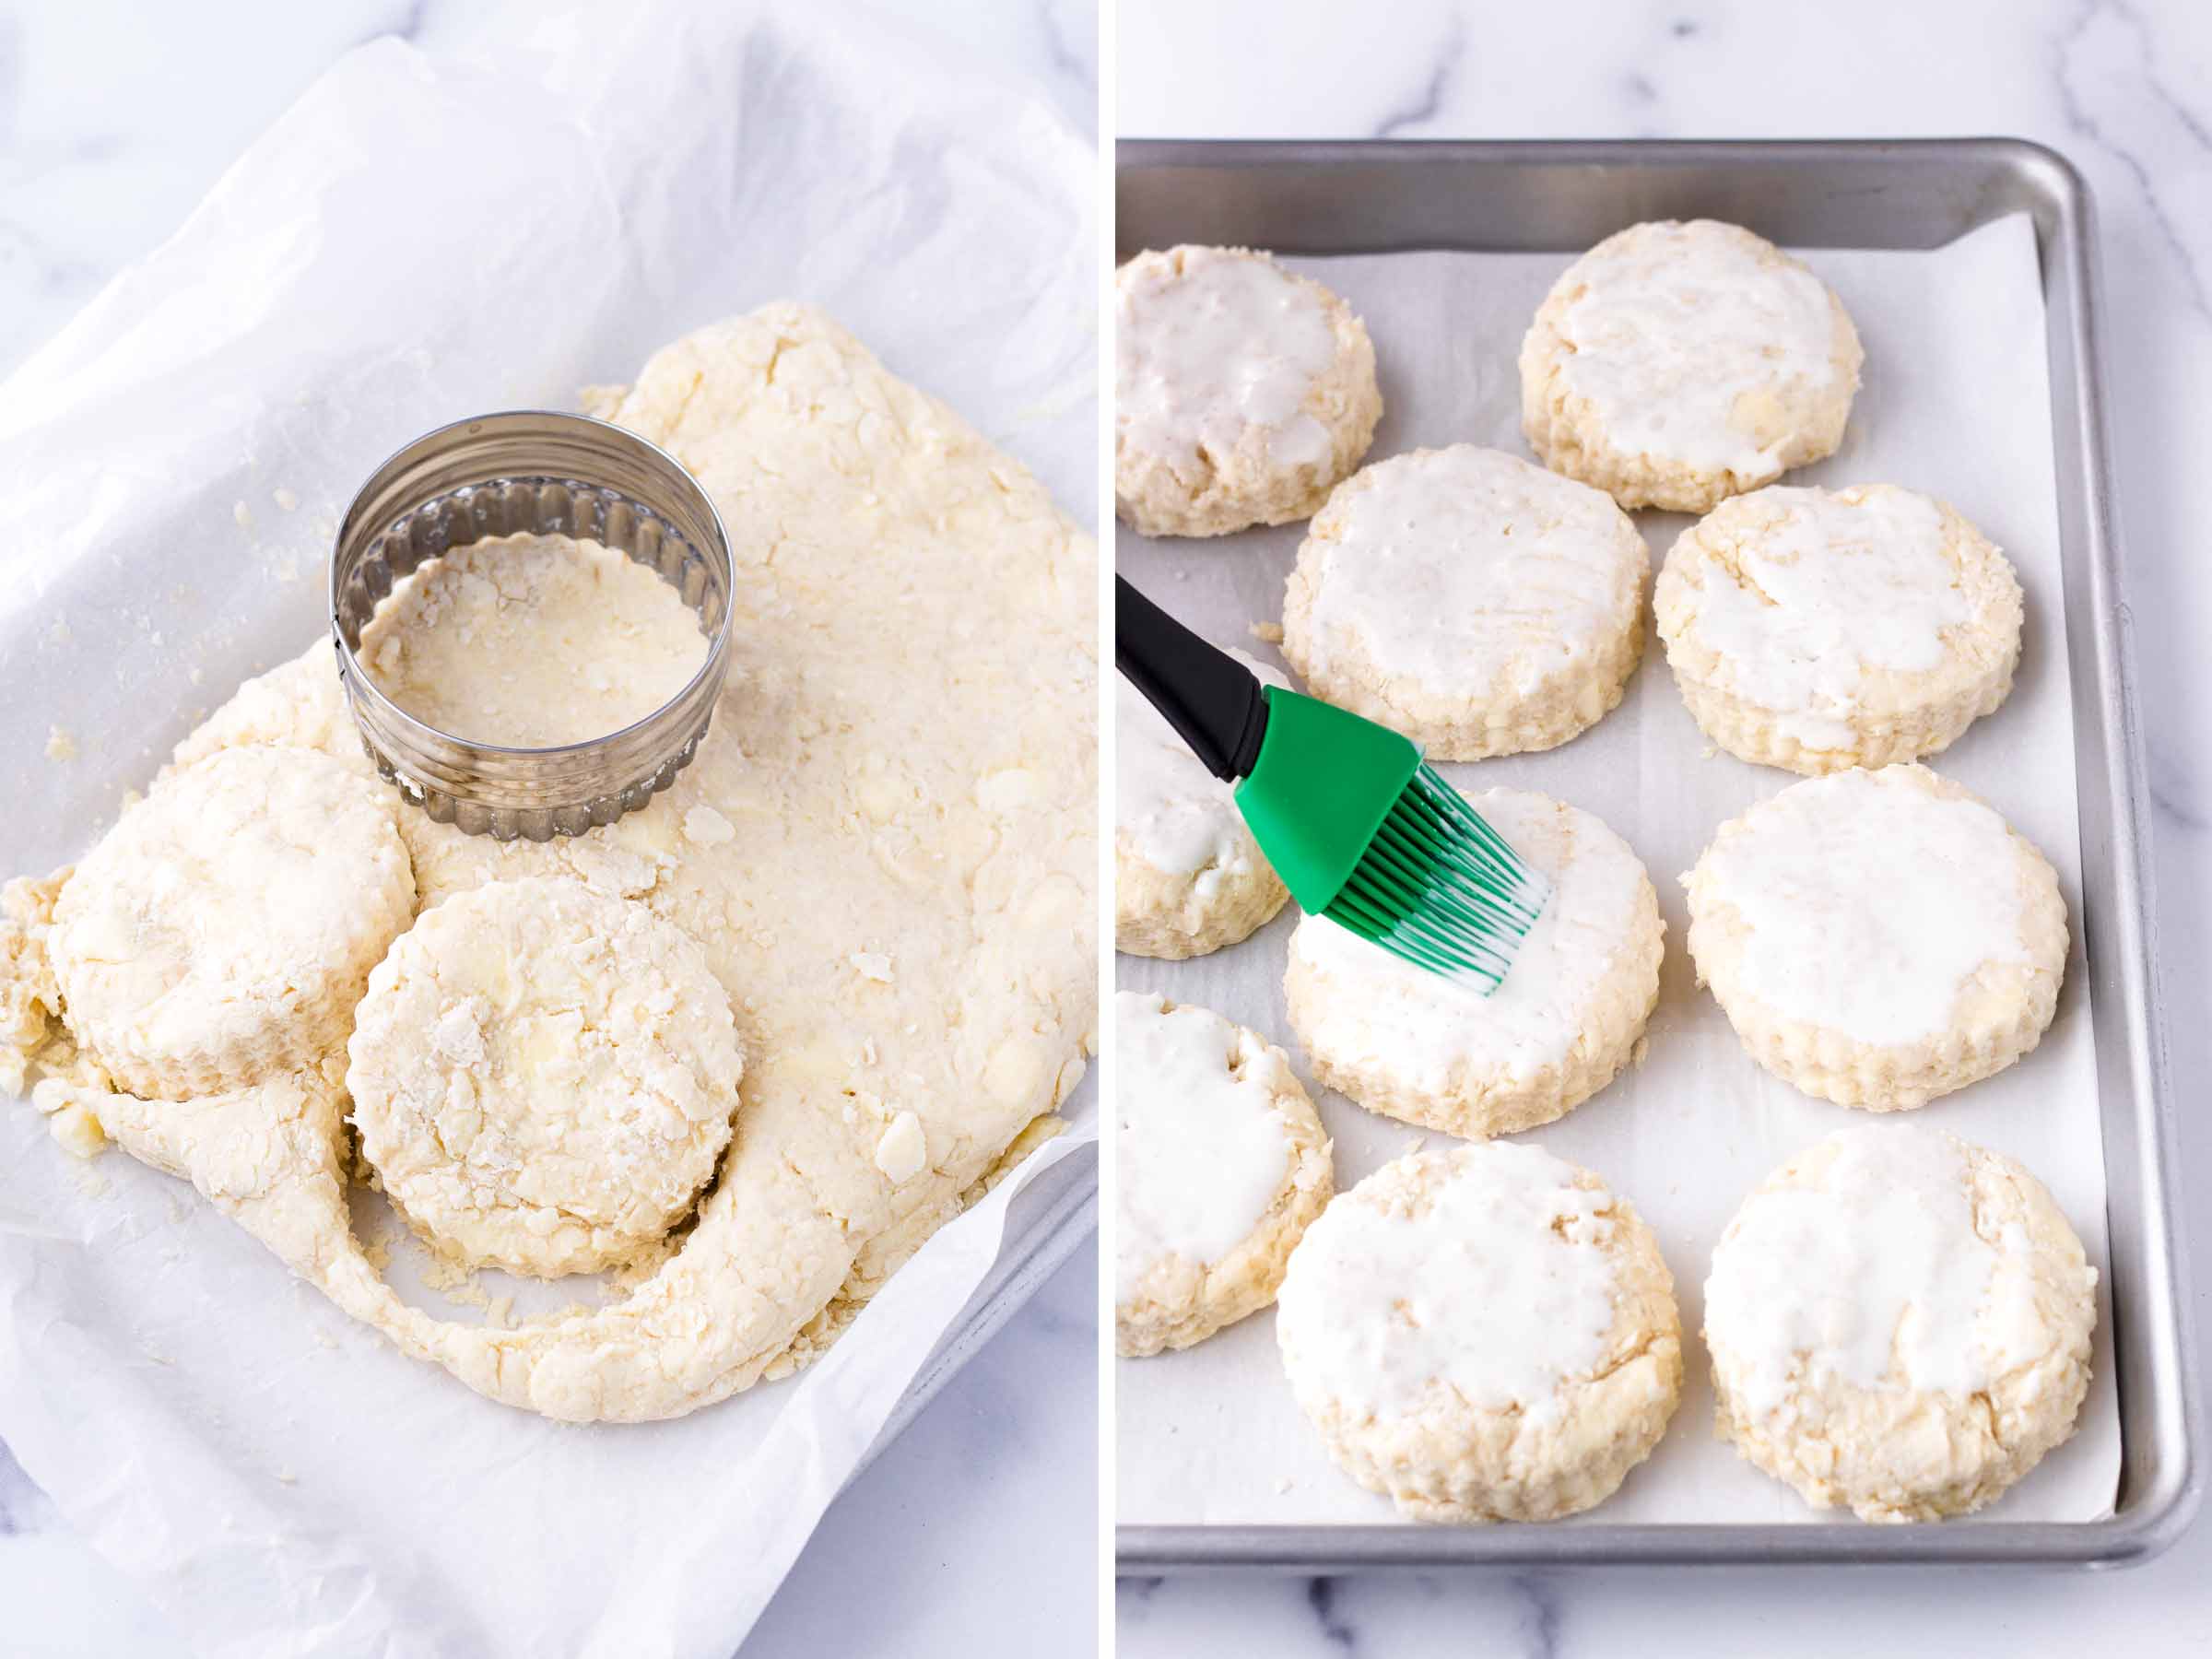
5. Cut the dough and brush
Cut the dough with a biscuit cutter. You may need to reshape the dough to gather the scraps.
Arrange them on a sheet pan about 1 inch apart. They will rise higher the closer they are together.
Brush with heavy cream. This will help you get a nicer golden brown color.
Tip: If you notice the dough is not cold, pop it in the freezer for a few minutes.
Tip: Don’t use a baking dish – the tall edges of a baking pan will prevent the heat from circulating properly.
5. Bake
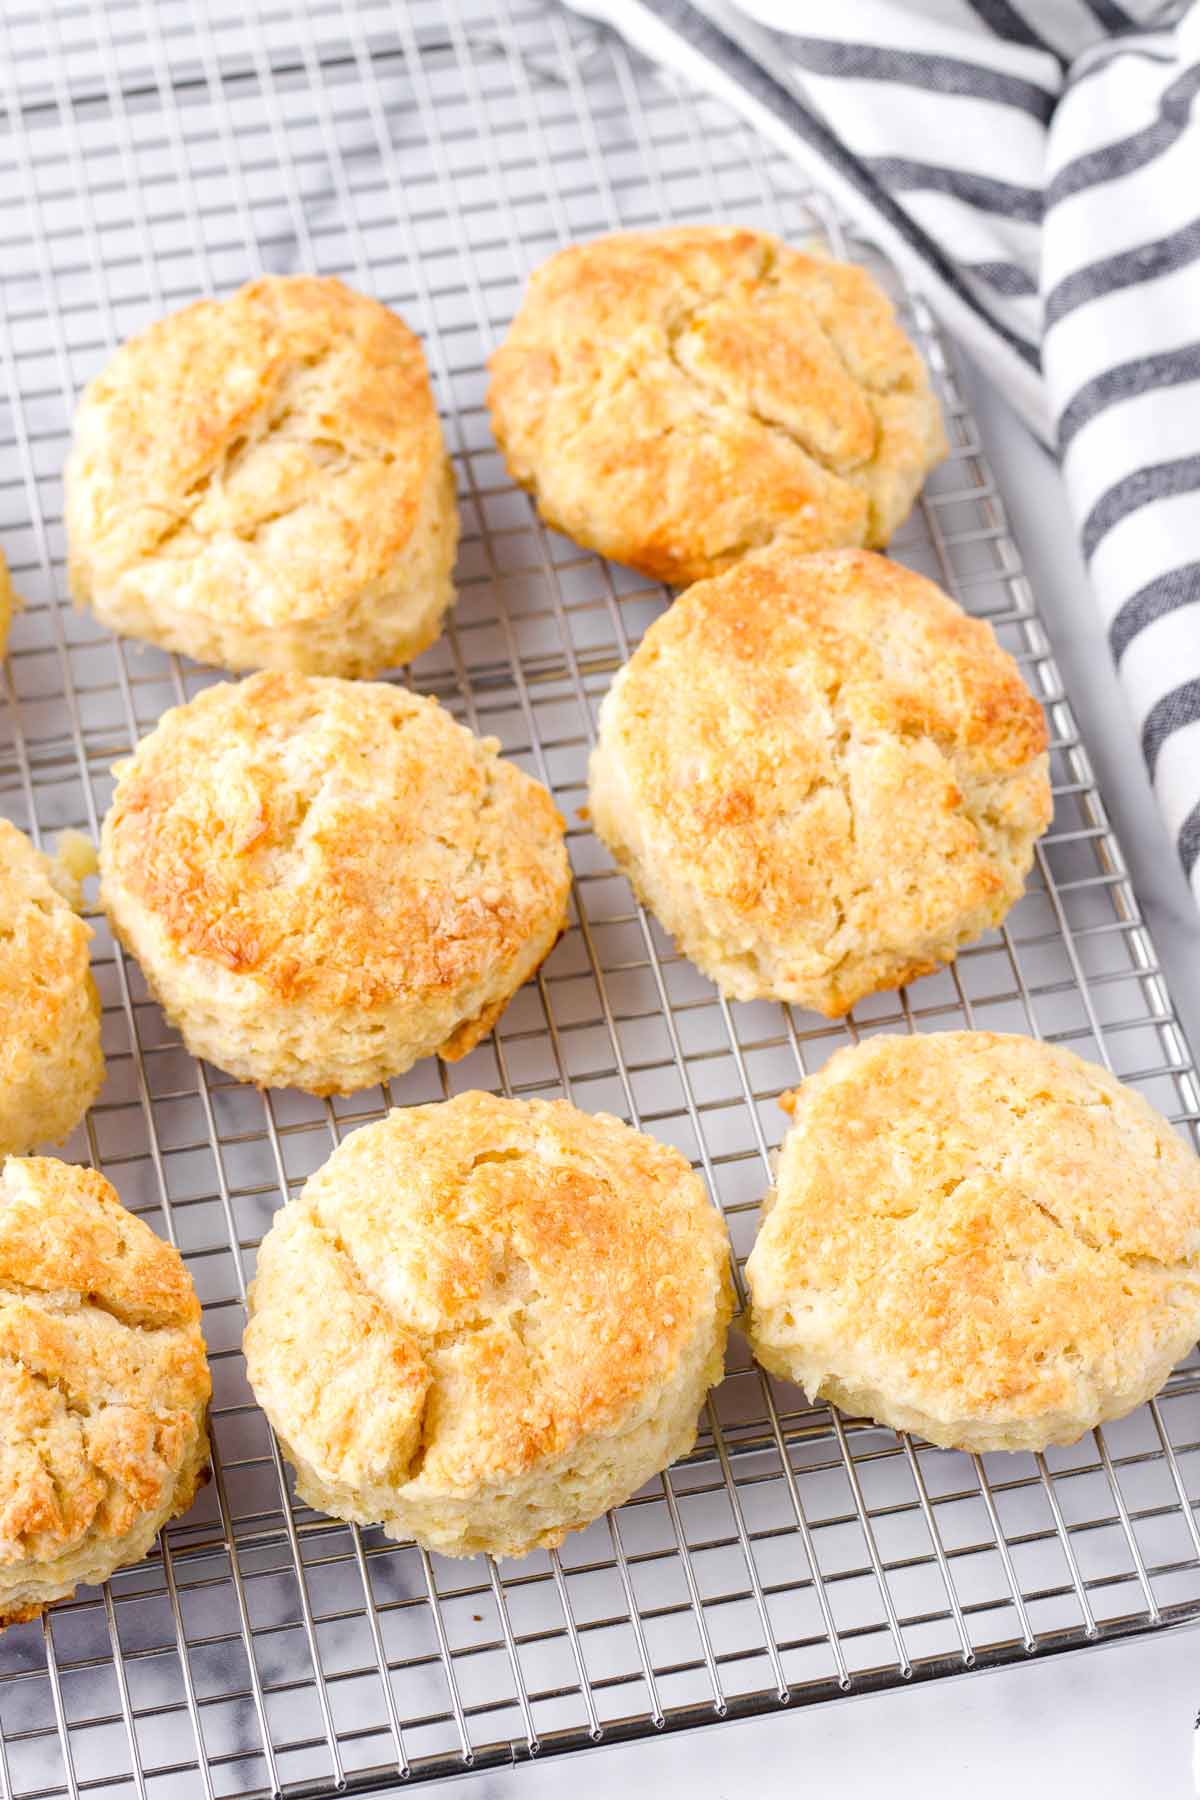
Bake at 450 degrees F. The higher the temperature, the taller and more golden brown they will get.
Serving and Pairing Ideas
There are so many ways to serve buttermilk biscuits. My favorite:
- Honey
- Jam
- Butter
- Sausage gravy
I also like to use them to make breakfast sandwiches, BLTs, fried chicken sandwiches, and more. The possibilities are endless!
You can also use it to make a Biscuit Chicken Pot Pie!

Recipe FAQs
Use the amount of baking powder and baking soda as directed. Make sure they are not expired. Also, the thickness of your biscuits should be about 1-inch thick. Another trick is to place them relatively close together on the sheet pan, about 1 inch apart.
Brush the tops with heavy cream prior to baking.
Pop it in the freezer for a few minutes.

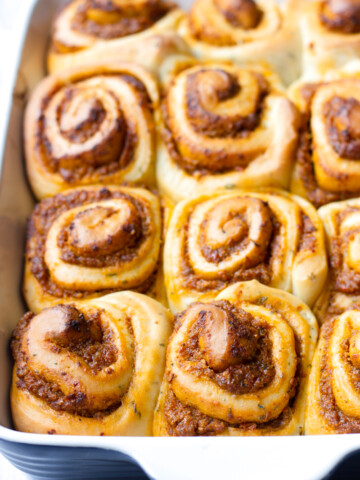
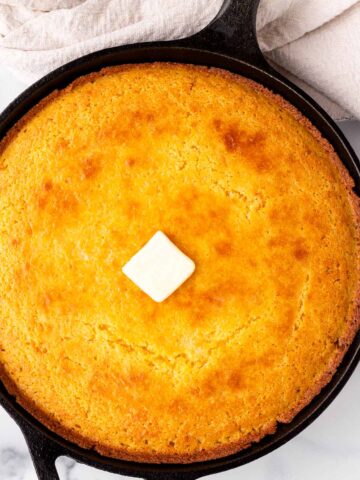
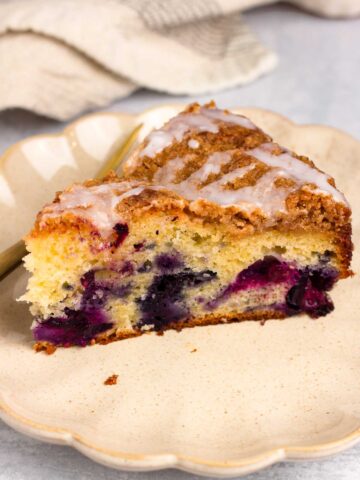
Also be sure to check out these recipes!
Tips for Success
- Make sure you use COLD butter. I freeze it overnight or for at least 30 minutes before using.
- Also use cold buttermilk. No need to freeze it, just make sure it stays cold in the fridge.
- If the dough gets warm, pop it in the freezer for a few minutes.
- Do not twist the biscuit cutter into the dough – this will seal the edges and prevent them from rising or forming flaky layers.
- Placing biscuits close together in the sheet pan will help them rise taller.

Tender and Flaky Buttermilk Biscuits
Equipment
- Pastry cutter
- Large mixing bowl
- Food processor (optional)
Ingredients
- 3 cups all-purpose flour
- 1 tablespoon granulated sugar
- 1 teaspoon Kosher salt
- 1 tablespoon baking powder
- ½ teaspoon baking soda
- 11 tablespoons unsalted butter, frozen and cut into cubes - see note
- 1 cup cold buttermilk - see note
- Heavy cream - for brushing
Instructions
- Preheat oven to 450 degrees F. Line a small sheet pan with parchment paper. Set aside.
- In a large bowl, whisk flour with sugar, salt, baking powder, and baking soda. Alternatively, you can pulse everything in a food processor.
- Add the COLD cubed butter (freeze the butter beforehand). Using a pastry blender, cut the butter into smaller pieces, incorporating it with the flour until you get pea-sized pieces. You may also need to use your fingers to work the butter into the flour. If using a food processor, pulse a few times until you get pea-sized pieces.
- Gradually add the buttermilk and incorporate using a rubber spatula until you get a shaggy and crumbly dough. If using a food processor, pulse a few times until a shaggy and crumbly dough forms. The pieces of butter should be visible in the dough.
- Transfer the shaggy dough onto a working surface. Bring everything together and press the dough to form a 1-inch thick rectangle. Fold it over, from short end to short end, and press it down again to re-form a 1-inch thick rectangle. Tip: I like to transfer the dough to a large piece of parchment paper and use it to press the dough – it’s much easier, less messy, and helps keep the dough cold.
- Cut into 9 biscuits using a 3-inch round biscuit cutter. Note: Do not twist the biscuit cutter as you press it down, as this can seal the edges and prevent the biscuits from rising and forming flaky layers.
- Arrange biscuits in the prepared sheet pan, about 1 inch apart (biscuits tend to rise taller when you place them close together). Brush the tops with some heavy cream. Bake at 450 degrees F for 15 to 16 minutes, or until risen and golden brown. Enjoy!
Notes
- Butter: Freeze the butter overnight or for at least 30 minutes prior to using. This is important to make flaky biscuits.
- Buttermilk: Use full-fat buttermilk, and make sure it’s cold (refrigerated).
- Freezing: You can freeze baked (let them cool down first) in freezer-friendly bags for 2 months. Thaw in the fridge and warm them up if desired. You can also freeze unbaked biscuit dough, and thaw in the fridge overnight prior to baking.
- When using the biscuit cutter, don’t twist it down. This will seal the edges, preventing the biscuits from rising properly. If you don’t have a biscuit cutter, you can cut them into squares using a knife.
- Place the biscuits close together (about 1 inch) in the sheet pan. This will help them rise taller.
- Try not to use a baking dish, and use a sheet pan or cast iron skillet instead. The tall edges of a baking pan will prevent proper heat flow for the biscuits to rise properly.
- Try my Biscuit Chicken Pot Pie recipe!


Wendy says
Amazing biscuits