
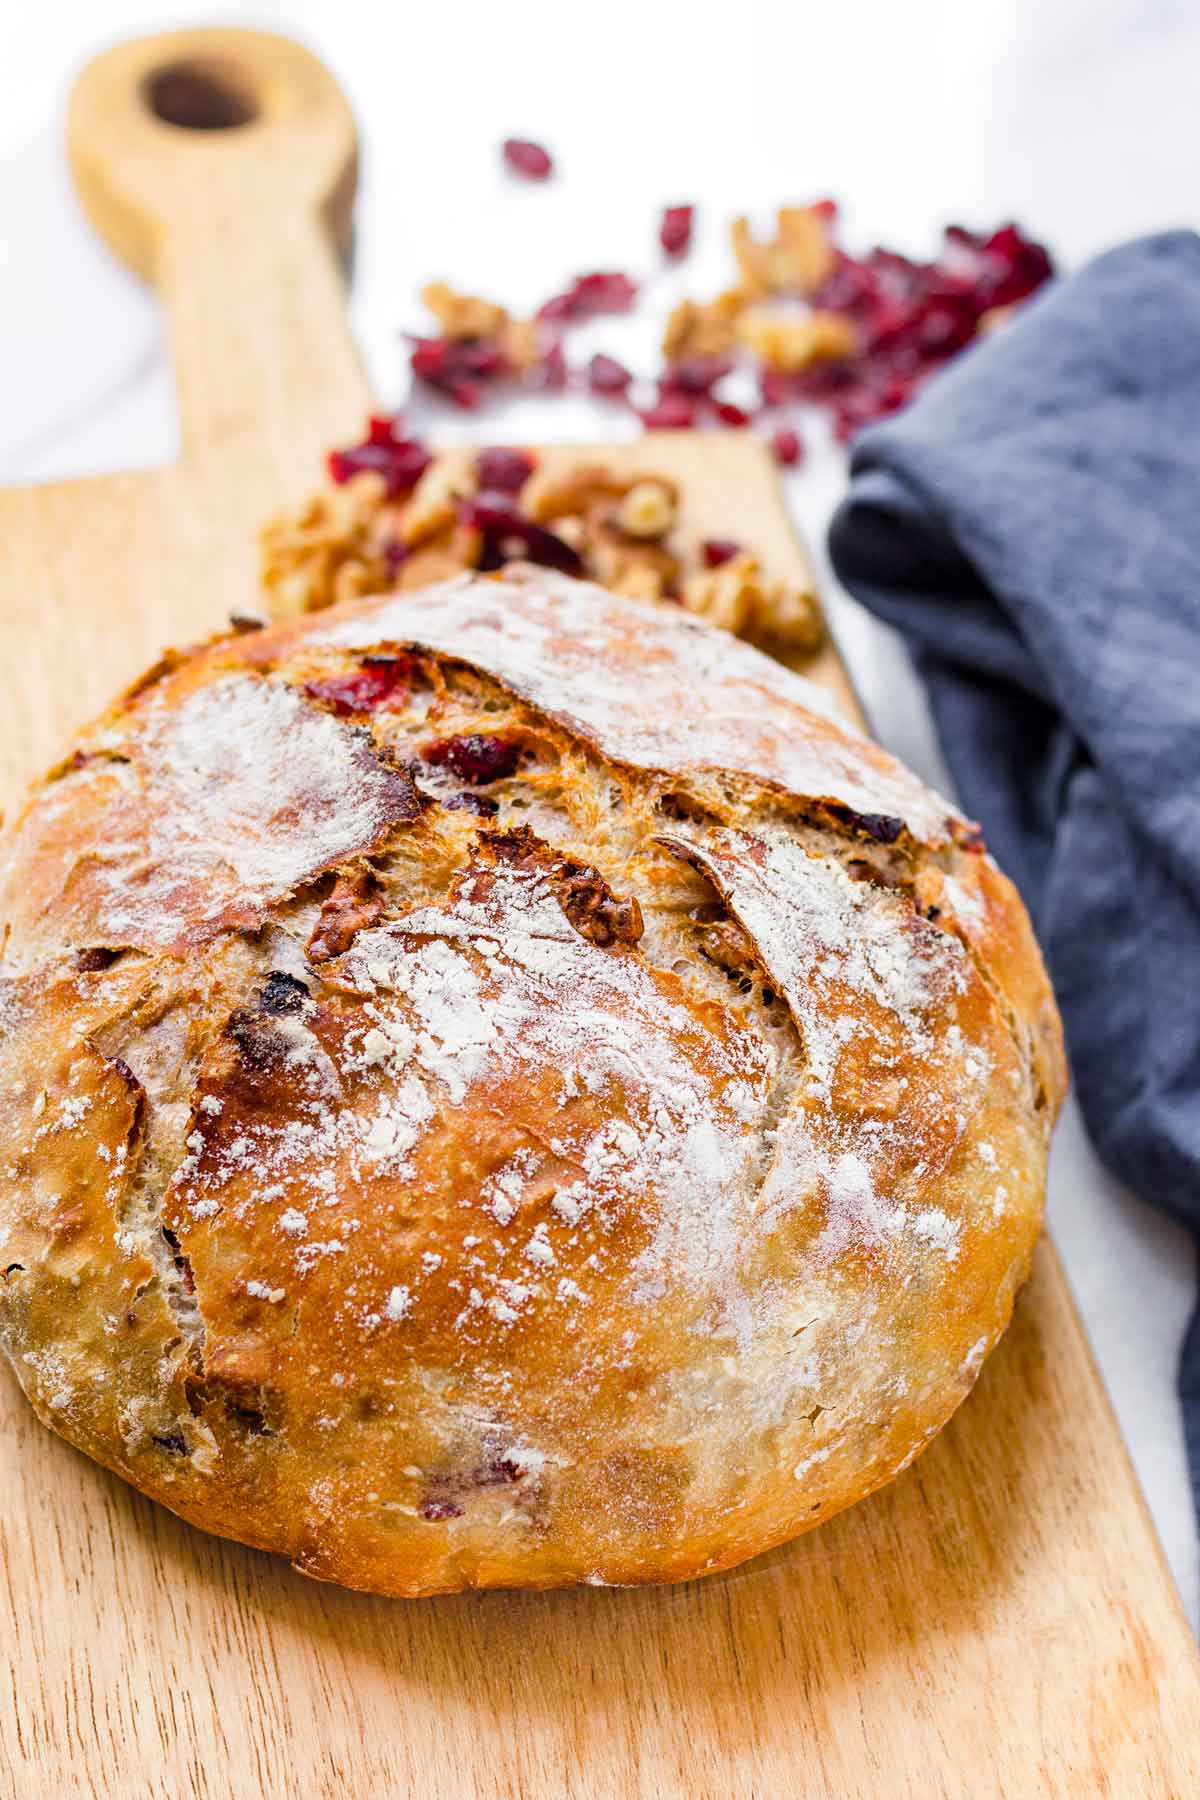
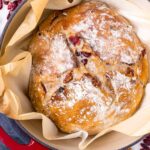
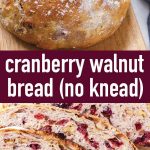
If you’re new to baking bread at home, no-knead breads may be a great place to start. Today I am sharing my most beloved artisan bread recipe: No Knead Cranberry Walnut Bread!
I’ve included all the tips and tricks you need to know to make the perfect no-knead artisan loaf of cranberry walnut bread. It’s actually really simple and takes very little active prep time.
It is seriously one of the best and coziest breads to make this season. Your house will smell like the best bakery in town!
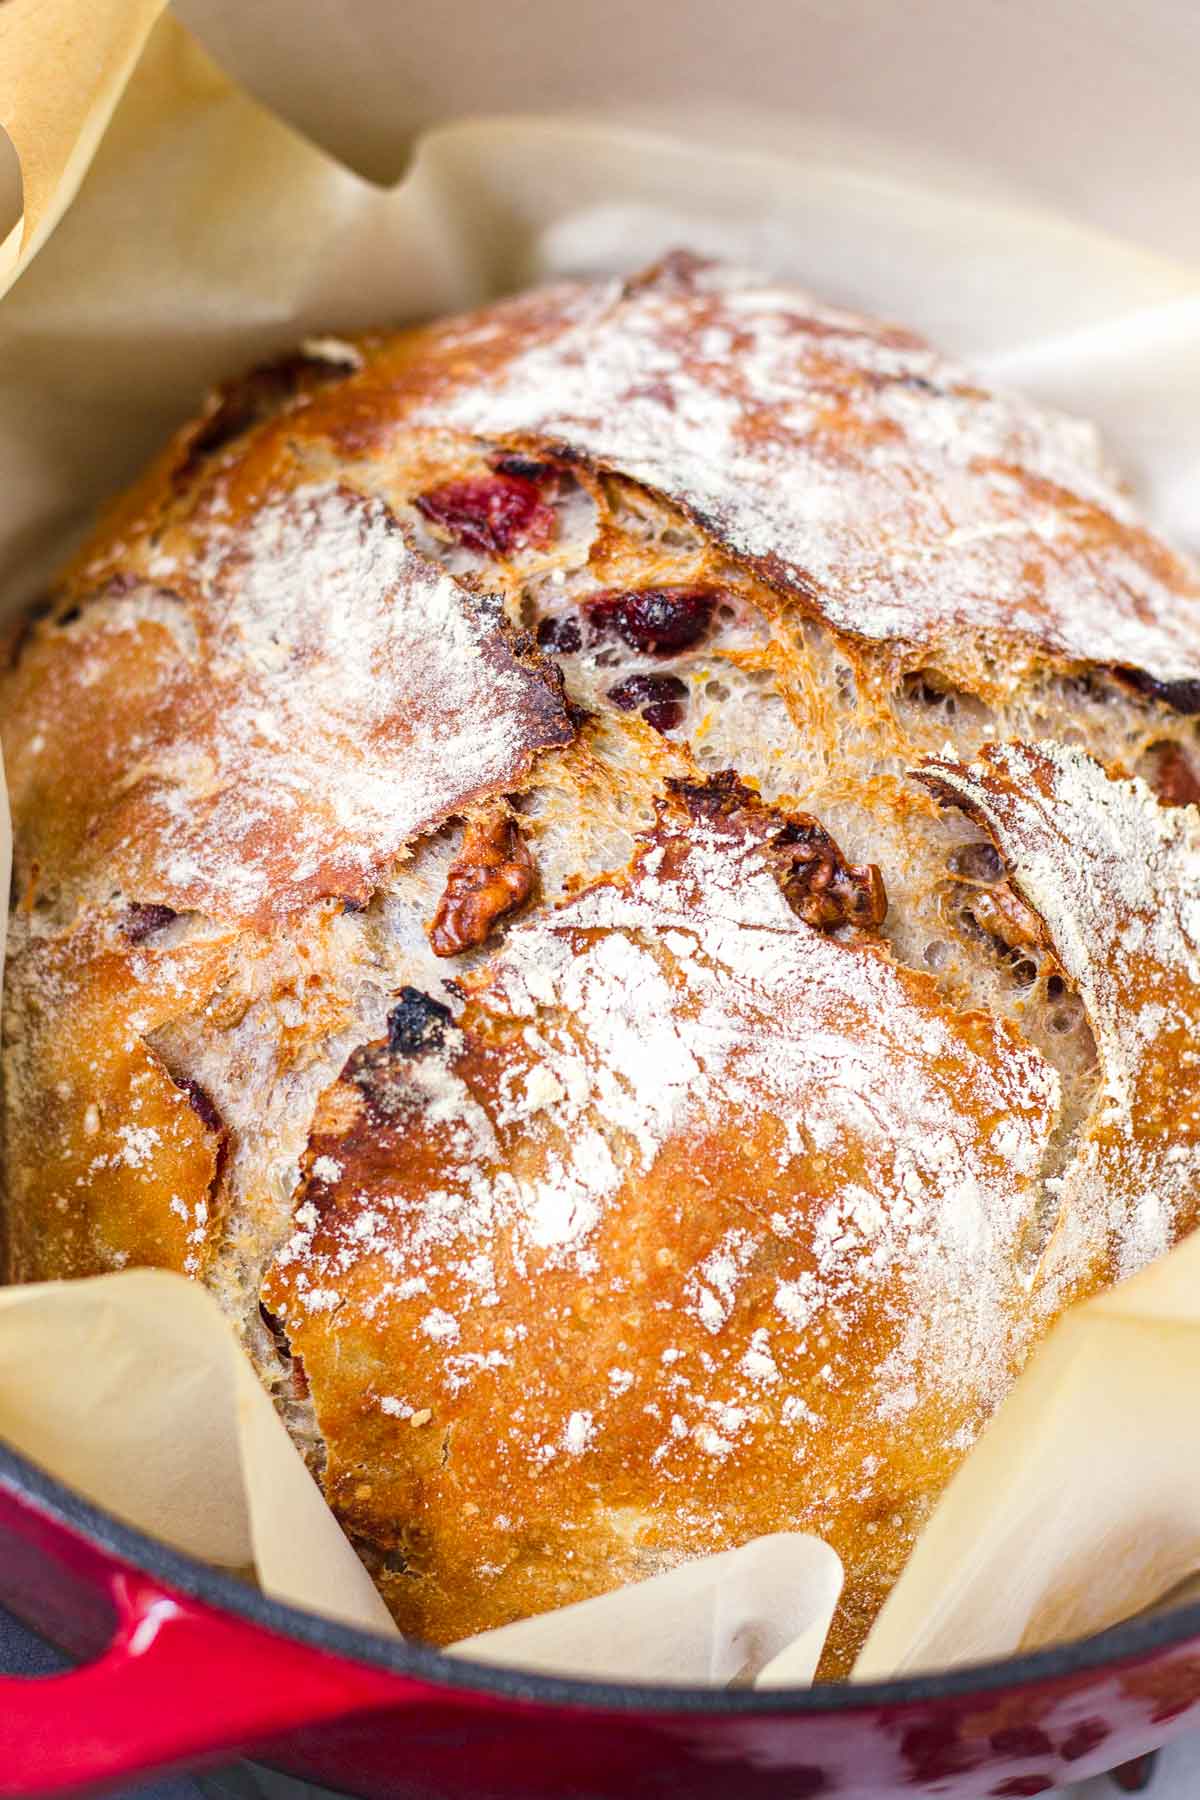
You may think that such a fancy-looking artisan bread is difficult to bake at home, but it’s actually not. The no-knead method requires, as its name says, no kneading and also no mixer. All you need is some patience and a Dutch oven, which is essential to get that beautiful golden brown, crisp crust. It’s really impossible to mess up!
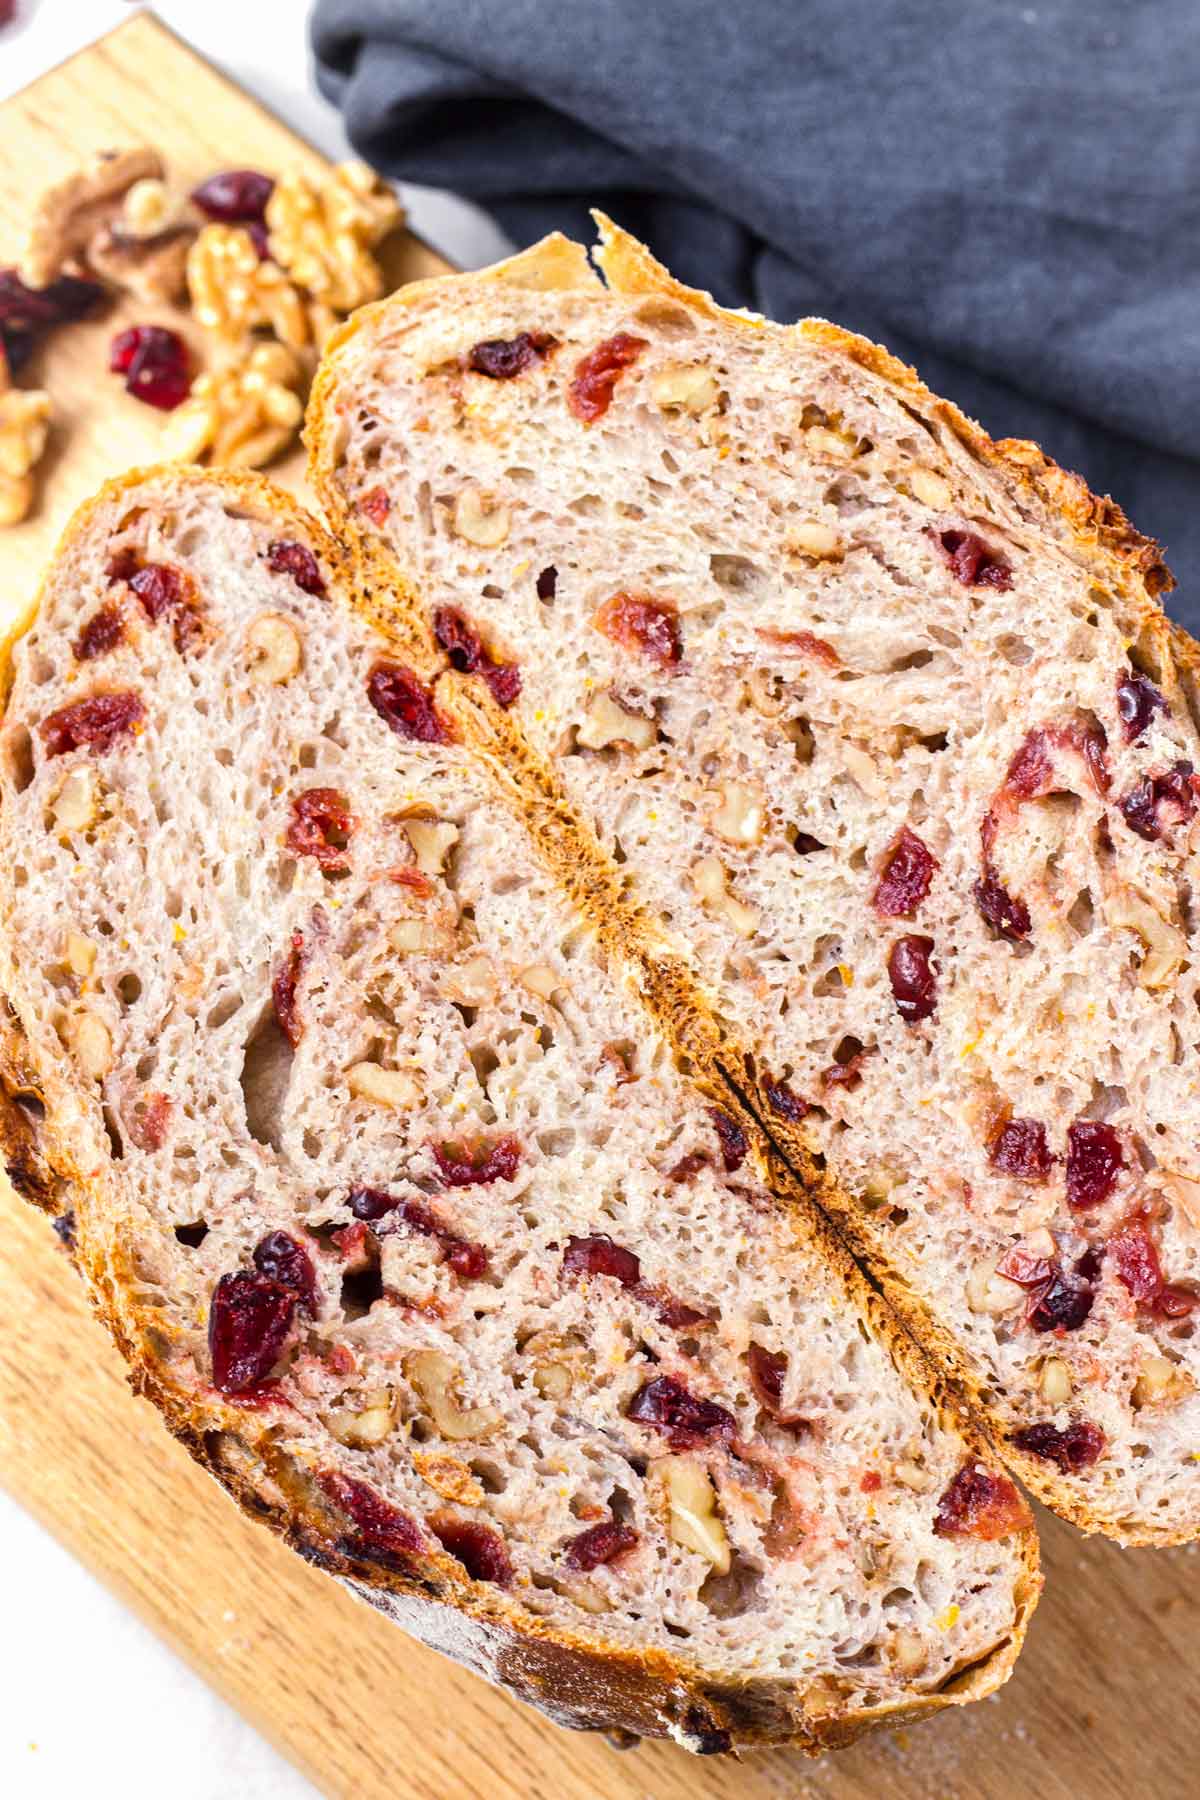
This cranberry walnut bread recipe is the perfect loaf to make during fall. It’s cozy, delicious, and packed with nuts and dried cranberries.
The cranberry walnut bread has a hint of orange thanks to the fresh orange zest. It’s fragrant (not overpowering at all!), delicious, and perfectly light and a bit chewy…just like a good artisan loaf should be!
Why we LOVE baking this no knead cranberry walnut bread at home:
- Effortless, no kneading required: Seriously, zero kneading. Promise.
- The crust is perfect! Baking this cranberry walnut bread in a Dutch oven creates the perfect artisan-style golden brown crust.
- Great flavor: The slow rising process infuses the bread with great flavor. Plus, all the mix-ins (dried cranberries, walnuts, orange zest) are awesome!
Basically, here’s the run-down of how this method works: you mix all the ingredients together in a bowl, let it rise for 18 hours, shape it into a ball, and bake in a Dutch oven. And just like that, you get a beautiful loaf of artisan bread. It’s like magic!
We love making Grape and Chicken Salad sandwiches with this cranberry walnut bread. Truly the perfect combination! Or keep it simple and start your mornings with a toasted slice of this bread plus some good butter.
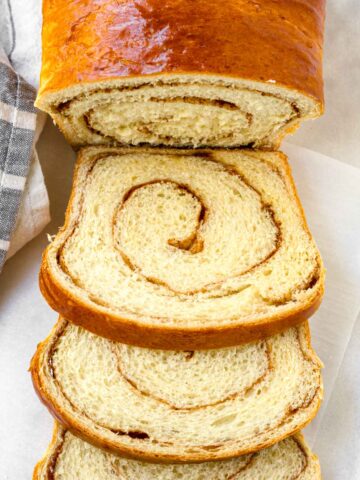
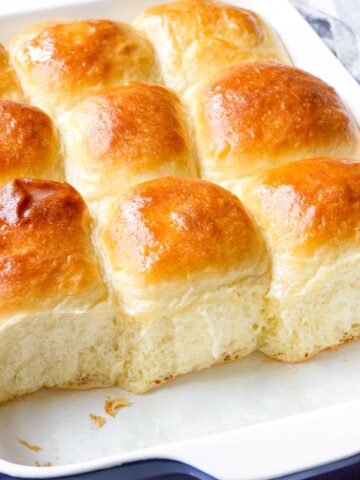
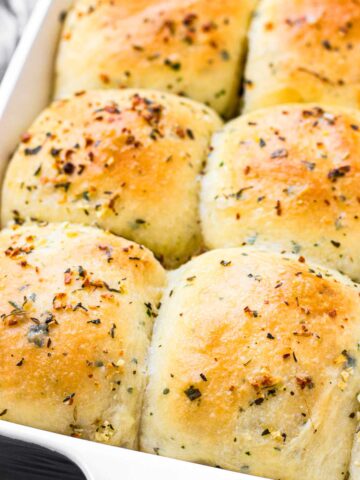
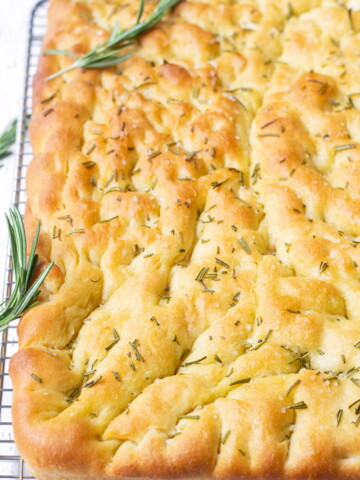
If you’re looking for traditional bread recipes, check out this Rosemary Focaccia, Super Soft Honey Rolls, Garlic Herb Rolls, and Cinnamon Swirl Bread.
Jump to:
All About the No-Knead Bread Method
The no-knead method is very simple and easy.
Here are the basics: You activate the yeast and mix all the ingredients in a bowl. Then cover and let it rise at room temperature for 18 hours, shape the dough into a ball on a floured surface, and bake in a hot Dutch oven pot. Absolutely zero kneading required.
And yes, you read that right, 18 hours! During this time, the enzymes break down and the yeast starts releasing air, and bubbles form. This movement of air stretches the dough during the 18 hours. With this movement, gluten forms. Remember, the whole point of kneading, in general, is to develop gluten. So, in this “no-knead” technique, it’s like the movement of air and bubbles “knead” the bread slowly to form gluten.
Here are a few things to know:
- This type of bread uses a very low amount of yeast. Yes, ½ teaspoon is all you need.
- Once you mix all the ingredients, it will be very sticky and wet. That’s normal. Do not add more flour, as this will result in a dense bread later on.
- This slow fermentation process also gives the bread amazing flavor naturally, aside from the orange zest that will infuse the bread even more.
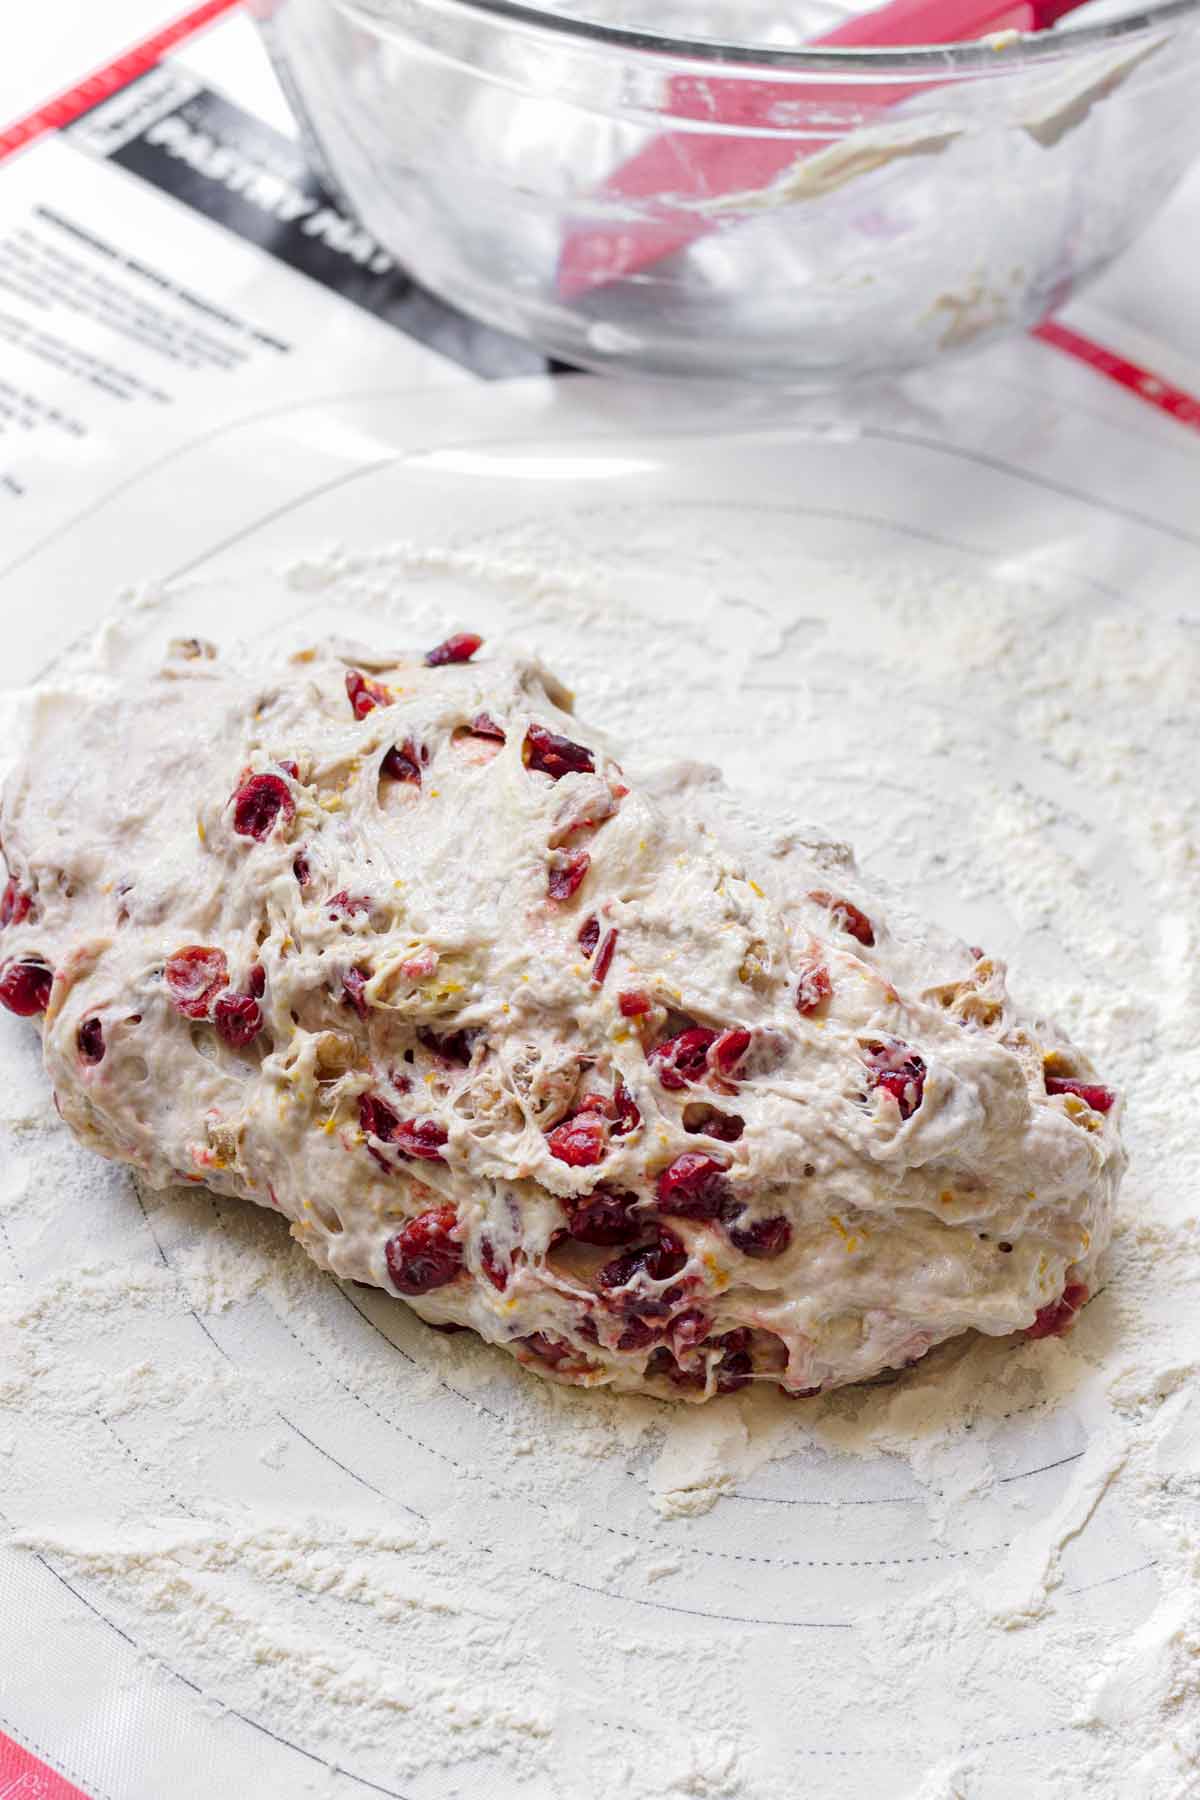
- After 18 hours, the dough will look shaggy, wet, and sticky. That’s normal. In fact, that’s what you want to make a perfect loaf – a “wet” dough will create steam inside the Dutch oven, which is what creates that nice, crispy crust. See more below.
Why Bake in a Dutch Oven
Baking your bread in a Dutch oven is what creates that beautiful, golden brown, crisp artisan-style crust.
Why? It’s all about steam! The Dutch oven is like a vessel that allows steam released from the moist dough to evenly circulate in a contained space. This steam creates that crusty surface that we all love in artisan breads. There’s a lot of science behind this, but I’m not going to bother you with it. So for now, let’s just say it’s like magic?
Because of this, not only does your oven need to be really hot (450 degrees F), but your Dutch oven pot too. Preheat the oven along with your Dutch oven pot inside for at least 30 minutes before you plan to bake your cranberry walnut bread. You’ll need to place the shaped dough inside the hot Dutch oven and then bake immediately.
I’d recommend using a medium-sized Dutch oven, between 5 to 6 quarts. Make sure it’s oven-safe up to 450 degrees F or higher. Believe it or not, some Dutch ovens are not safe at those temps.
Ingredient Notes
As always, the specific ingredient quantities are listed in the recipe card down below, but I wanted to provide a few helpful ingredient notes here.
- Active dry yeast: Make sure you get active dry yeast, and not instant dry yeast. They work differently.
- Wam water, about 110 to 115 degrees F, to activate the yeast. This is to make sure the yeast is good to go. Make sure the water isn’t too hot or too cold.
- Bread flour: Bread flour has higher gluten content than all-purpose flour, so your cranberry walnut bread will rise taller, have better structure, and be a bit lighter and perfectly chewy. If you don’t have bread flour, all-purpose will do too, but the texture may not be optimal.
- Granulated sugar, used for flavor and to activate the yeast.
- Kosher salt will give the bread amazing flavor!
- Dried cranberries and roughly chopped walnuts.
- Honey: Adds a nice subtle touch of sweetness.
- Fresh orange zest: Adds subtle aromatic tones to the bread. It’s not overpowering at all, but if you’re worried about it, decrease the amount or omit it.
Step-by-Step Instructions
First of all, make sure you have a 5 or 6 quart Dutch oven that is safe up to 450 degrees F or higher. Also, plan accordingly since the dough will need 16 to 18 hours to rest on your countertop at room temperature. I always make my dough in the evening and bake the next afternoon.
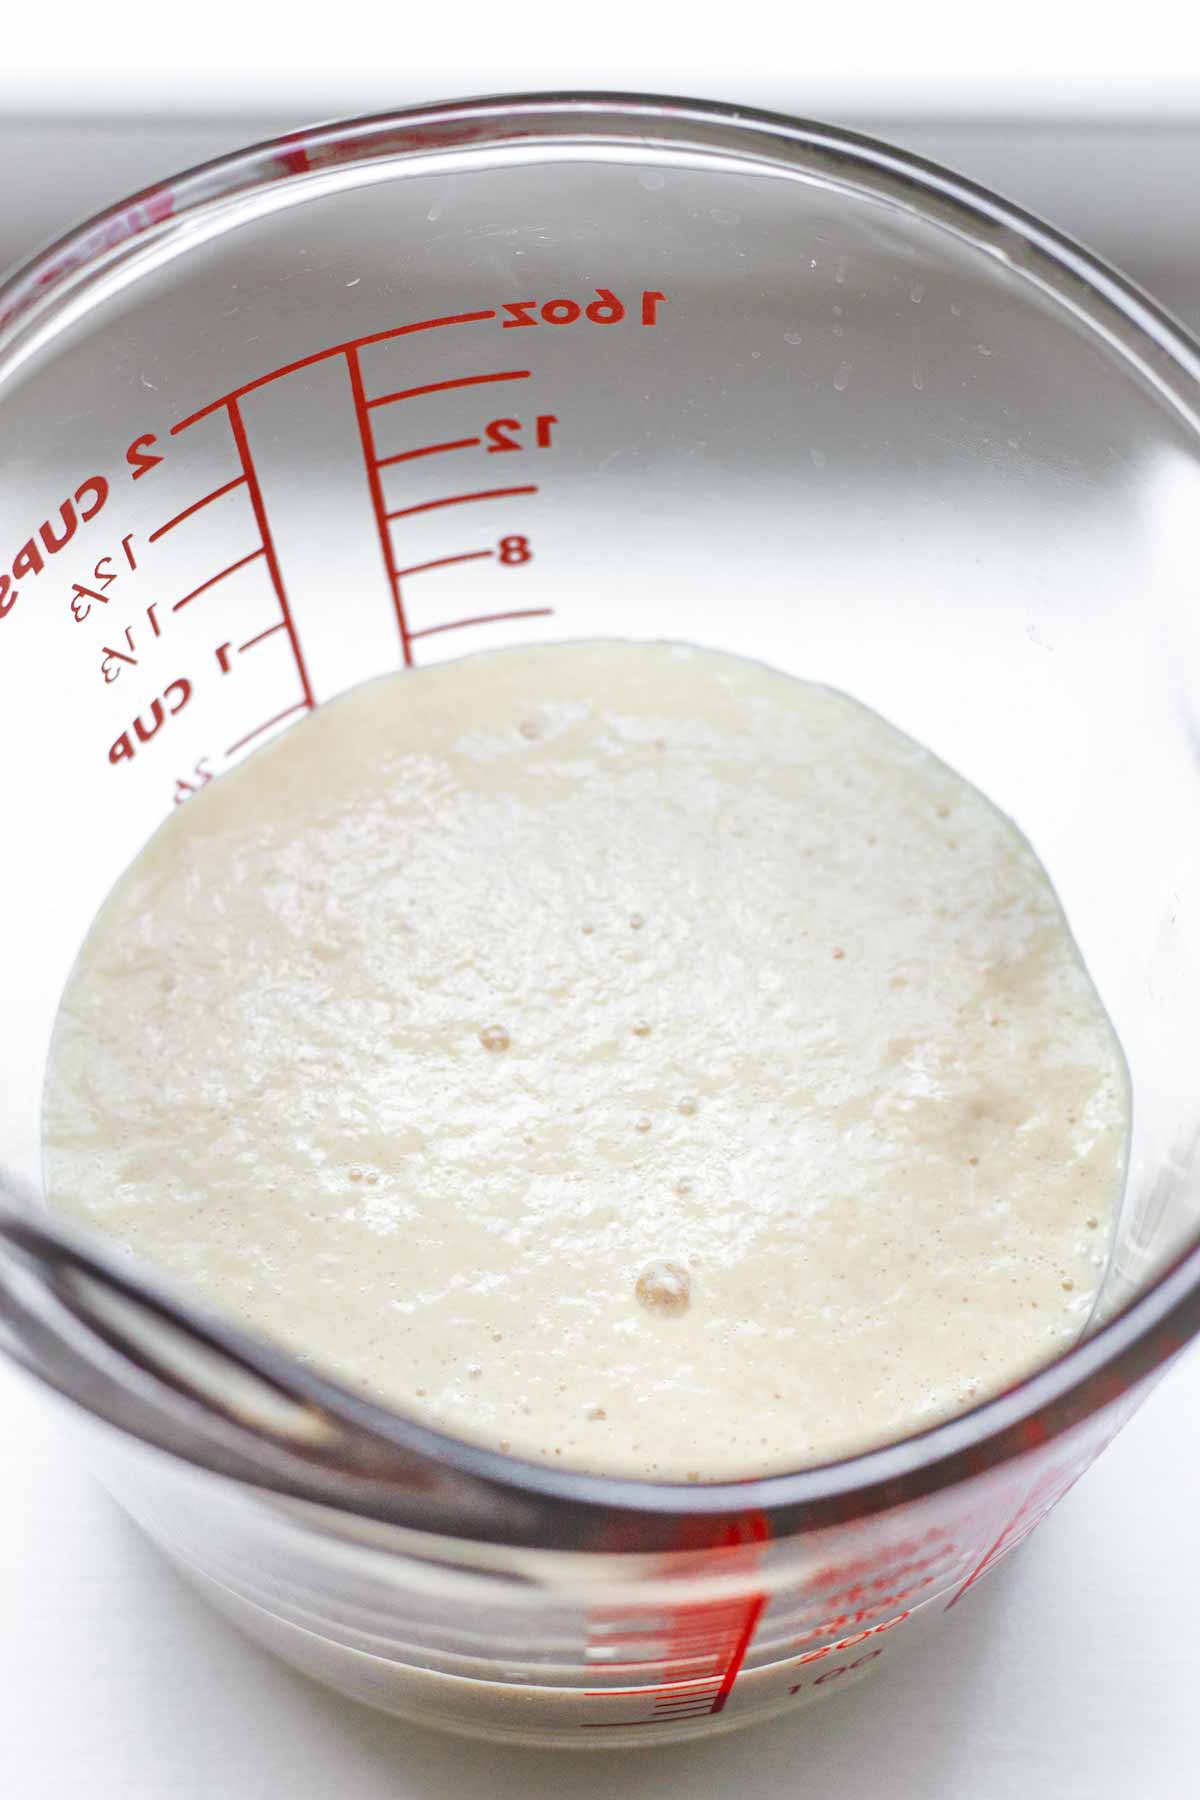
Step 1 | Activate yeast
In a bowl, dissolve the yeast and sugar with the warm water (110 to 115 degrees F). Let it sit for 10 minutes or until foamed up. If it doesn’t, discard and start over. This means the yeast is expired or not active.
Step 2 | Mix the dough and let it rise for 18 hours
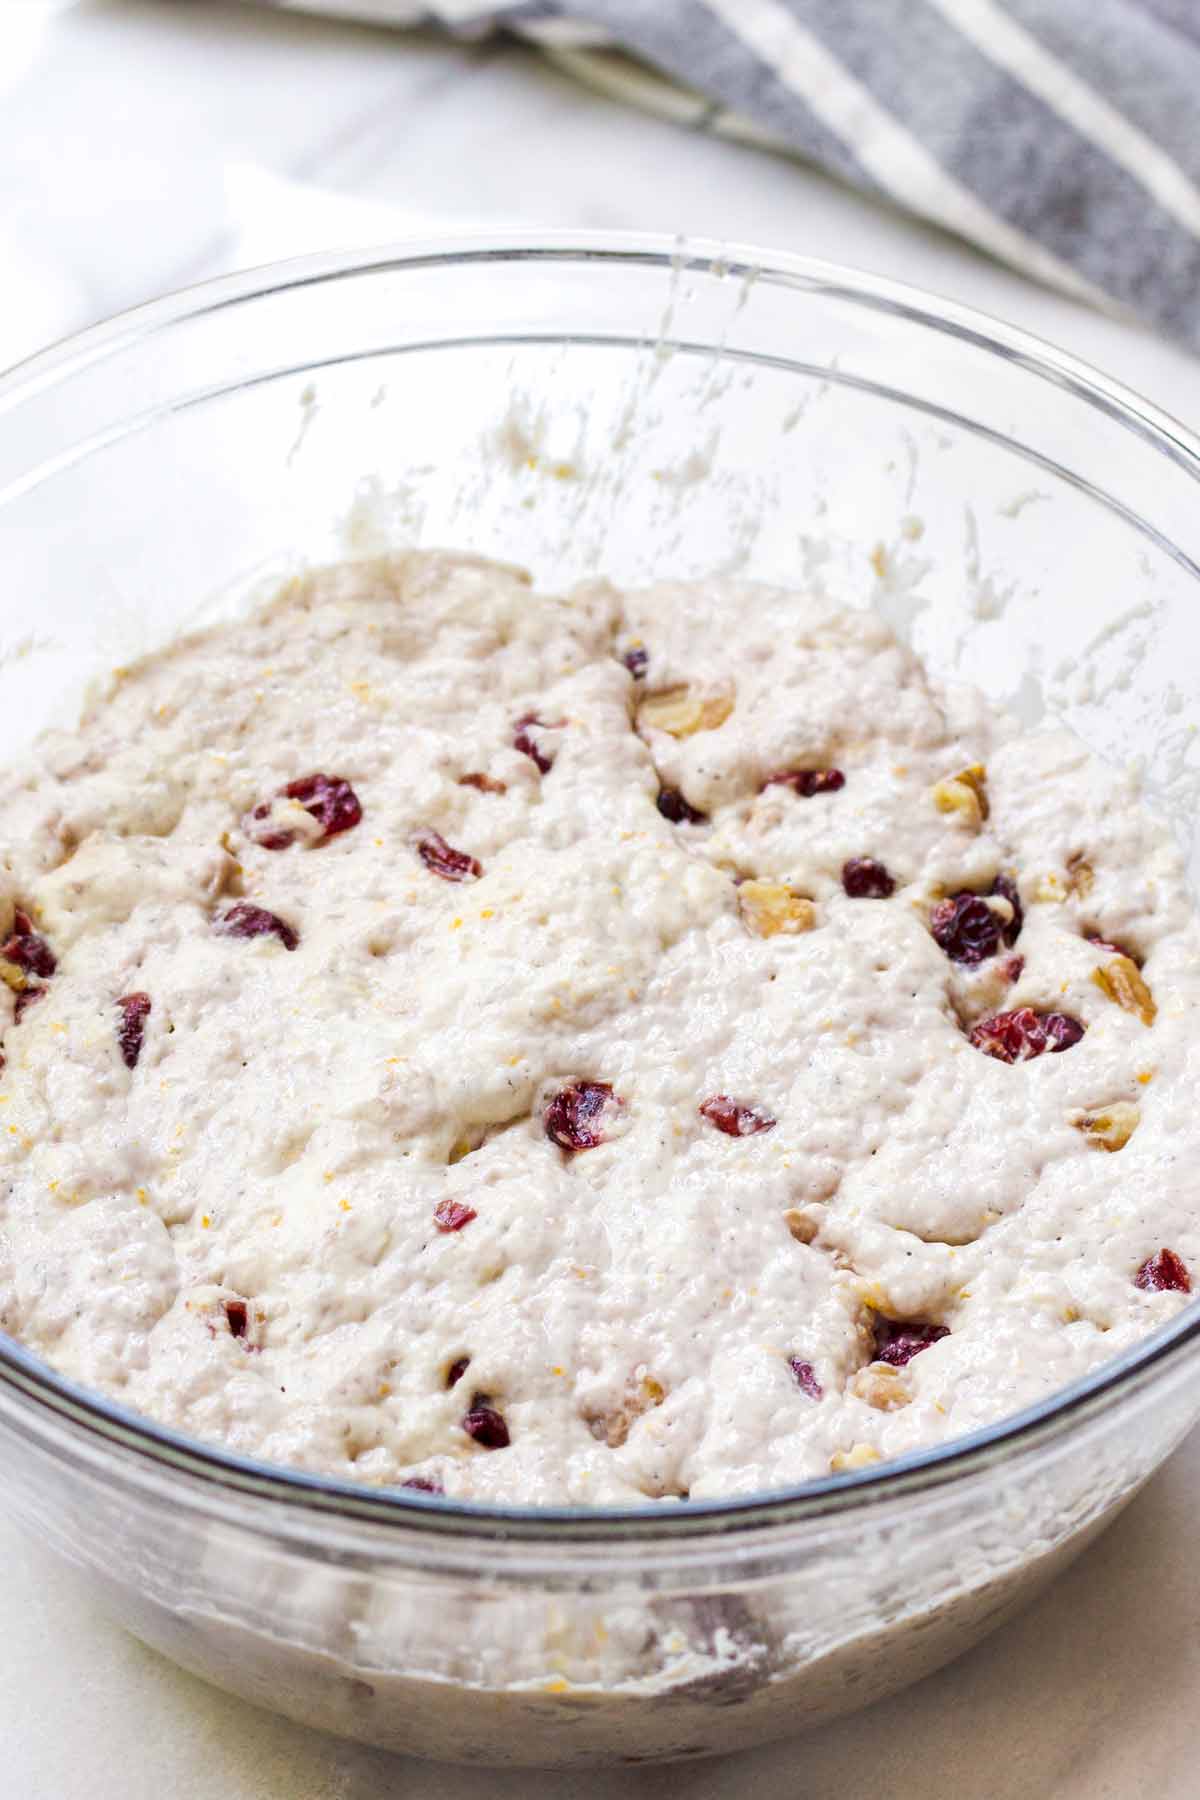
In a large bowl, whisk the flour with salt. Then, add the yeast mixture and honey, and combine until no pockets of flour remain, without over-mixing. Stir in the dried cranberries, walnuts, and orange zest. Give it a stir until just combined.
Cover the bowl with plastic wrap (without touching the dough) and let sit on the counter at room temperature for 18 hours. Yes, 18 hours! The recommended range is 16 to 18 hours, but the longer the better.
Step 3 | Shape dough
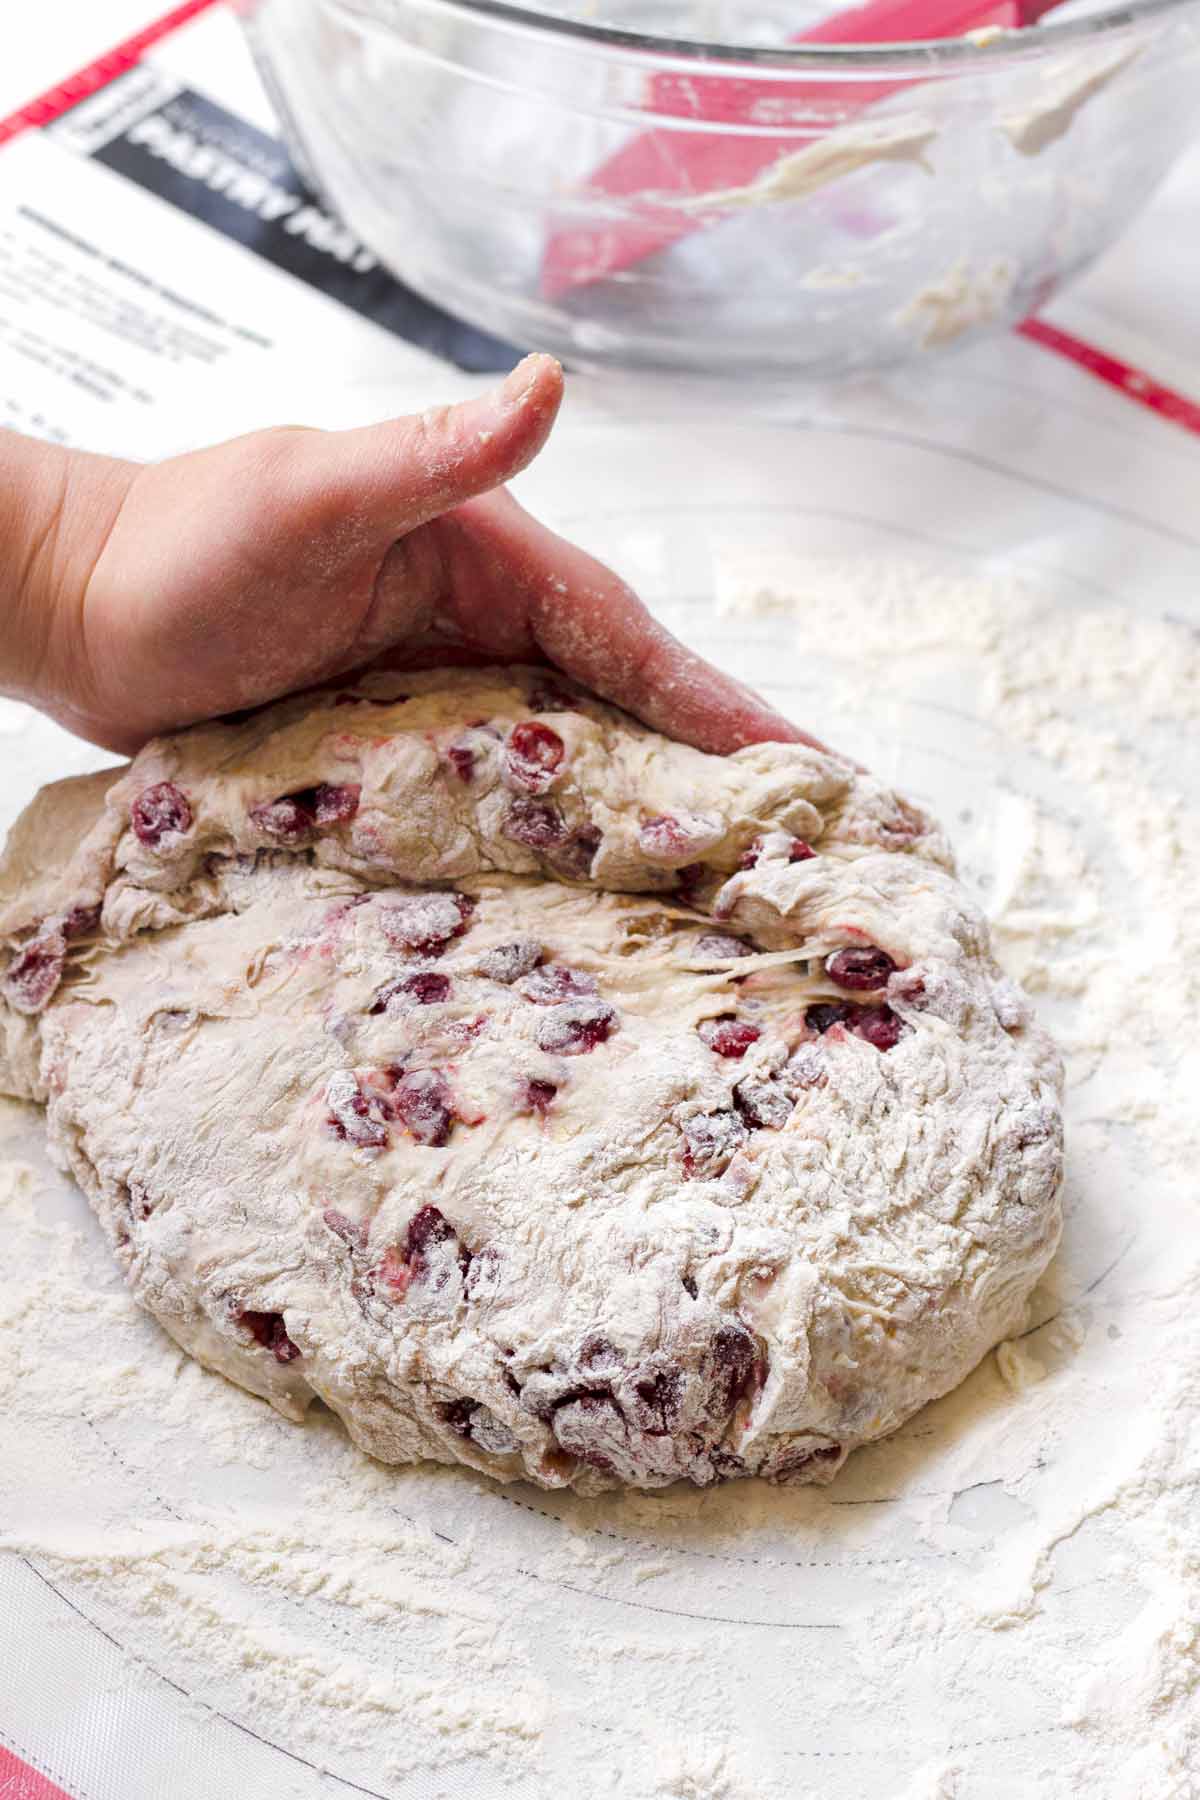
After 18 hours, the dough will look very wet and sticky. That’s normal! Do NOT punch the dough. Using a bench scraper, transfer the dough to a well-floured surface and turn to coat with flour. Sprinkle more bread flour as needed.
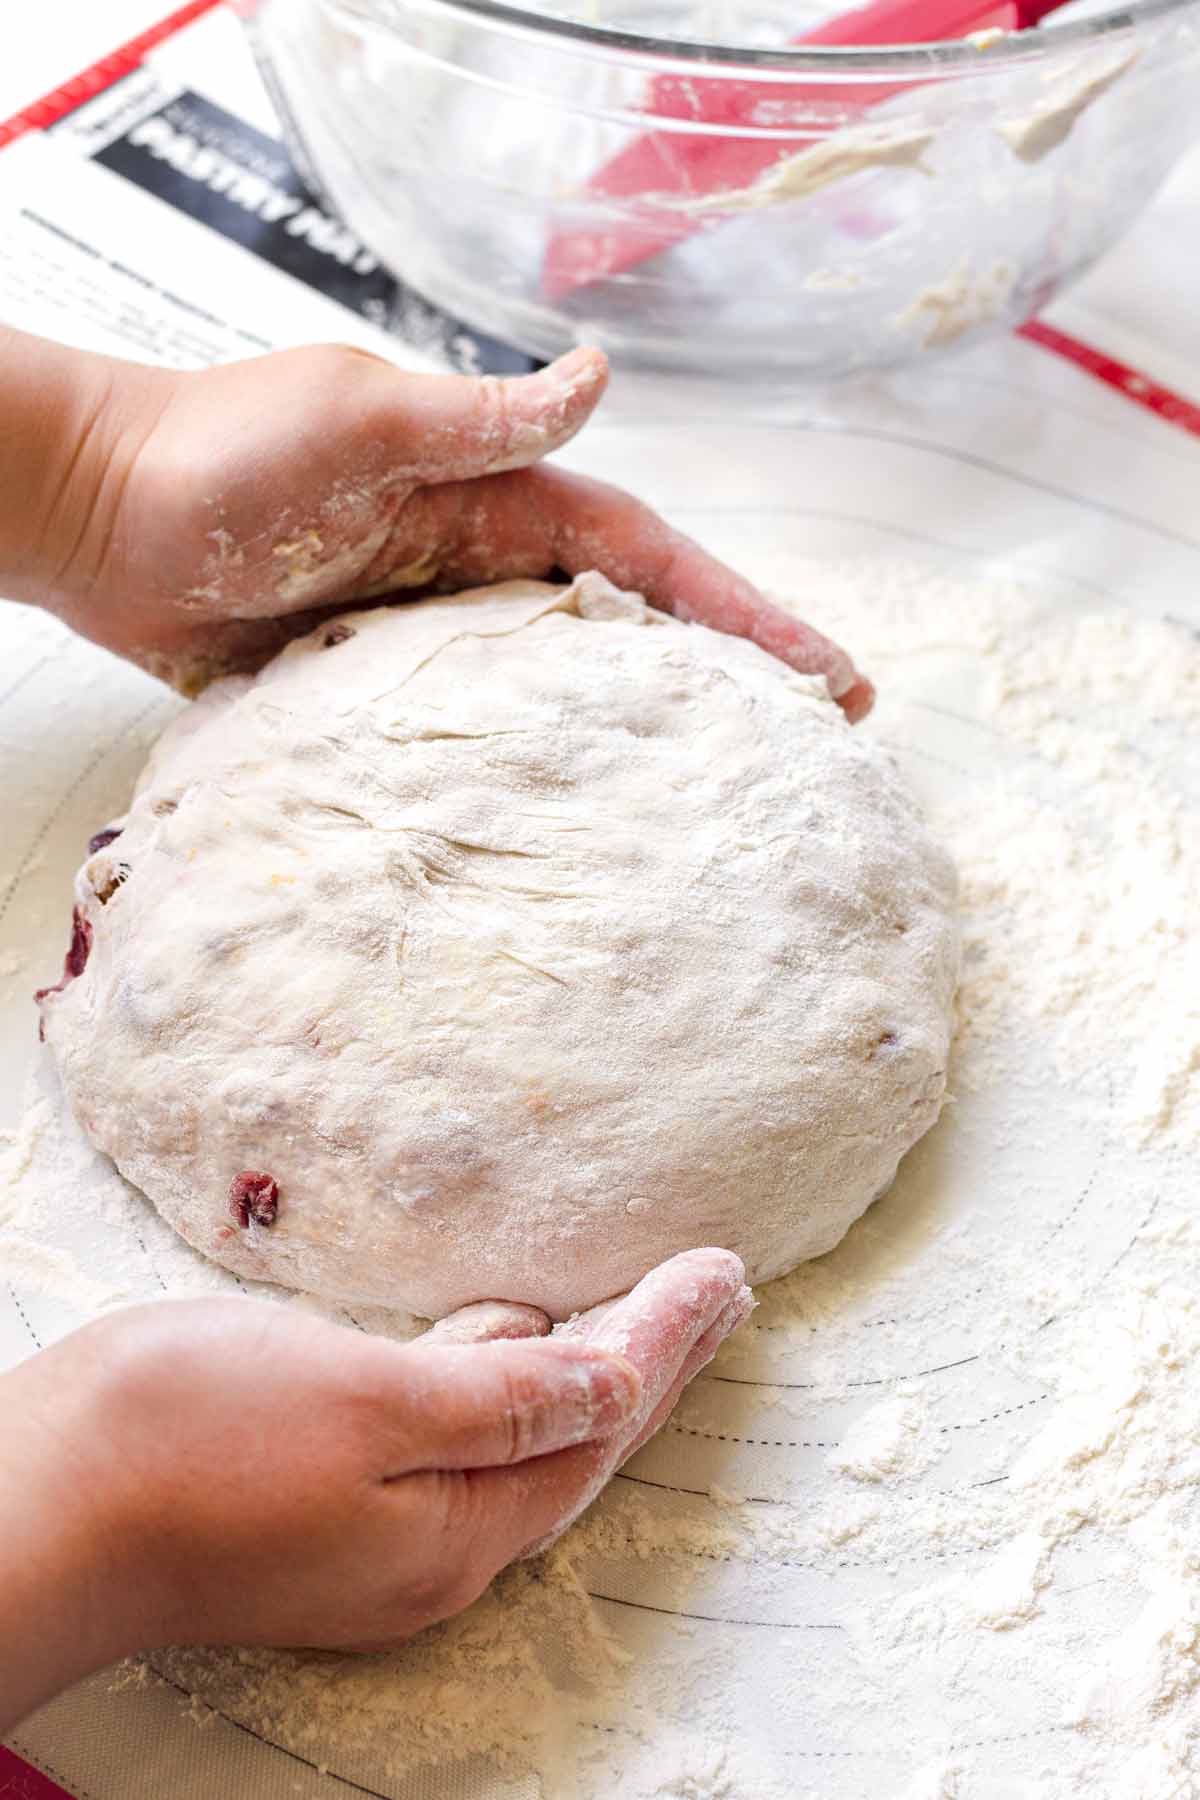
Flour your hands. Gently fold the dough over from the edges to the center to form a ball, being careful not to burst the air bubbles trapped inside. Carefully transfer the dough onto parchment paper, smooth side up. Gently press the sides to re-shape if needed, and flour the top a little bit. Cover with plastic wrap, and let it rest for 30 minutes.
Step 4 | Preheat oven and pot
While it’s resting, place the Dutch oven with the lid inside the oven. Preheat the oven to 450 degrees F for 30 minutes.
Step 5 | Bake in Dutch oven
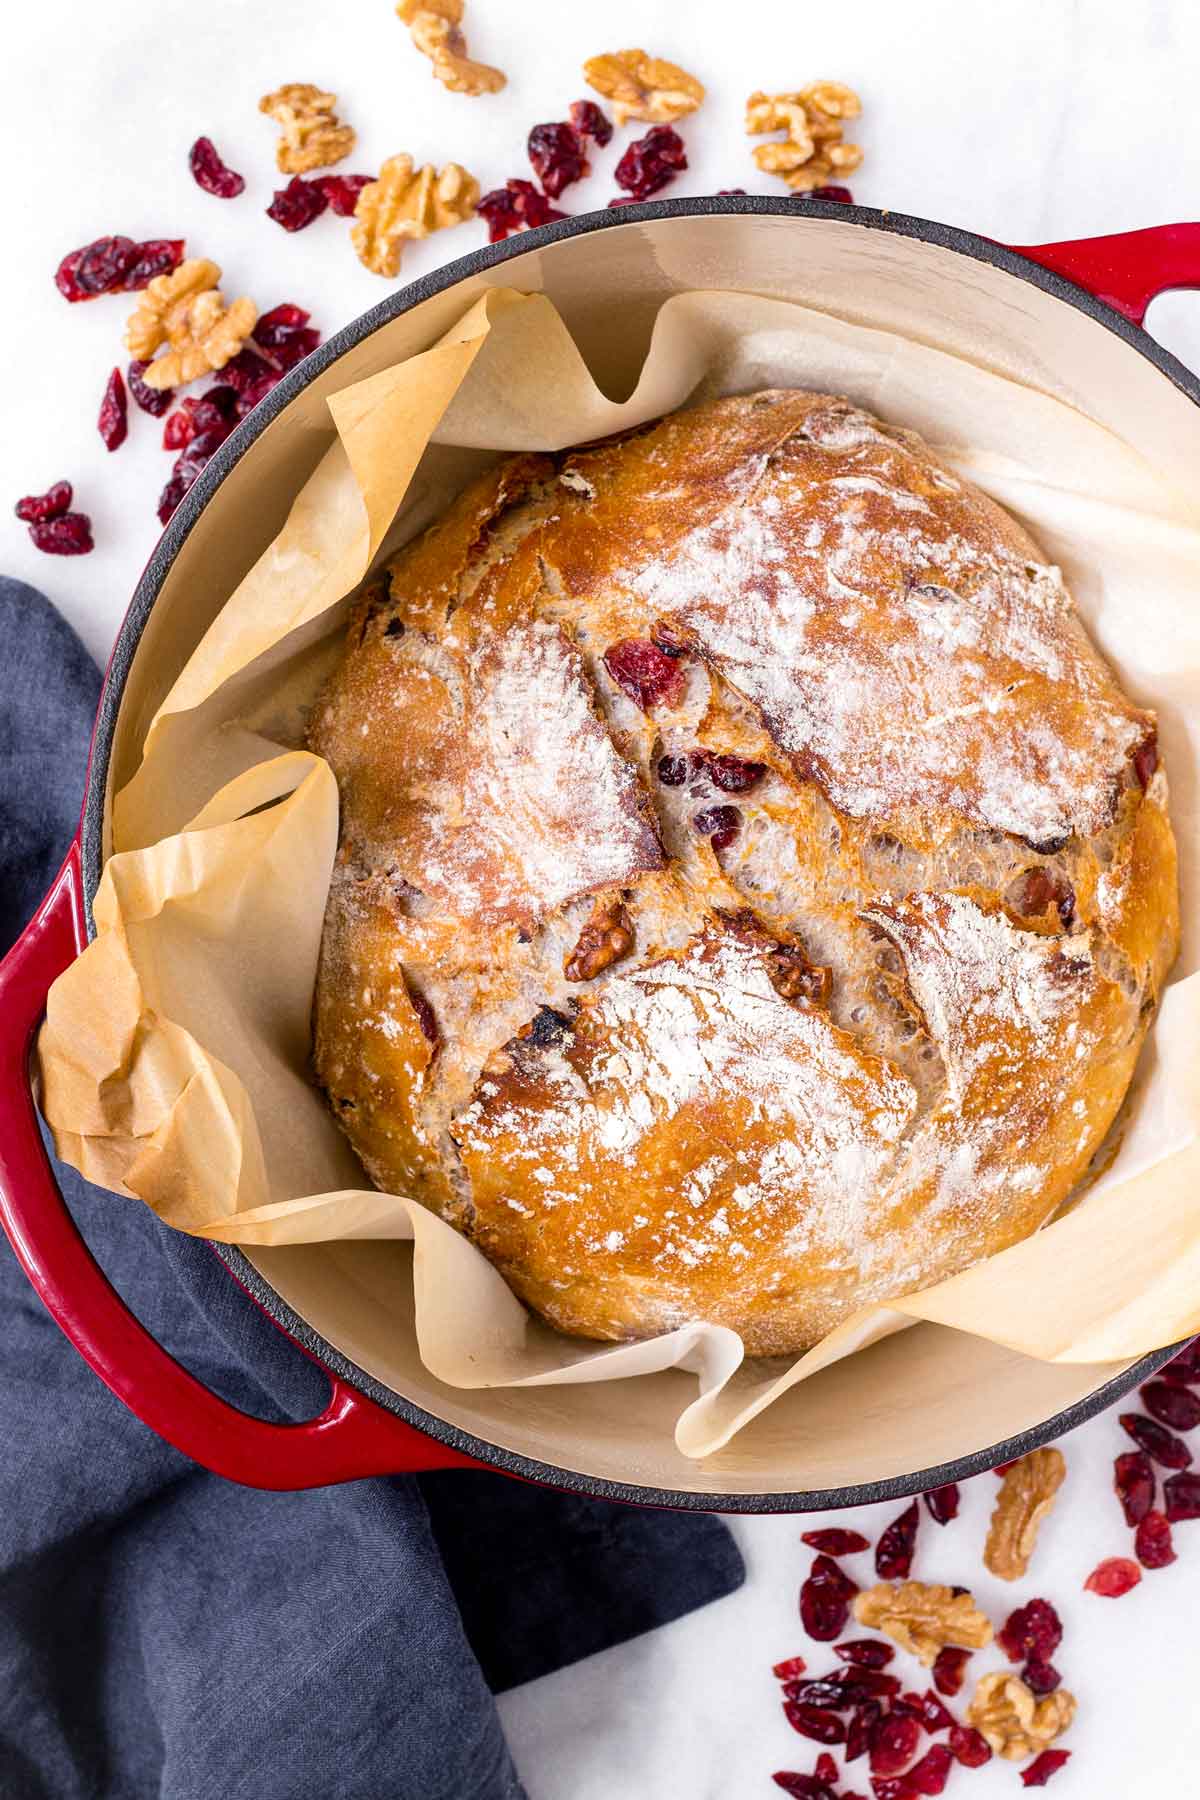
Score an X or any pattern on the dough and gently reshape it if needed. Remove the hot Dutch oven from the oven. Immediately lift the parchment paper to transfer the dough into the hot pot. Cover with the lid tightly and securely. Bake at 450 degrees F for 30 minutes. Uncover and continue baking for another 8 to 10 minutes, or until golden brown.
Let the baked cranberry walnut bread cool down completely before slicing.
How to Tell If the Bread is Ready
This is how I tell if my no-knead cranberry walnut bread is ready:
- The bread should be golden brown in color and have a nice crisp crust. If it looks pale, give it a few extra 3 to 5 minutes.
- When tapped lightly, it should sound a bit hollow on the top crust and bottom crust.
- To be completely sure, insert an instant read thermometer. The center should read 210 degrees F.
Let the Bread Cool Completely
If you’re like me, you may be tempted to cut into this beautiful loaf of cranberry walnut bread while it’s warm, but trust me, this is the kind of what that needs to be completely cooled down before you slice it.
The bread continues to “bake” with the residual heat, perfecting the texture of the interior. You want to let the air cool down to allow those beautiful holes to set. This will also yield a lighter and more airy texture, and not dense.

How to Serve
Here are my favorite ways to serve this amazing, crusty cranberry walnut bread:
- The simple way, toasted and with some butter or jam.
- Make avocado toast, ricotta toast, or really any kind of toast!
- Try this Chicken Salad with Grapes recipe – it makes a GREAT chicken salad sandwich!
- Serve with your breakfast or with soup. Try it with this Roasted Butternut Squash Soup, Creamy Tortellini Soup, or Bacon Potato Chowder.
- Or simply enjoy as is, warm of course!
If you’re a bread baking enthusiast, be sure to check out these other bread recipes on the blog:
Recipe FAQs
I’d recommend 18 hours for this recipe. I usually mix the dough in the evening and bake the next afternoon. If you’re looking for ranges, 16 to 18 hours is good. Technically, the minimum is 12 hours but may not turn out as flavorful.
No, fresh cranberries will add too much moisture to the dough and also make it taste too tart. Use dried cranberries.
No. It will not rise in time if refrigerated. It needs to be at room temperature. Don’t worry, it’s safe to do so, if that’s what you’re wondering.
I’d recommend using active dry yeast for this recipe. Instant yeast needs different proportions and rise times.
Yes, for up to 3 months. Wrap in aluminum foil and then inside a freezer friendly resealable plastic bag. Thaw at room temperature.
Yes, although I’d highly recommend using bread flour, if possible. Bread flour has more protein content, which means more gluten and therefore bread with better structure and more height. With all-purpose flour, it will still turn out great but will look a bit more flat and be a little bit dense.
This recipe was published in 2020 and updated in October 2022 to include new photos and information.
Tips for Success
- The dough will look sticky and wet. That’s normal. Don’t be tempted to mix in more flour.
- Be patient! The dough needs to rise for 16 to 18 hours for best results. During this time, all the “no-knead” magic happens.
- Make sure the lid fits securely and tightly in the Dutch oven. The goal of baking the bread in a Dutch oven is to create and trap steam inside, so you don’t want it to escape.
- Believe it or not, some Dutch oven are not safe up to 450 degrees or higher. If you’re looking to purchase one, double check the product’s oven safe temperature.
- The bread is ready when the crust is golden brown and when it sounds hollow when tapped lightly. If you want to be sure, use an instant thermometer – it should read 210 degrees inside.
- Let the baked bread cool down completely before slicing. You want to let the air cool down so to allow those beautiful holes to set.
I’d love to hear from you! If you loved my recipe, please consider leaving a 5-star rating and a comment down below. Sign up for my newsletter and follow along on Instagram, Facebook, or Pinterest
Cranberry Walnut Bread (No-Knead)
Equipment
- 1 5 to 6 quart dutch oven with lid oven-proof and safe for 450 degrees F
Ingredients
- ½ teaspoon active dry yeast
- 1 ½ cups warm water - warmed to 110 to 115 degrees F
- 1 teaspoon granulated sugar
- 2 teaspoons Kosher salt
- 3 cups bread flour, plus 2 tablespoons - plus more for surface
- ¾ cup dried cranberries
- ½ cup dried walnuts, roughly chopped
- 1 tablespoon honey
- 1 tablespoon orange zest
Instructions
- Make sure you have an oven-proof 5 to 6 quart Dutch oven with a tight-fitting lid that is safe up to 450 degrees F.
- Dissolve the yeast and sugar with the warm water (110 to 115 degrees F). Let it sit for 10 minutes or until foamed up. If it doesn’t, discard and start over.
- In a large bowl, whisk the bread flour with salt. Add the yeast mixture and honey, and combine until no pockets of flour remain, without over-mixing. Add the cranberries, walnuts, and orange zest. Stir until just combined. The dough will be very sticky and wet, that's normal. Cover bowl tightly with plastic wrap (without touching the dough) and let it rest for 18 hours on your kitchen countertop at room temperature. Yes, 18 hours!
- After 18 hours, the dough will be very wet and sticky. Do NOT punch the dough.
- Transfer dough to a well-floured surface and turn to coat with flour. Sprinkle more flour as needed, and flour your hands also. Gently fold the dough over from the edges to the center to form ball, being careful not to burst the air bubbles trapped inside. Then, turn the dough smooth side up and gently press the sides to re-shape if needed. Carefully transfer to a sheet of lightly floured parchment paper, smooth side up.
- Cover with plastic wrap and let it rest over the counter for 30 minutes (no need to transfer it back to the bowl).
- Meanwhile, place the Dutch oven with the lid inside the oven. Preheat the oven to 450 degrees F for 30 minutes.
- Score an X or any pattern you'd like on the ball of dough.
- Remove the hot pot from the oven, and immediately lift the parchment paper to transfer the dough into the hot pot. Cover with the lid tightly and securely. Bake at 450 degrees F for 30 minutes – during this time, do not open the lid, as you can't let the steam trapped inside escape. Then, remove the lid and continue baking for another 8 to 10 minutes, until the crust is golden brown.
- Remove from oven and lift it up with the parchment paper. Let it cool completely before slicing. Enjoy!
Notes
- Let the dough rise for 18 hours. During this time, the “no-knead” magic (okay, maybe more like science!). During this time, flavors develop too, so the longer the better.
- For reference, anywhere between 16 to 18 hours should be fine. I always go for 18. In theory, the minimum needed is 12 hours, but your bread may not turn out as flavorful and could be a bit dense.
- Dough consistency: The dough will look sticky and wet before and after it rises. That’s normal and preferred. You’re looking for a dough that’s high in humidity so it can create steam as it bakes in the Dutch oven (see below). When you shape it, flour your working surface and hands generously – the dough will be manageable.
- Why you need to use a Dutch oven: The contained vessel for the bread helps to create steam (from the dough, which is high in humidity). This steam is what creates the beautiful, crisp, golden brown crust.
- How to store: I like to store in a semi open paper bag, just like how they do it in the bakeries. The bread needs some air for the crust to stay crusty.
- Freezing: Wrap in aluminum foil and then inside a freezer friendly resealable plastic bag for up to 3 months. Thaw at room temperature.
- More add-on ideas: Pistachios, pecans, pumpkin seeds, raisins, lemon zest.
- Bread flour: This recipe will work with all-purpose flour too, but I’d HIGHLY recommend using bread flour. It has more protein content, which means more gluten and therefore bread with better structure and more height
- Yeast: Use active dry yeast. Do not use instant yeast.


Tina says
This is my second time making this bread, it is so delicious. Thank you for sharing.
Jan says
Love love love, love, and love this bread; no more purchases at Costco!
I’m following the direction exactly as stated, but my bread seems dry. Any suggestion to alleviate the problem? I’m using whole wheat bread flour and using cast-iron pot.
Thank you kindly for your help!
Tania says
Hi Jan! I’d say the first thing to check is to make sure the flour is measured by using the spoon and level method. Sometimes scooping directly from the flour container can pack in more flour than needed.
Karan says
I have made this bread a couple times now. It is easy and comes out perfect each time. I prepare it late evening and let it rise overnight then bake and cool in the morning and serve brunch. I love the idea of subbing OJ for the water! I will try that next time. Great recipe !
Sue says
What if you don’t have a Dutch oven
Lindsey Roberts says
The bread turned out amazing as far as flavor and taste! But I did burn the top and bottom of the loaf. I’m thinking because the cranberries had added sugar in them. I can’t find dried cranberries that don’t have added sugar! Any suggestions on how to adjust recipe so the loaf doesn’t burn? TIA!
Bridget says
Try lowering the dutch oven to the next level down, and try putting a cookie sheet on the shelf below the one the dutch oven is on. That might help with burning.
Wonderful says
Great recipe I did it once & used a Corelle ceramic pan with lid which worked fine ! Delicious ! I used dates and walnuts ! Will try again with cranberries and walnuts and plain !!
Thank you for your answering all my questions and for a wonderful bread recipe.
Julee Smith says
First time ever making bread and it turned out amazing! Love this recipe.
Robert says
I followed the recipe exactly and the bread turned out perfectly. Great crust and flavor! My only question is after cooling completely and then slicing I found it to still be fairly moist in the middle part of the loaf. It was completely done but had a surprising amount of moisture left. I layed the slices out on a rack to dry a little before freezing. Did I do something incorrectly?
karen says
I’m having a hard time getting my yeast to proof am I supposed to proof the yeast In the entire 1 1/2 cups of water? Because none of it is proofing and I’ve tried multiple yeast and I know they’re all still good. I just feel like I’m using way too much water. Can you please advise.
Joanne says
Hi Karen if the date on your yeast is still good it should work. Make sure your water is warm, like a baby’s bath. You can try it in just 1/4 c of tge water. There is not a lit of yeast in this but it should foam in about 5 min. Hope this helps.
Jean says
Love making this bread. It is delicious.
Toni says
Hey there. I made this bread yesterday and it was as wonderful as it was beautiful. Thank you for sharing. God bless you
Cheryl Heitz says
Can you substitute any portion of bread flour for whole wheat flour?
Tania says
Yes, I believe so! I’d substitute up to half of the AP flour with whole wheat flour.
Lourdes says
Can I use all purpose wheat flour?
Tania says
Yes you can!
Pat says
5 Stars Indeed! Wonderful recipe, easy to follow and the results are so good! Thank you so much for providing such good instructions. Have made this bread a couple of times now and it is a keeper!